SX-64 Short Expansion Board

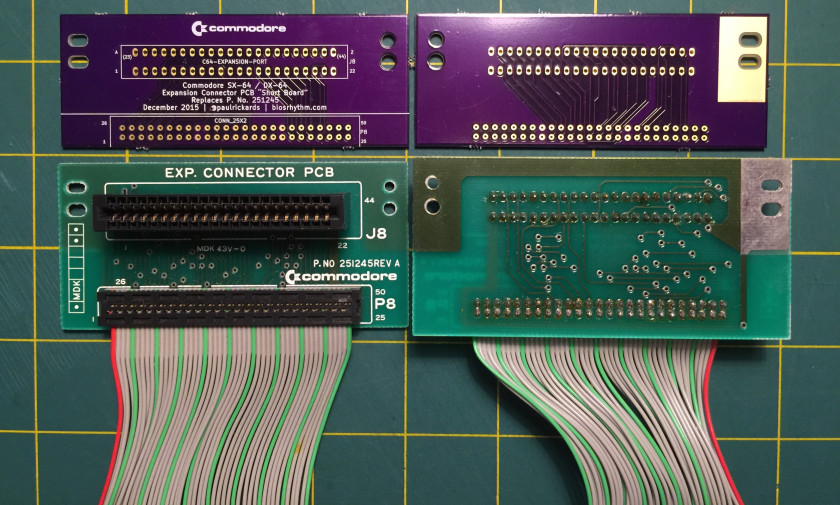
SX-64 Expansion Boards, original and new, front and back views.
SX-64 Expansion Boards, new (top) and original (bottom), front (left) and back (right) views.

If you were following along with my previous post about converting an SX-64 to a DX-64 by adding a second floppy drive, you’ll know that the process isn’t without it’s problems. There are some irreversible changes that need to be made to the case to accommodate all the extra equipment.

Continue reading

Converting a Commodore SX-64 to a DX-64 Dual Drive

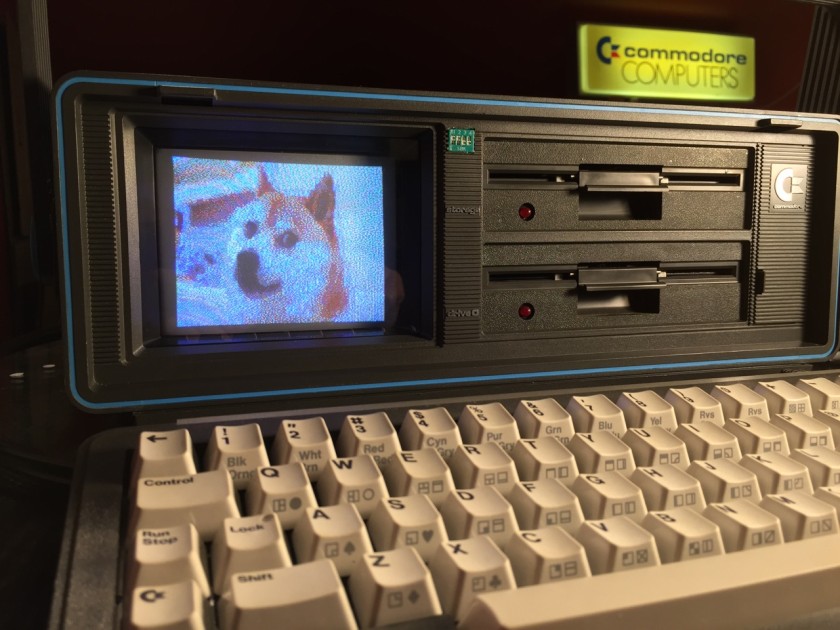
Commodore DX-64 (converted from SX-64) Many floppy. Very retro. Such storage. Wow. #doge #c64
Commodore DX-64 (converted from SX-64)
Many floppy. Very retro. Such storage. Wow. #doge #c64


The SX-64 was Commodore’s portable version of the best selling C64 computer that wrapped the C64, a 5″ color display and a 1541 floppy drive into one case that loosely resembled a Kaypro. They were also called luggables because, well, they are quite heavy. Despite folks calling them rare, they litter eBay very frequently and command a premium price.

Continue reading

A new dust cover for the Sony PS-F5 turntable

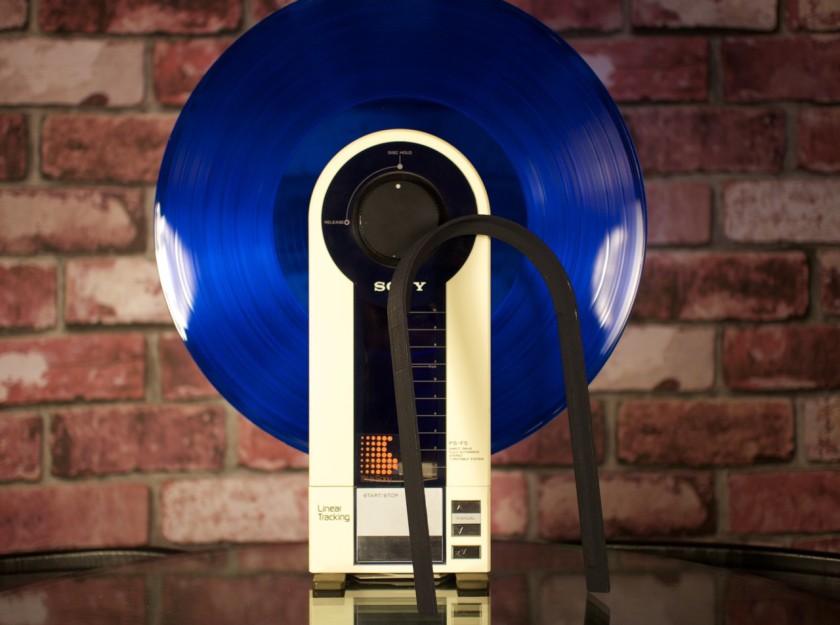
Sony PS-F5 and new dust cover

Introducing the Sony PS-F5– a very unique turntable created in 1983 around the same time as the Walkman. It was arguably the beginning of Sony’s own burgeoning portable music craze. It unfortunately wasn’t the same success as the Walkman. Production was halted and the remaining inventory was quickly sold at a discount and largely forgotten along with the records they played from the late 80’s through the late 2000’s.

Continue reading

Getting Programs For The C64 CP/M Cartridge

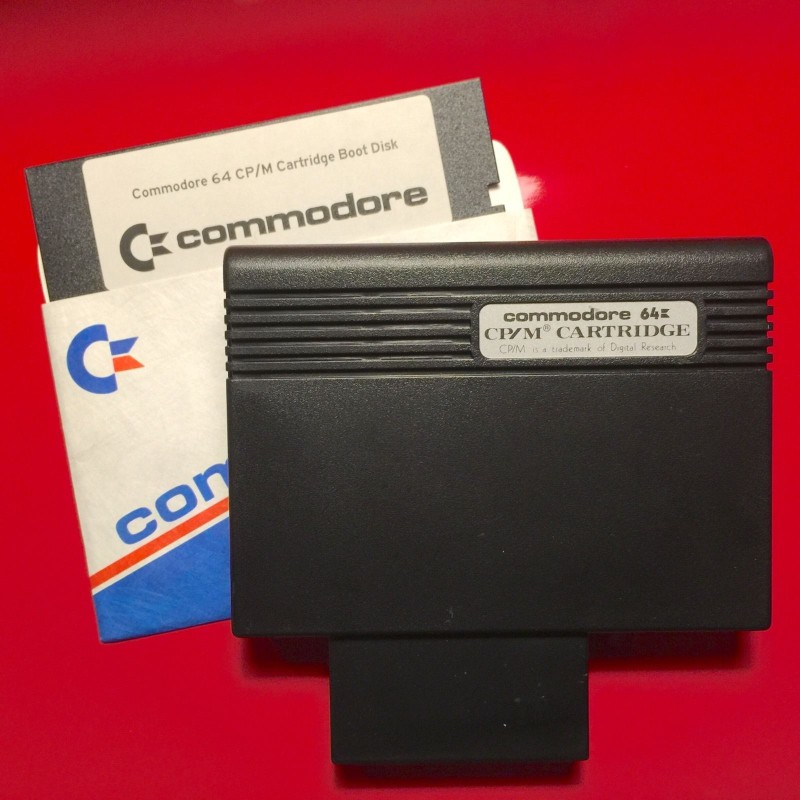
Picture of Commodore 64 CP/M Cart and Boot Disc


The Commodore 64 CP/M cartridge was released sometime in the early 1980’s, shortly after the introduction of the C64 itself. The cartridge contained the necessary Z80 chip inside to run CP/M software natively. While a novel idea, it was a bit too late with the popularity of CP/M waning which itself had been released almost a decade earlier. To make matters worse, it seems to only work on very early revisions of the Commodore 64. I personally am only able to get it to work reliably on a Rev A motherboard (1982, with no s-video output).

Continue reading

The Jameco JE520 Voice Synthesizer

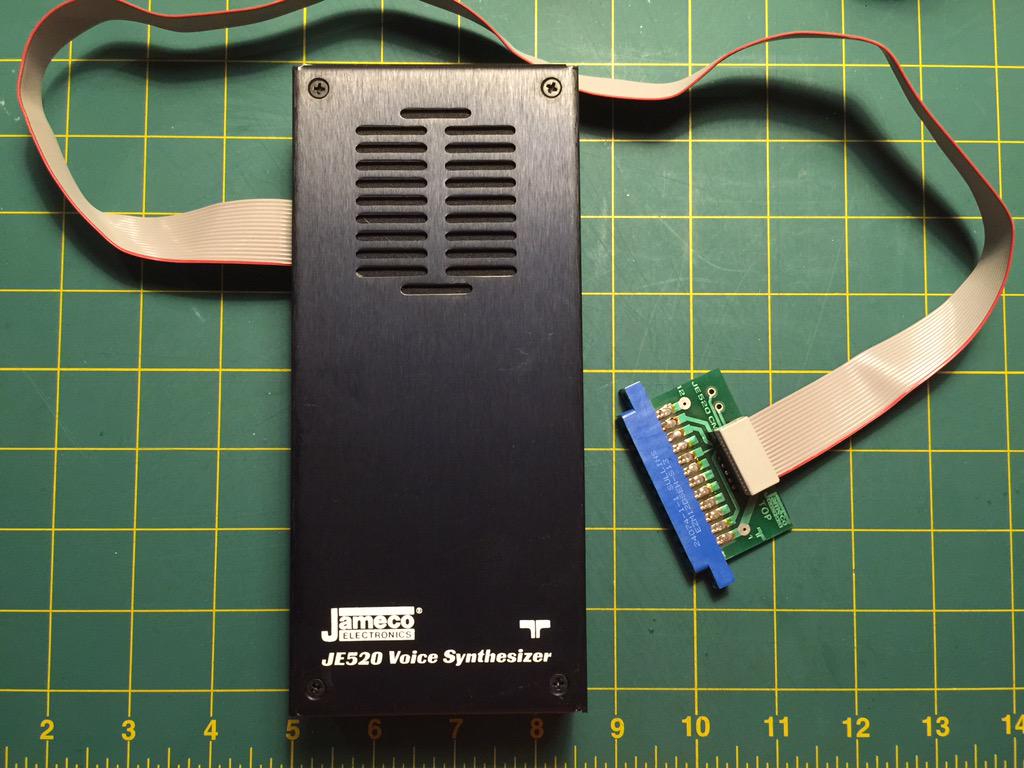
Jameco JE520 Voice Synthesizer for C64The latest acquisition is the JE520 by Jameco. This external voice synthesizer came in two variants: the JE520-CM for Commodore and JE520-AP for Apple II. The only difference was the interface connection to the computer. The Commodore version, the one I have, connects to the user port while the Apple II version connects via an interface slot card. Otherwise, I believe the rest of the hardware to be the same. I found an advertisement for it in RUN issue 7 1984— it retailed for $115-$150.

Continue reading

Guest DJ Set On WVUD 91.3FM

I’ve been invited to have a guest DJ set for All Tomorrow’s Parties on WVUD 91.3FM in Newark, DE. It’s simultaneously exciting and terrifying. The theme is synthpop, new wave and the Fairlight CMI. I’ve attempted to put together some cuts that I enjoy myself while trying to weave some threads through the artists.

I’ll be on Tuesday June 23, 2015 from 7:00pm to 9:00pm EDT.

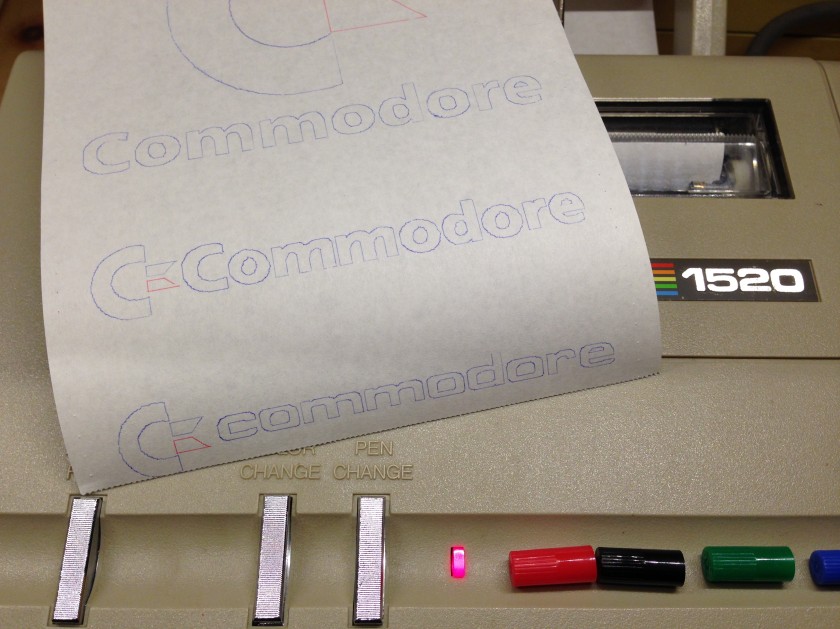
Commodore 1520 Plots .SVG Images

Commodore 1520 Plots SVG Files
NOTE! Split gears causing causing or plot errors? New replacement Alps gears for the Commodore 1520, Atari 1020, etc are now available! Click here to order your set.

I’ve put together a quick program that can convert an .SVG file into data statements that can be used to plot it on a Commodore 1520 Printer/Plotter. The program doesn’t run on the Commodore 64 (yet) but instead runs in the browser. It’s not ready to release yet as it’s fair picky about the types of .SVG files you feed it.

To whet your appetite, I’ve prepared a .D64 disk image that has four BASIC programs that will plot four different Commodore logos.

Download the disk image here.

And if you need plotter pens for your Commodore 1520 printer, you can get new old-stock pens from @futurewas8bit!

Reddit/r/RetroBattlestations BASIC Week 3– C64 port

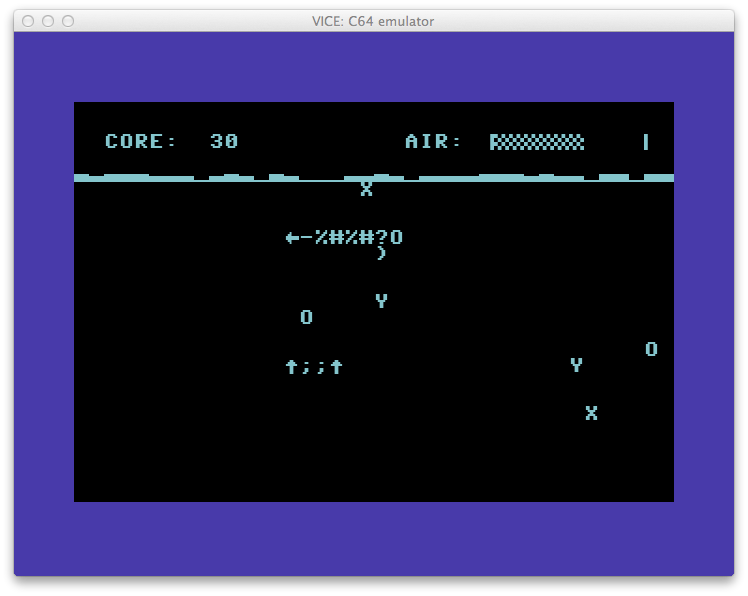
Under The Sea: BASIC Week 3 C64It’s BASIC Week on Reddit/r/RetroBattlestations and I ported the BASIC Week program “Under the Sea” to the Commodore 64. The original code was written by FozzTexx for the IBM PC which allows for variable names longer than two characters. The Commodore 64 BASIC version 2 would probably still work using the longer names, it would just ignore everything after the first two characters. Doing this though would run the risk of overwriting variables so it was best to convert them. You can find a list of the variable name conversions at the end of the post.

If you’re keen to type the program in yourself, you can do so here. There’s a few special characters used the code. “CBM-” means hold the Commodore key (lower left) and hit the character after.

If you want to simply run the program from a disc image or to make a floppy, you can download a D64 disk image of Under The Sea here.

The BASIC version is quite slow and there’s room for optimization of the display code. Instead, I ran the code through the BLITZ! BASIC compiler and it runs much faster. This version is on the disc as “c/underthesea”

There’s three keys used the game. ‘A’ makes the turtle (you) go up, ‘Z’ goes down and ‘Q’ will quit the game.

Variable name conversion

Turtle$ = t$
TurtleWidth = tw
TurtleHeight = th
TurtleErase$ = te$
TrutleDead$ = td$
Enemy$() = nm$()
EnemyErase$ = ee$
EnemyW = ew
GameOver$ = go$
GOWidth = gw
GOHeight = gh
AirMax = am
Sea$ = se$
TurtleY = ty
Surface = sf
Score = sc
LastY = ly
TurtleX = tx
NumEnemies = ne
BubbleX = bx
BubbleY = by
Enemy X = ex
Enemy Y = ey
EnemyHit = eh
Food$ = f$
FoodX = fx
FoodY = fy
NewX = nx
NewY = ny
EnemyC = ec
NumBubbles = nb
NumFood = nf
exV = xv
eyV = yv
rows = rw
cols = cl
3D Visualization on the Commodore 1520

Riz1520_Plots00011
NOTE! Split gears causing plot errors? New replacement Alps gears for the Commodore 1520, Atari 1020, etc are now available! Click here to order your set.

Recently on the Lemon64 forum, user Rizthomas posted some excellent scans of some plots that he did on a Commodore 1520 Printer/Plotter back in 1986. The plots were well executed and very intricate. Some were 2D “string art” and some were 3D functional models. Unfortunately, Rizthomas was unable to locate the original disks for his plots (still hopeful they’ll turn up!) but was generous enough to point everyone in the direction of where he began.

One route was Transactor Magazine Volume 6, Issue 4 which contained a program called The Projector by Ian Adam of Vancouver, B.C. The program was of combination BASIC that built on top of a series of machine language routines (from Transactor Volume 5, Issue 6) that made it easy to draw lines, circles, and text on a hires screen. The routines were called with a SYS command from BASIC and were passed coordinates as variables. This made it incredibly easy to patch the program to also send those coordinates to the Commodore 1520 Printer/Plotter with a few modifications.

  • The hires screen coordinates (320×200) doesn’t match the 1520 plotter (480,999) but that’s easily taken care of by scaling the coordinates by a factor of 1.5.
  • The program includes several functions to plot contained in REM statements. I broke those out into a menu system so you can choose a function to plot.
  • I eventually matched Rizthomas’ color choices by making horizontal lines blue, vertical lines green, bounding box green and text black (on the plot only).
  • The origin of the plotter (current pen location at start) is (0,0). Below that point is the negative Y axis so you need to advance the paper up by 300 and then send the “I” command which sets a new “relative origin” point. Now the coordinate systems match screen coordinates (bottom left is (0,0)). Sending the command “R” instead of “M” for moving (pen up) will now use the new relative origin as does “J” instead of “D” for drawing (pen down). The 1520 manual is a great resource to understand the coordinate system of the plotter.

3d 1520 plots

You can download the program (and required ML program) here.

The nice thing about the program is that it will draw a line on the screen while drawing it on the printer simultaneously so you can see both evolve together. Enjoy and a big thanks to Rizthomas for the pointers to the code! If you’re able to get it working, let me know in the comments (and let’s see what you plotted).

Here’s a quick Vine of the plotter working:

Using Prowl to Announce IP Address of Raspberry Pi on iOS

Prowl on iOSIf you use your Raspberry Pi without a keyboard and monitor, you know how frustrating it can be to use it without knowing it’s IP address. By default, the Raspberry Pi is configured to use DHCP to obtain an IP address. This is great for moving the unit around to different networks but can be annoying when you want SSH to the unit. Typically you can use the zero-config/Bonjour “raspberrypi.local” address but this doesn’t always work. I’ve instead come up with a way to use Prowl to notify me of the current IP address after it boots. As a bonus it works with either an Ethernet or WiFi (or both) connection.

Prowl is a Growl push notification service for iOS. It costs $3 and is available from the iTunes App Store.

1. The first step is to download and install Prowl and setup an account. Next, obtain an API key from Prowl. Copy the API key– you’ll need to insert it into a script below.

2. Next, create two files in your home directory (/home/pi/) called prowl.sh and prowlip.sh. Insert the API key into prowl.sh as shown.


File: prowl.sh from koma5 on github.

#! /bin/sh
# Usage: ./prowl.sh priority(-2 to 2) app event description
# Example: ./prowl.sh 0 "transmission" "torrent has finished" "Coen Brothers Compilation has finised downloading"
app=$2
priority=$1
event=$3
description=$4
apikey=PASTE_YOUR_HEXADECIMAL_API_KEY_HERE

if [ $# -ne 4 ]; then
echo "Usage: ./prowl.sh priority(-2 to 2) app event description"
echo 'Example: ./prowl.sh 0 "transmission" "torrent has finished" "Coen Brothers Compilation has finised downloading"'
else
curl https://prowl.weks.net/publicapi/add -F apikey=$apikey -F priority=$priority -F application="$app" -F event="$event" -F description="$description"
fi


File: prowlip.sh with apologies to original author.

#!/bin/sh

eth=`ifconfig eth0 | awk -F':' '/inet addr/&&!/127.0.0.1/{split($2,_," ");print _[1]}'`
wlan=`ifconfig wlan0 | awk -F':' '/inet addr/&&!/127.0.0.1/{split($2,_," ");print _[1]}'`

if [ "x$eth" = "x" ]; then
eth=""
# Variable is empty
else
eth="eth0: $eth "
fi

if [ "x$wlan" = "x" ]; then
wlan=""
# Variable is empty
else
wlan="wlan0: $wlan"
fi

/home/pi/prowl.sh 0 "Raspberry Pi" "IP Address" "$eth$wlan"


3. Set both files to executable by typing

chmod 755 prowl.sh prowlip.sh

4. Add this line to /etc/rc.local before the “exit 0” line. This will execute the script at startup.

/home/pi/prowlip.sh

5. Reboot your Raspberry Pi and you should receive a push notification from Prowl on your iOS device with the current IP address(s).