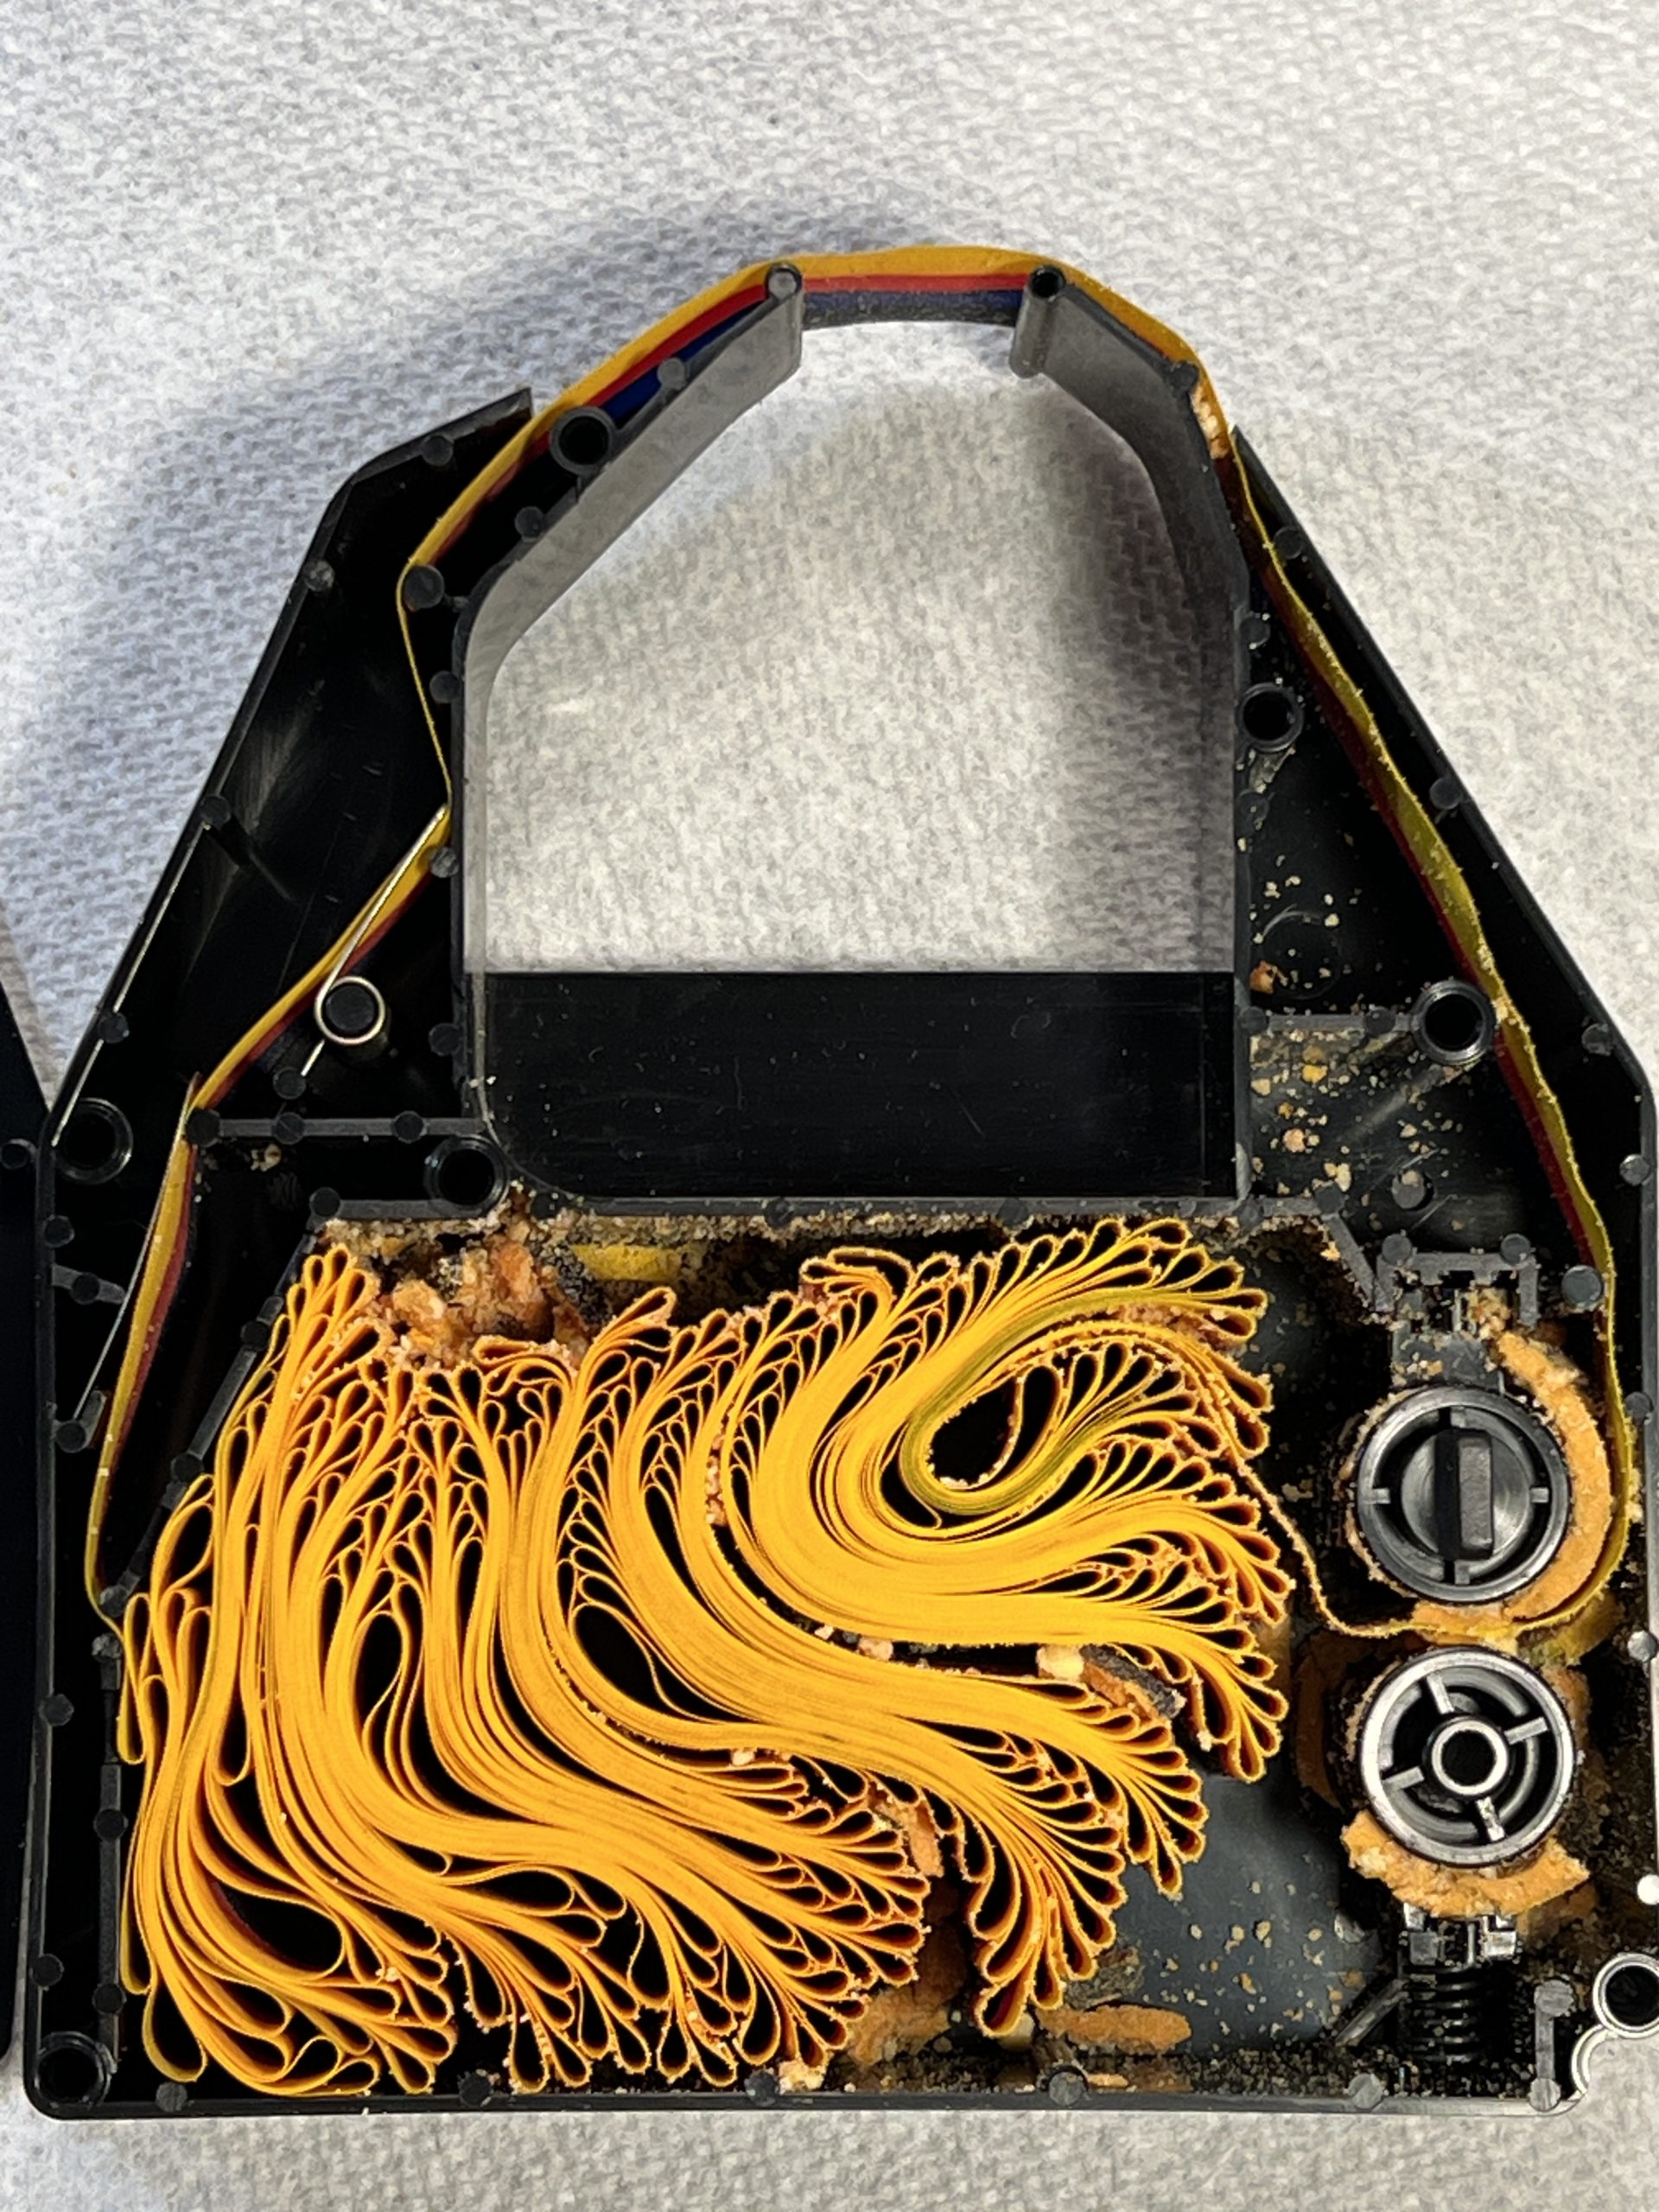
If you’ve attempted to use an original color ribbon in your ImageWriter II recently, you’ve quickly found out that the pinch rollers inside the cartridge have disintegrated over time. More specifically, the foam that goes around the rollers that pull the ribbon through the cartridge have fallen apart and turned to sticky dust.
I recently got a few new NOS color ribbons for my ImageWriter II and I wanted to see if I could salvage them. Sure, brand new ribbons are being made again [MacEffects, $29], but I wanted to see if it was possible to clean these up and get them working again.
Replacing the Pinch Rollers
I found a couple of sources that used rubber O-rings that slip over the pair of rollers. So I set about giving this a try.
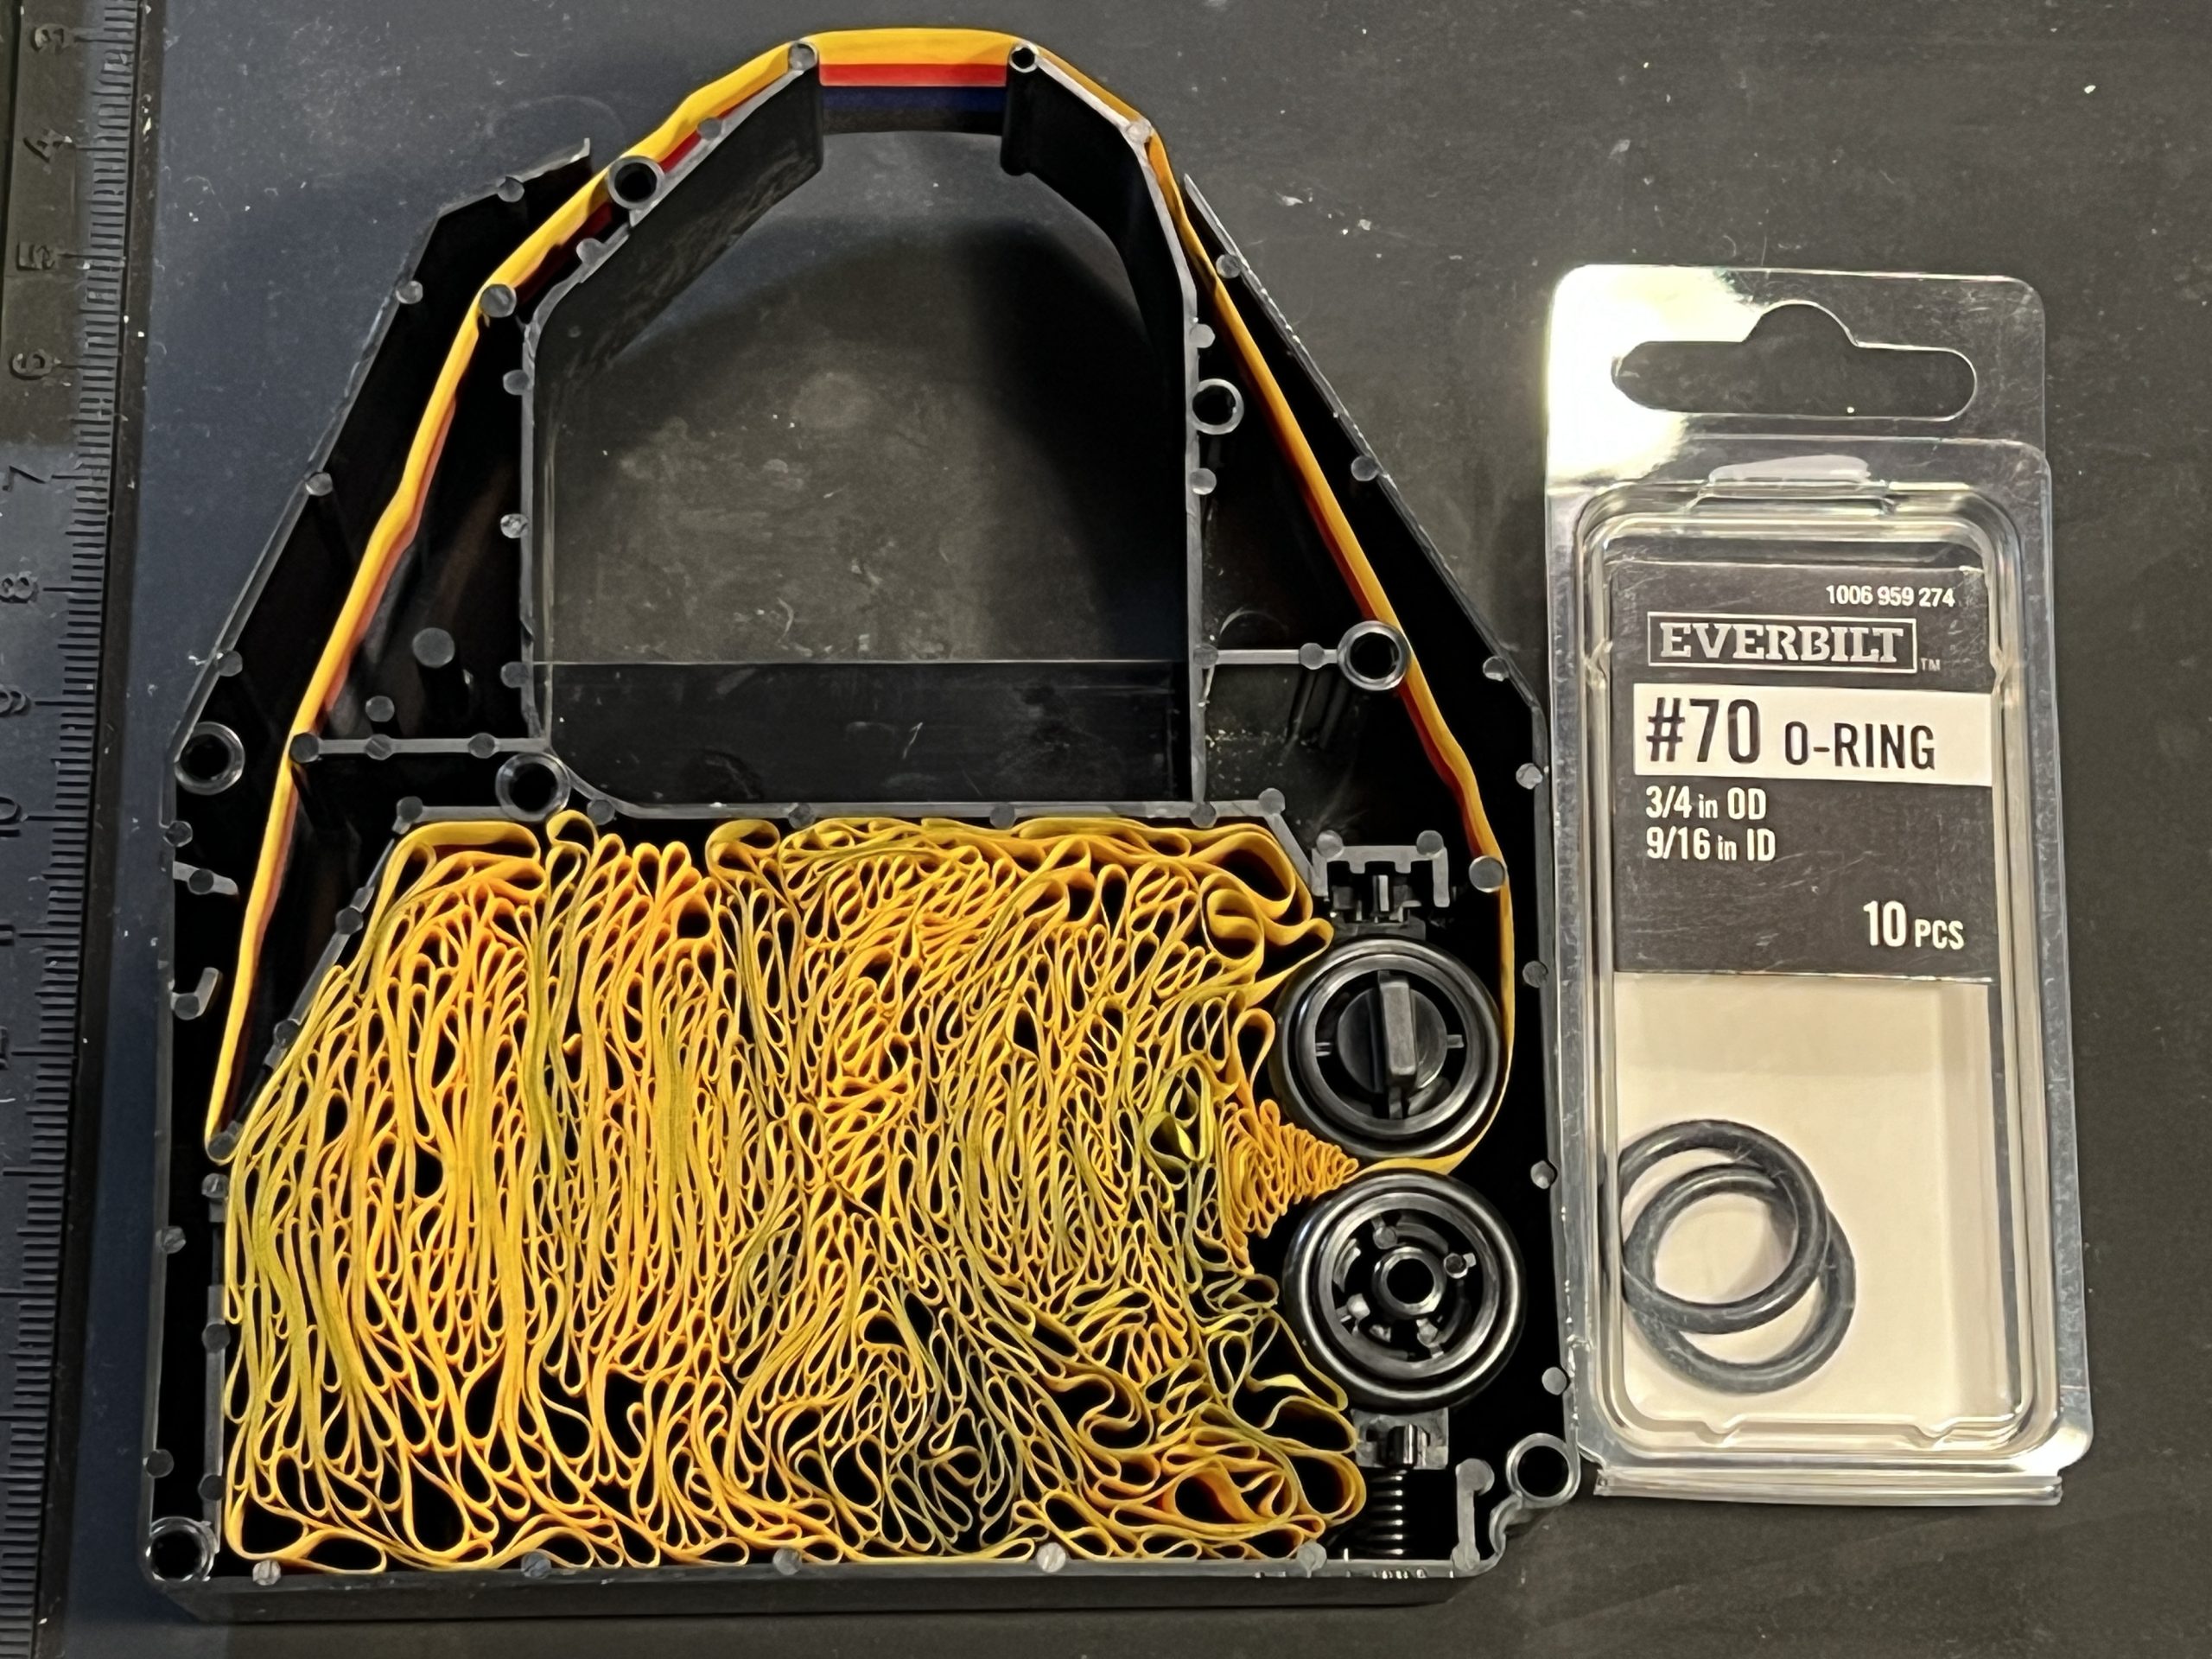
First I purchased #70 O-Rings from Home Depot. They measure 3/4″ OD and 9/16″ ID. They slip on easily but were quite loose. They could stand to have a bit smaller ID. Nevertheless, I put the cartridge back together and gave it a spin. Unfortunately, the rollers just slipped and the ribbon was stationary. I noticed on the left side there are two mechanisms that provide tension on the exiting ribbon– a flat metal spring and a coil spring. I removed both of those to release the tension but the ribbon was still stationary.
I went to Harbor Freight and purchased an O-ring assortment to try to find something that was a better fit. There was but the OD dimension was then too small to effectively reach the ribbon.
Defeated, I gave it some thought and went back to the original design– foam. There’s likely a good reason foam was used. My guess is it gives maximum surface area to touch the ribbon and grips well under compression. The O-rings on the other hand have a relatively small surface area that contacts the ribbon due to the round shape and could slip under compression.
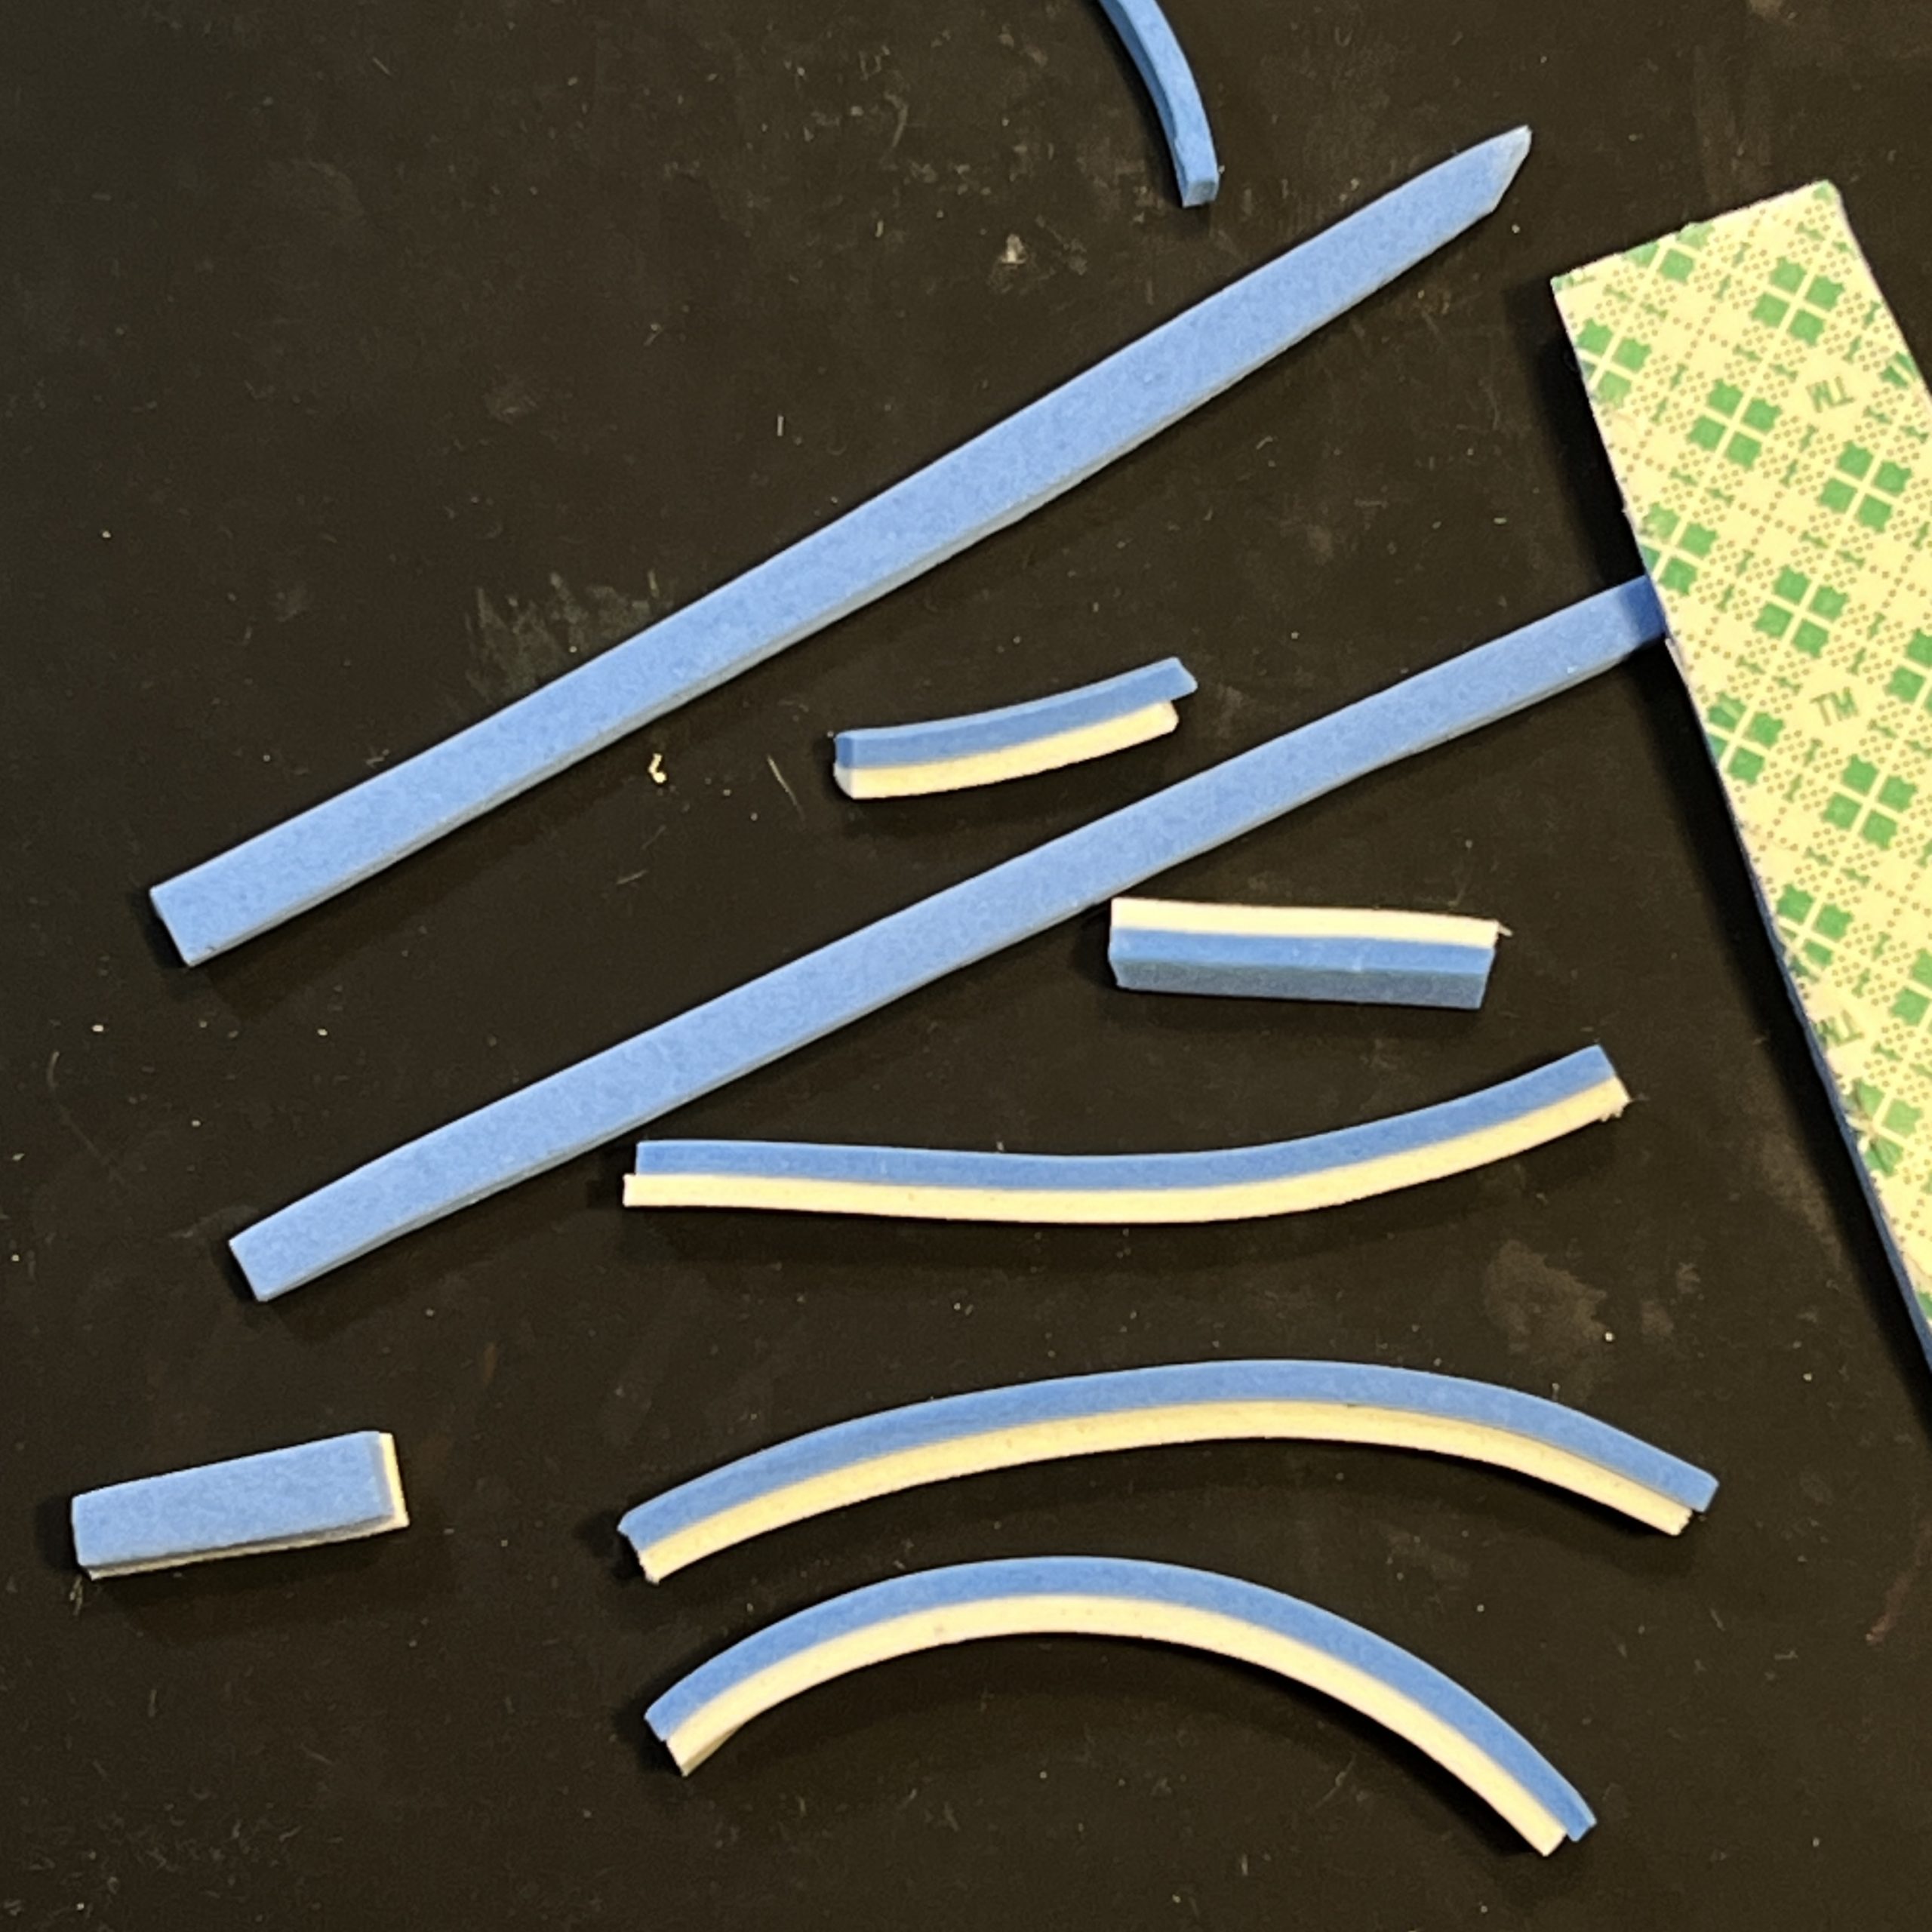
I started by attempting to cut strips of adhesive backed foam and sticking those on the rollers. Unfortunately, this didn’t work as the adhesive would begin to release at the seam.
After some more thought, it occurred to me I could simply cut discs from 3mm thick sheets of foam with the right OD and ID. I measured this to be approximately 16.9mm OD and 13.8mm ID.
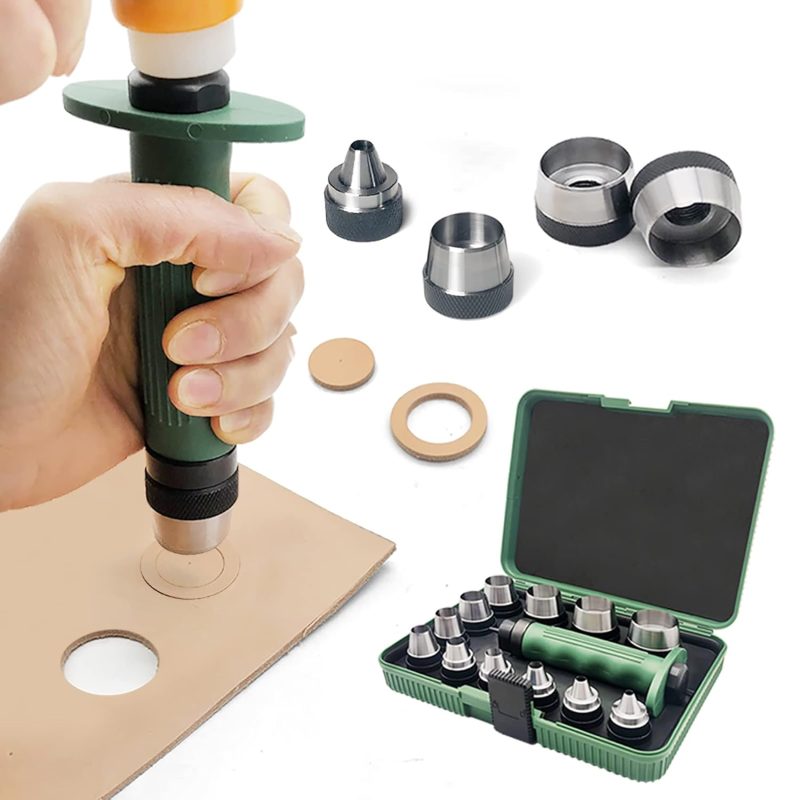
Enter the leather hole punch tool kit. This kit will cut perfect sized holes from leather (as well as foam). I first cut discs of 3mm thick foam using the 19mm for the OD and 12.5mm for ID. Even though the hole punch tool had a centering pin, it was still a little tricky to getting the ID perfectly centered. My recommendation is to make a lot and choose the best ones.

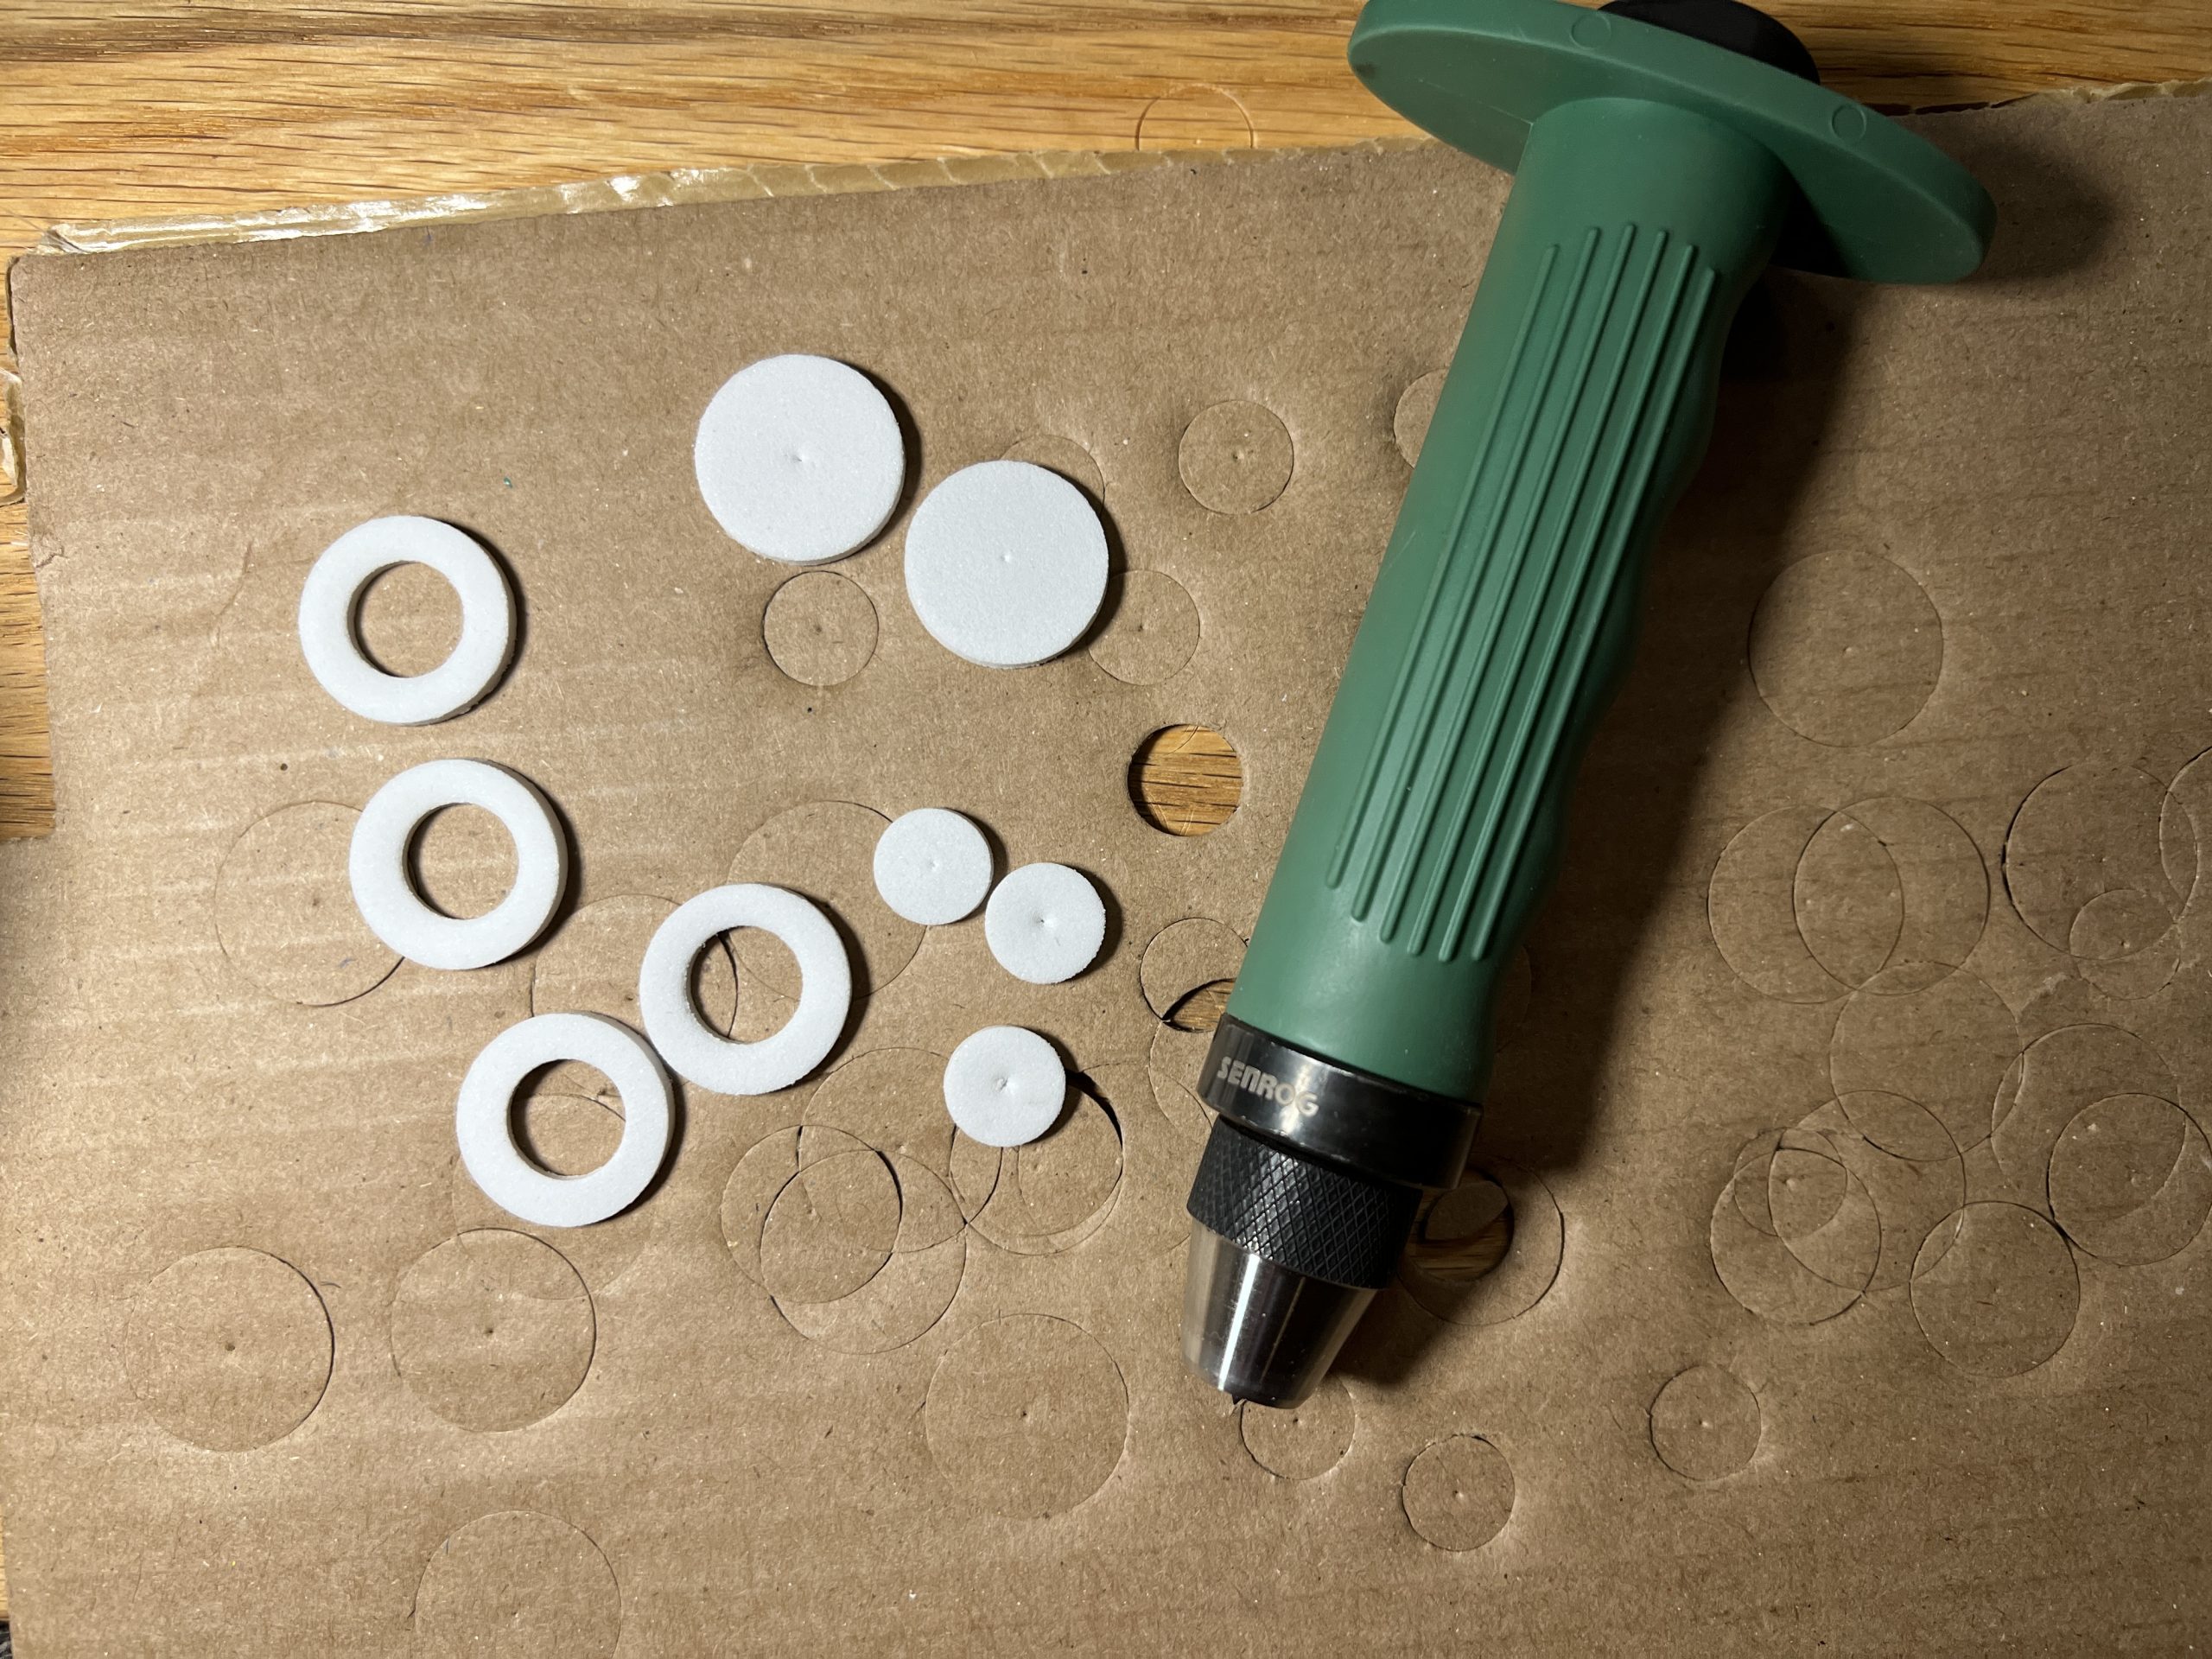
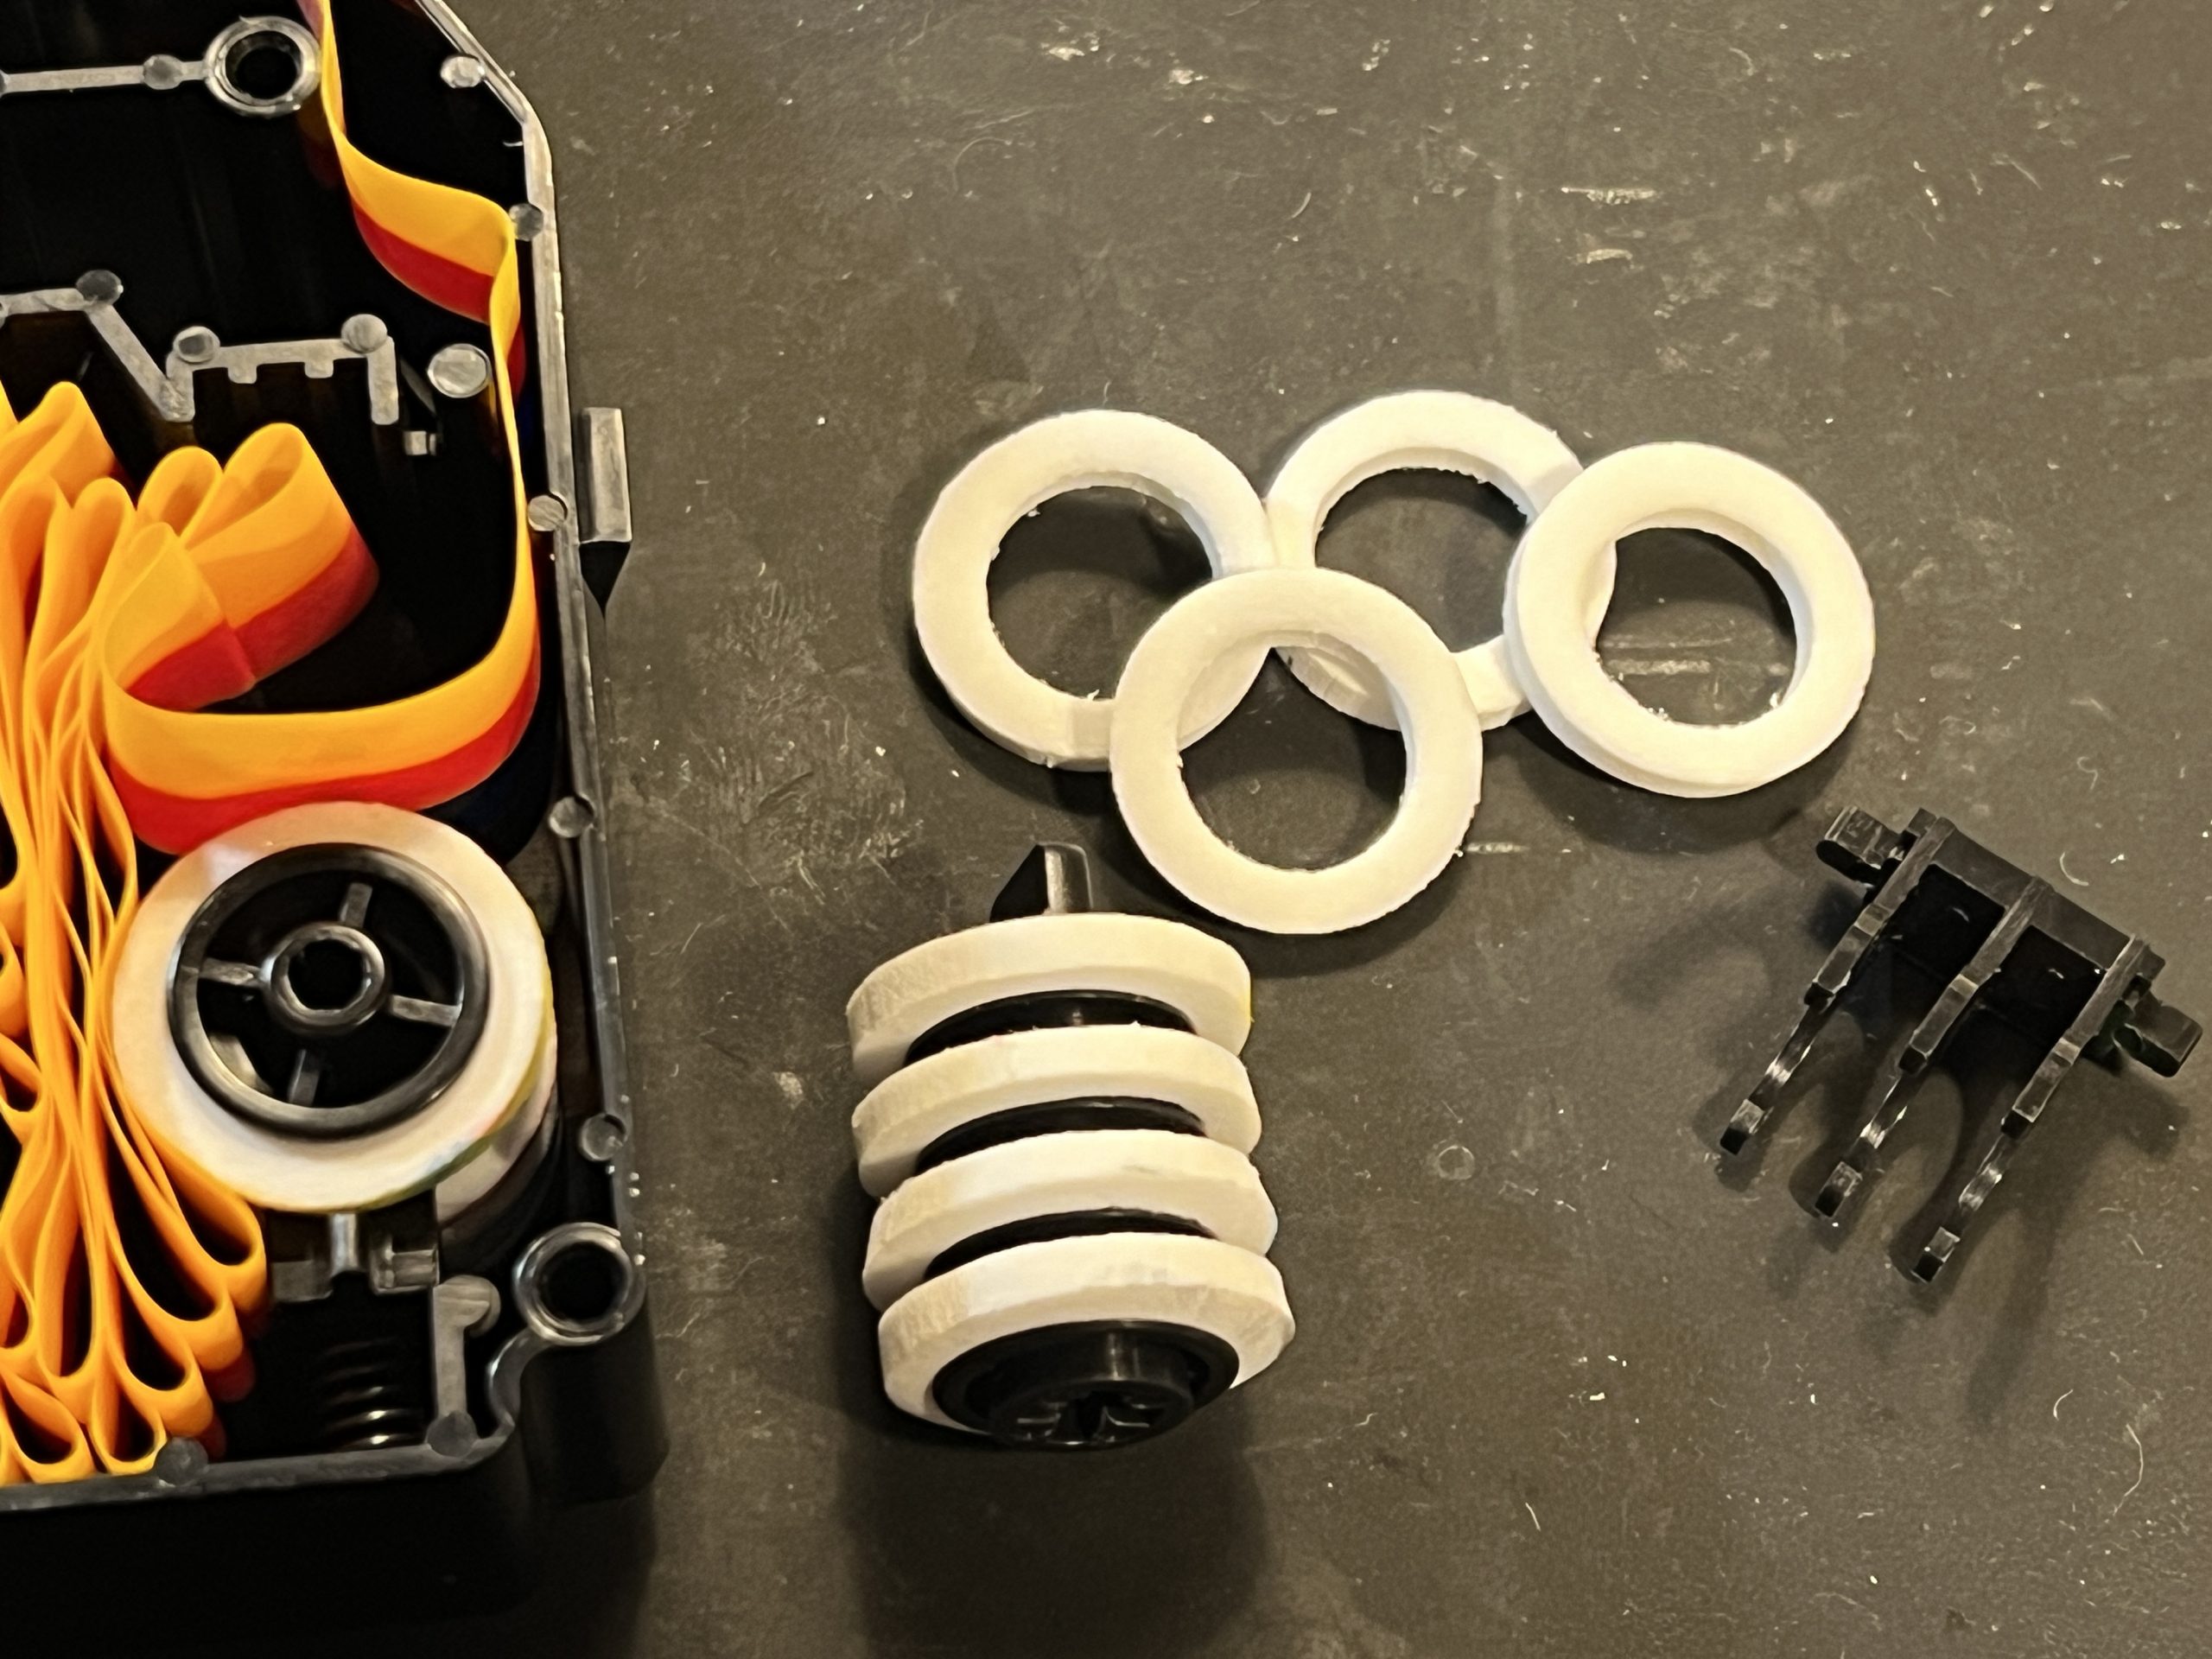
The new foam rings slip over each of the two rollers (you’ll need 4 each) and have good tight fit. I also left out the two spring tension mechanisms on the ribbon exit.
I’ve been using the new ribbon now and after about 10 prints the ribbon still advances properly so I’m calling this a success. Time will tell if they hold up. I’ll be happy to get another 40 years from them!
Removing the Old Foam
The old foam rollers have fallen to pieces over time. Upon opening the cartridge, I was surprised by just how much the foam bits migrated around the still sealed cartridge. This made clean up challenging.
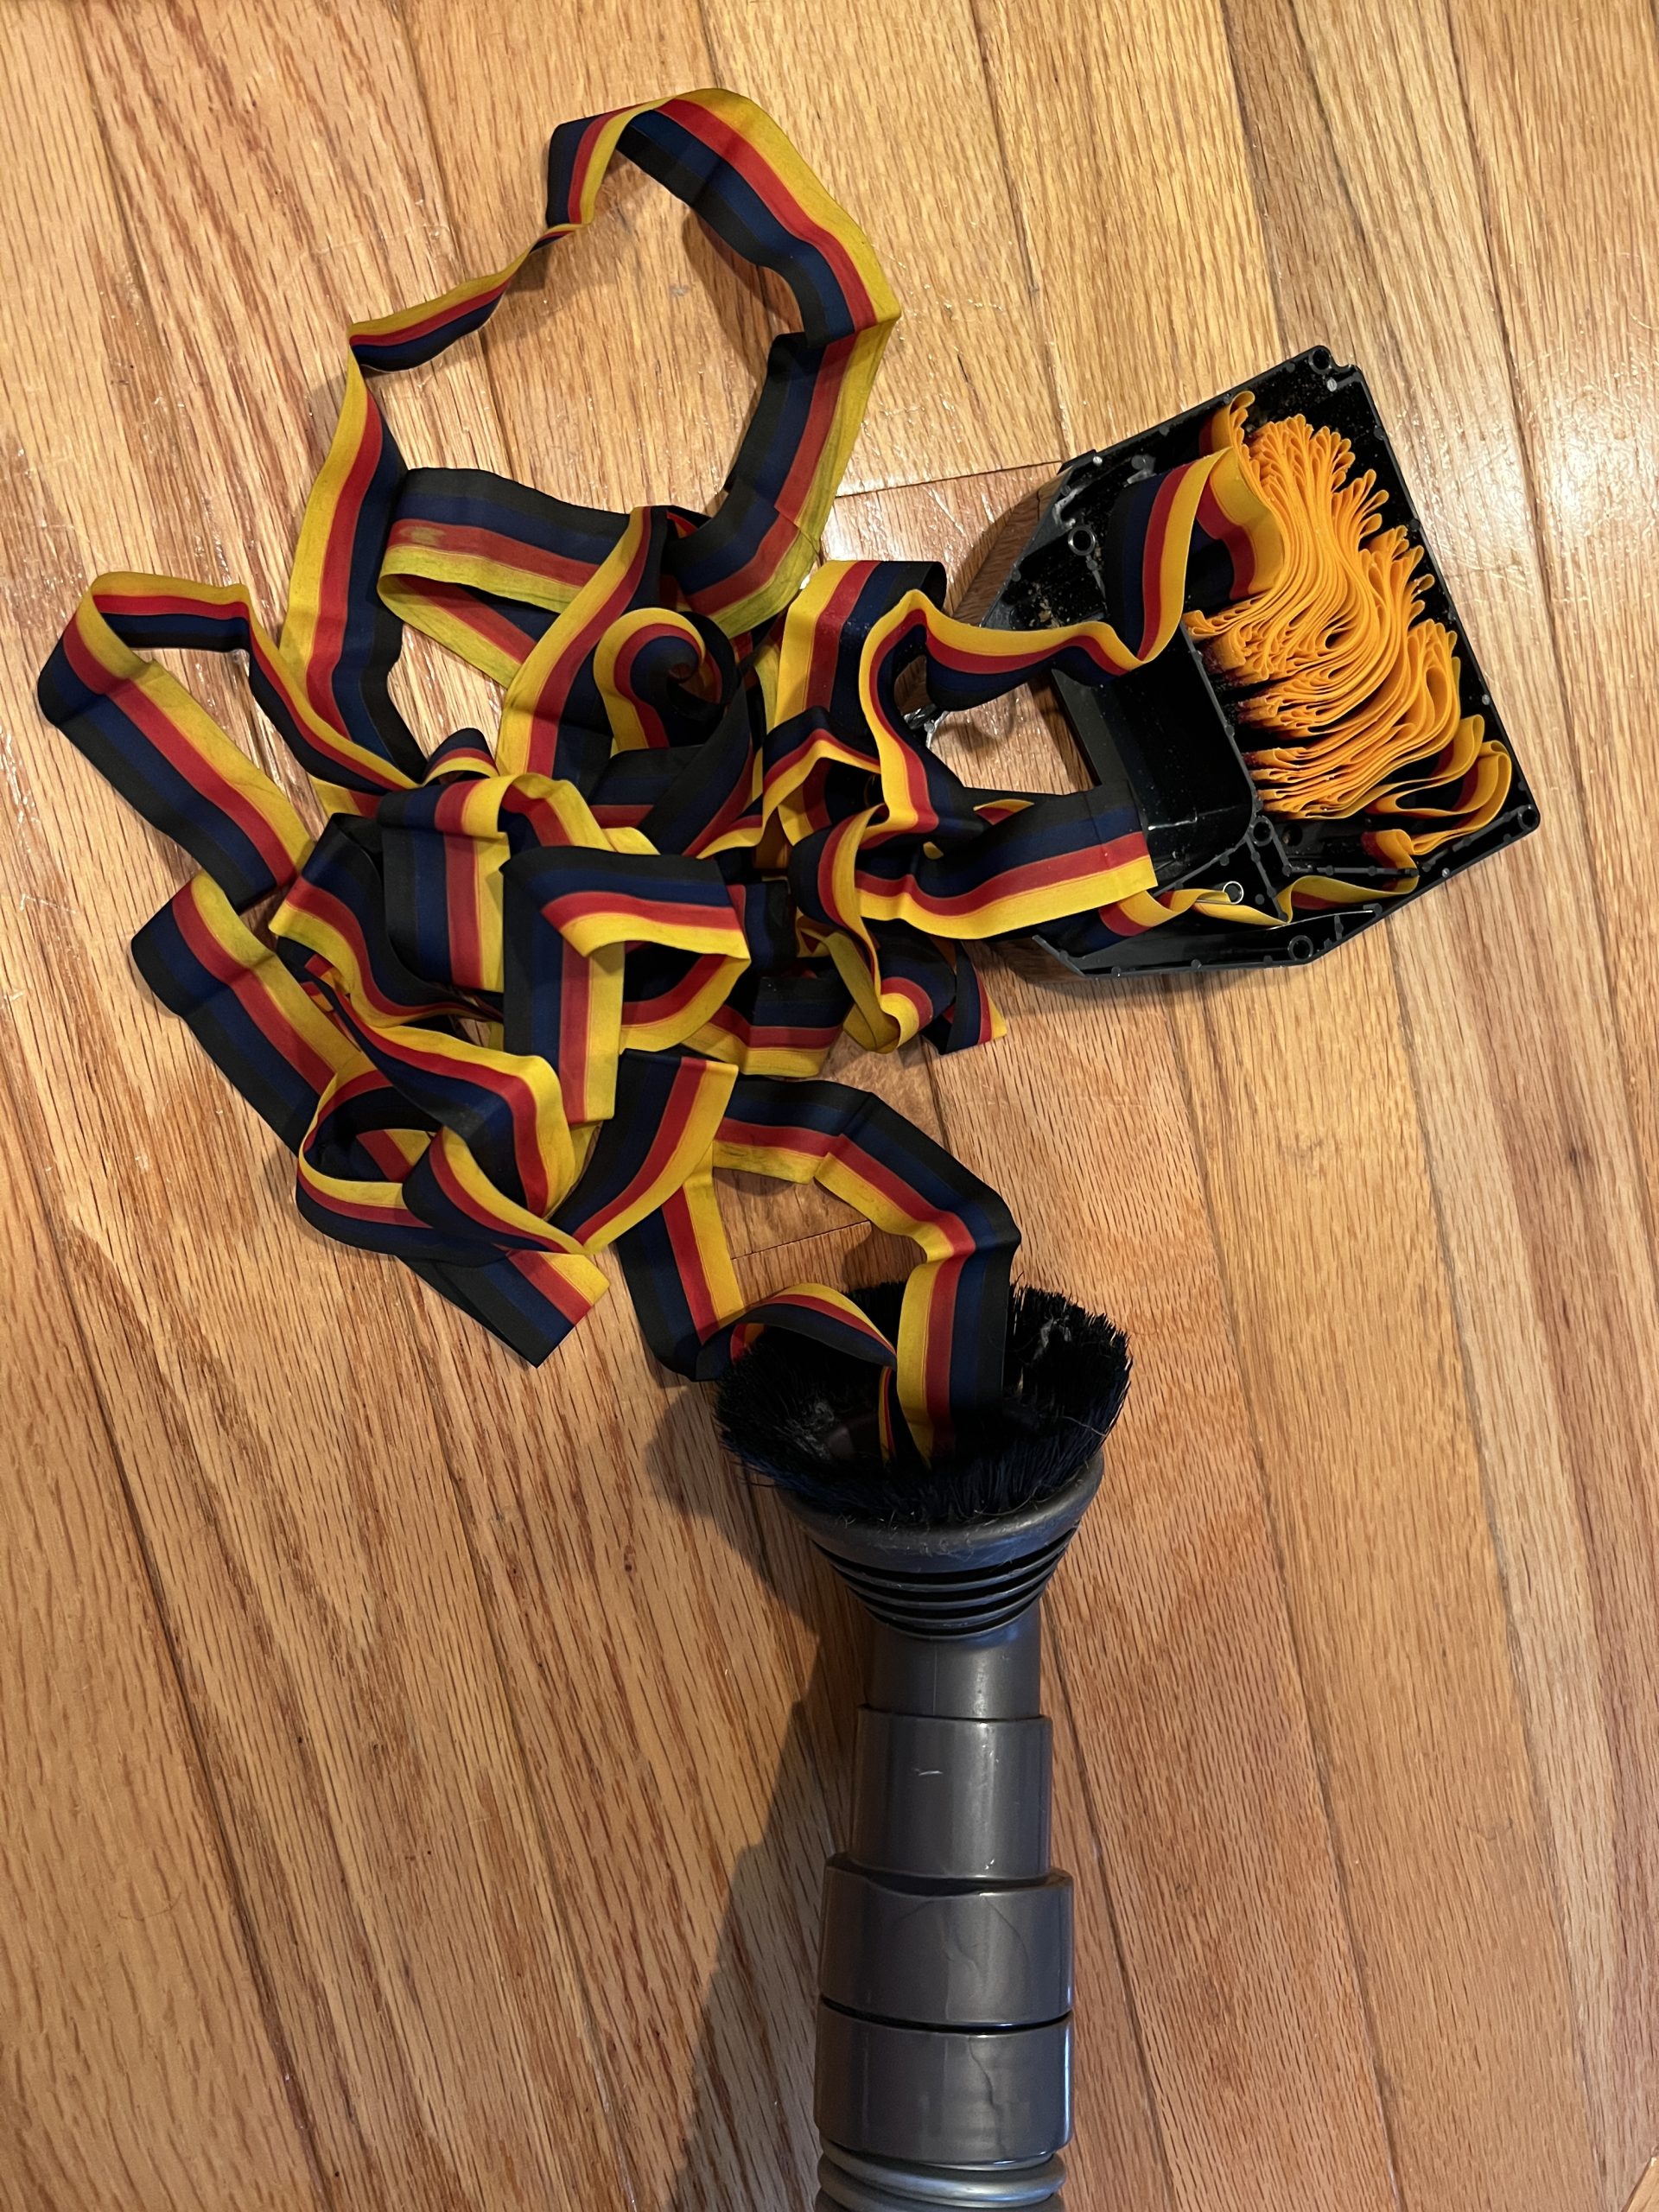
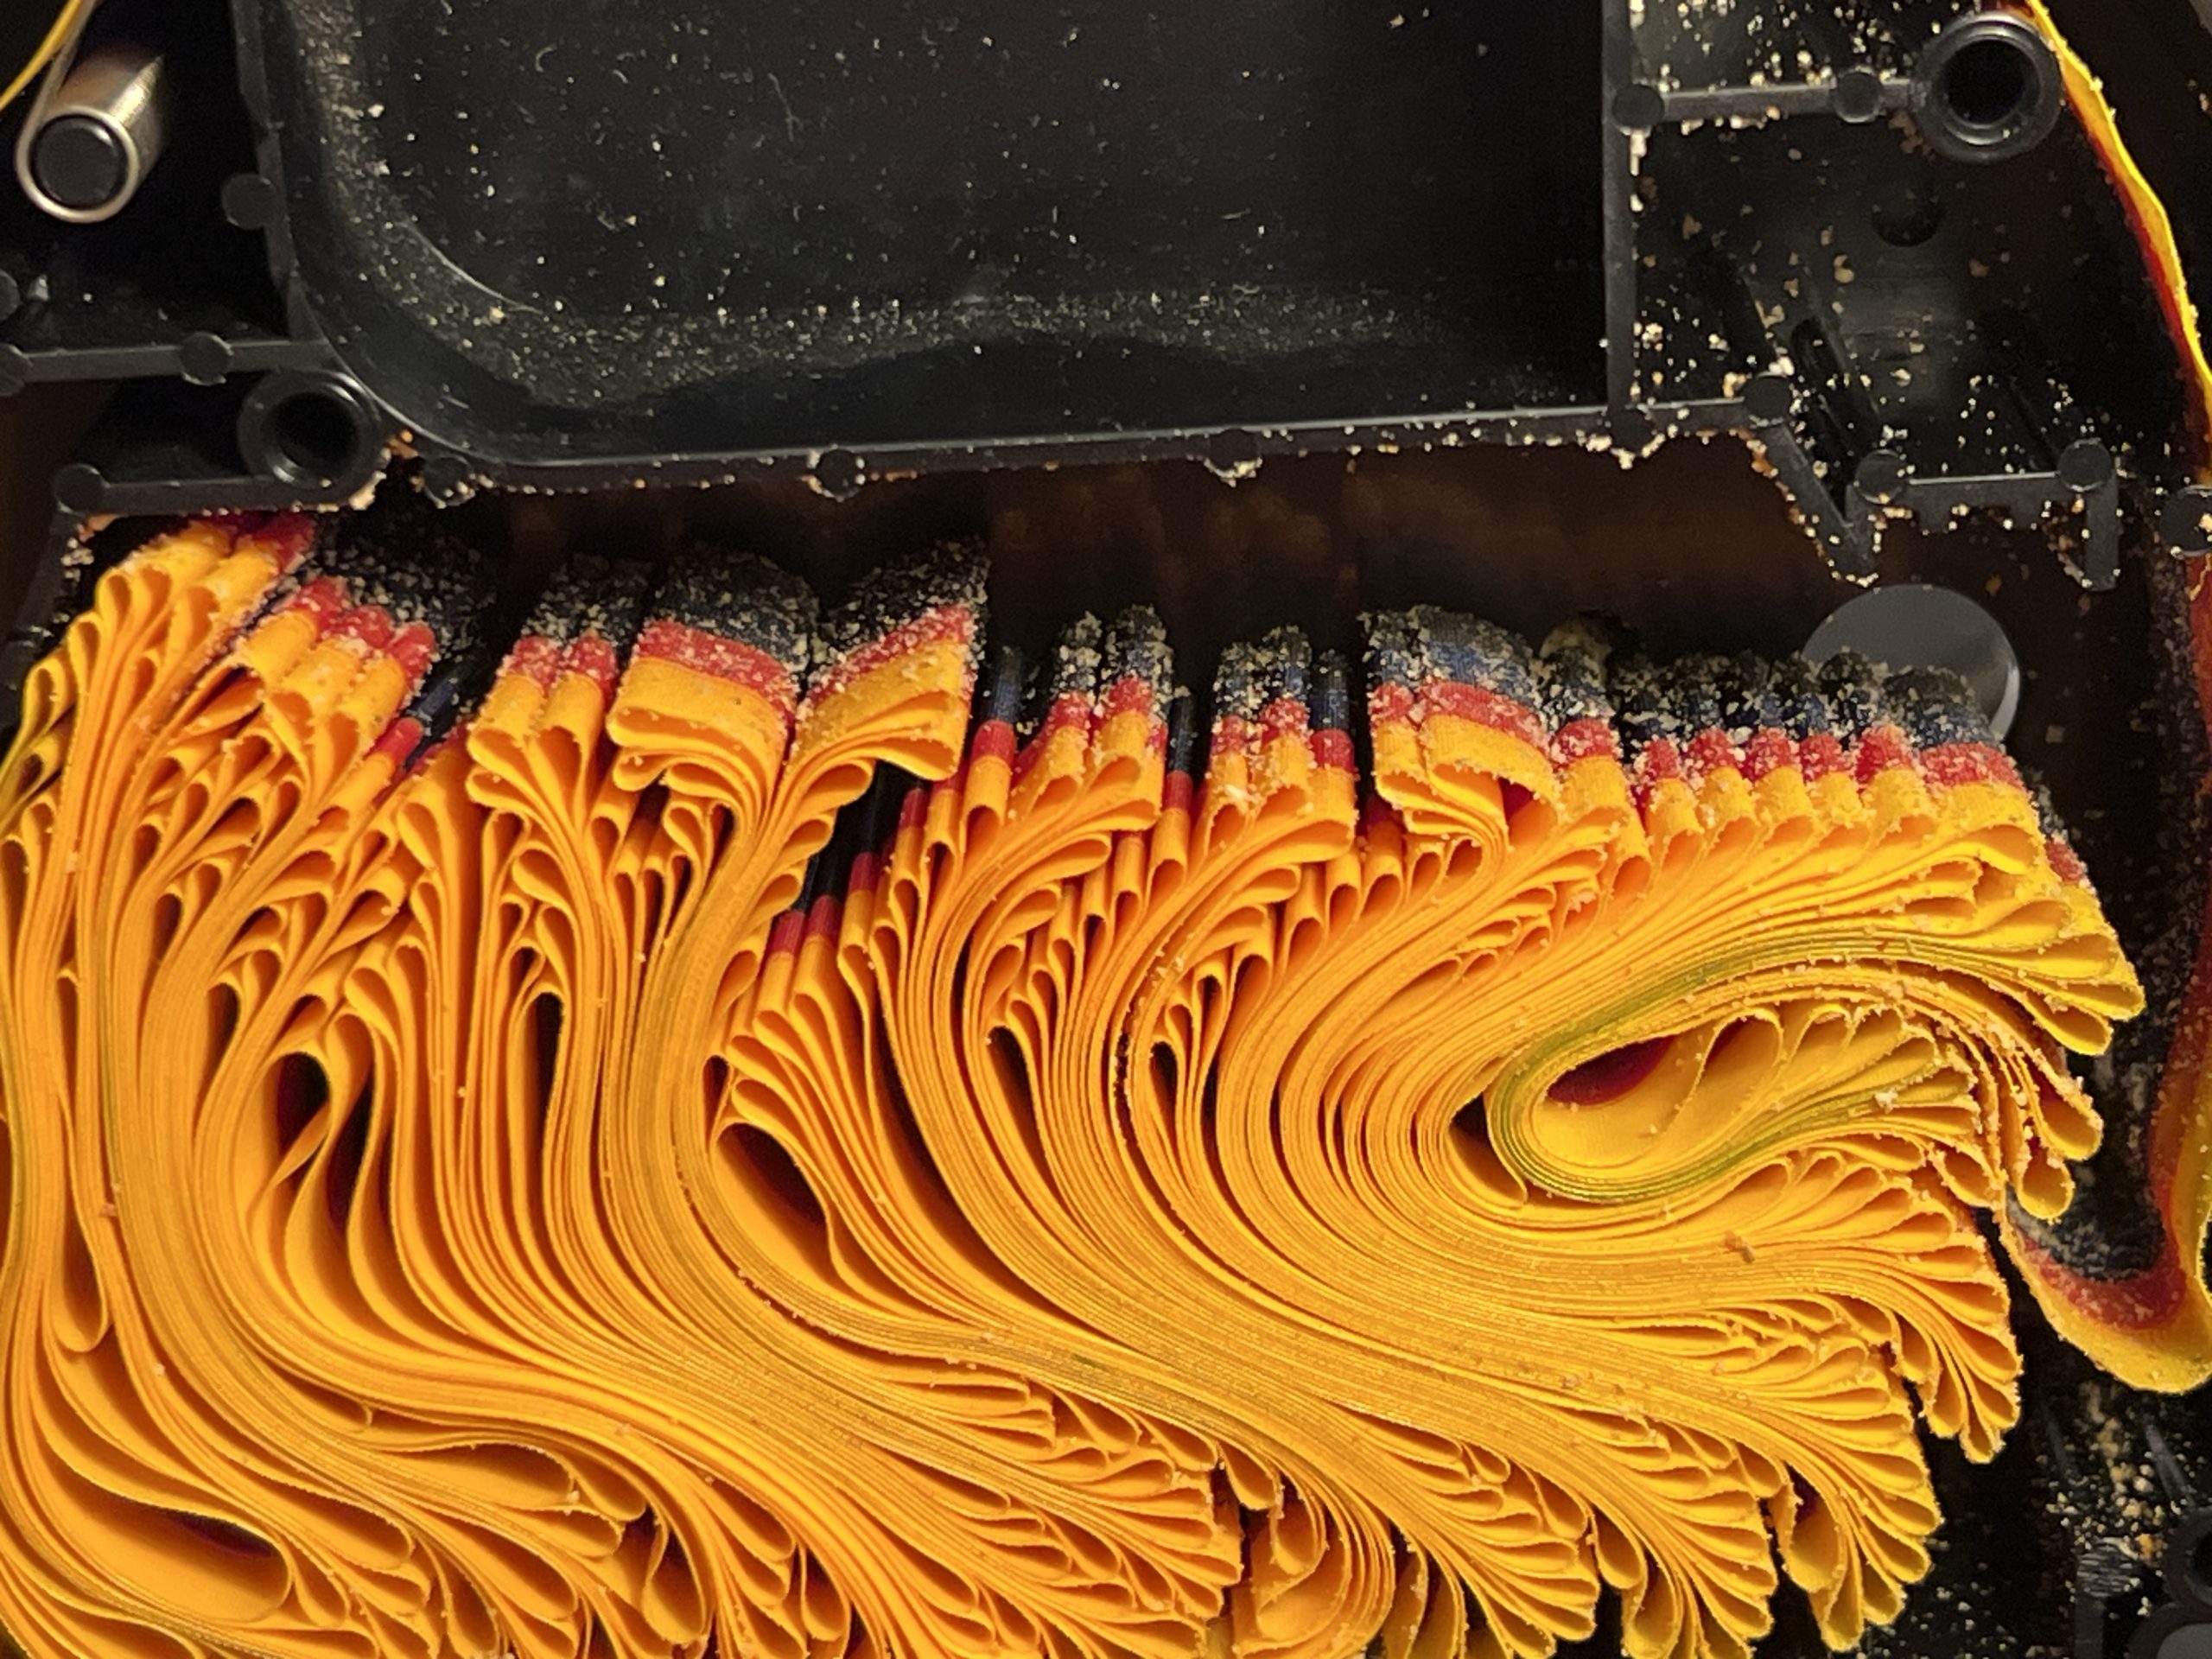
I first removed the large chunks of foam with tweezers. I then attempted to use a vacuum to get the remaining bits. This proved to be a disaster as the vacuum sucked up half of the ribbon. After pulling it out of the hose, I noticed that the colors were really muddled, especially the yellow. However, the upside is that it was now clean. It rewound easily into the cartridge.
On a second attempt, it’s best to remove the ribbon as a block and lightly brush off the foam bits from the ribbon. Then thoroughly clean the cartridge and reassemble.
Color Printing from a Mac

The best driver to print in color from your classic Mac is MacPalette II. This driver does an excellent job of printing photos. It includes serial and AppleTalk versions (which is great to use under emulation). Learn more about building a classic Macintosh support server via one of my earlier blog posts.