I thought I’d share with you how I create my time lapse movies. It’s quite simple and doesn’t require any special equipment, save for a simple video camera.
I use a Flip HD camera that I picked up before they went out of business (someone, please remind me, why did Cisco kill that business again?). It has a maximum recording time of about 1 hour per movie so I can’t make time lapses longer than that so I need to keep that in mind.
I start by setting up the camera on a tripod to keep it stationary– this is very important and is hopefully obvious. Set it to record and don’t move it (unless you want to change the shot). Let it record in real time and capture everything. Don’t worry about the audio, we won’t be using it.
Afterwards, you’ll be left with a huge Quicktime .MOV file. Using Quicktime 7 Pro, open the movie. Make sure the player window hasn’t been resized (hit command-1 on a Mac). This will be important in the next step. Usually the head and tails of your movie will have a slight bit of motion in them so you don’t want that– trim the heads and tails off from the movie if you need to. It’s all under the edit menu. Use the ‘I’ and ‘O’ key to mark in and out points and use Edit->Cut to remove it.
Next, use File->Export. Choose export as “Movie to Image Sequence” and click Options. Change the format to JPEG. The frames per second you choose here will dictate how fast or slow your final time lapse will be. Let’s assume that your source movie is 1 hour. Choosing a small number like 1 FPS will give you a movie that lasts 2 minutes. Choosing 2 FPS will give you 4 minutes and so on. You can also put decimal numbers like .5 or .25 FPS. You can experiment with this value. I call this frame thinning because you are discarding a lot of the original source movie. This is ok. Also, click “Insert space before number.” Click OK. Make a new folder to put these images in (in the thousands for our example). Give it a base name and click save.
The final step is where the magic occurs. Choose File->Open Image Sequence, navigate to the folder and click the first image from the series. The next dialog asks what frame rate. I choose 30 to keep things fluid. Again, choosing a slower frame rate will make your movie longer. Click OK and wait. Once done, you’re rewarded with a great time lapse. Add some music, export to MPEG-4 and share!


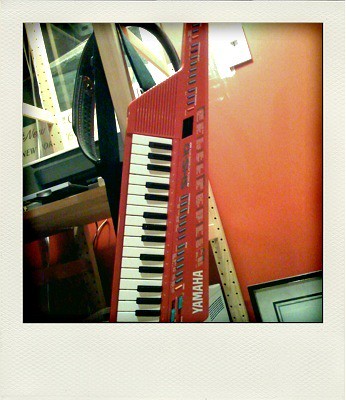
 This app, Project Polaroid will take pictures from your iPhone and convert them to look like they were taken with a Polaroid. Snap and save to your camera roll. Nifty!
