Alternate title: I want to print from an emulated Mac on a pocket computer to my ImageWriter II over AppleTalk.
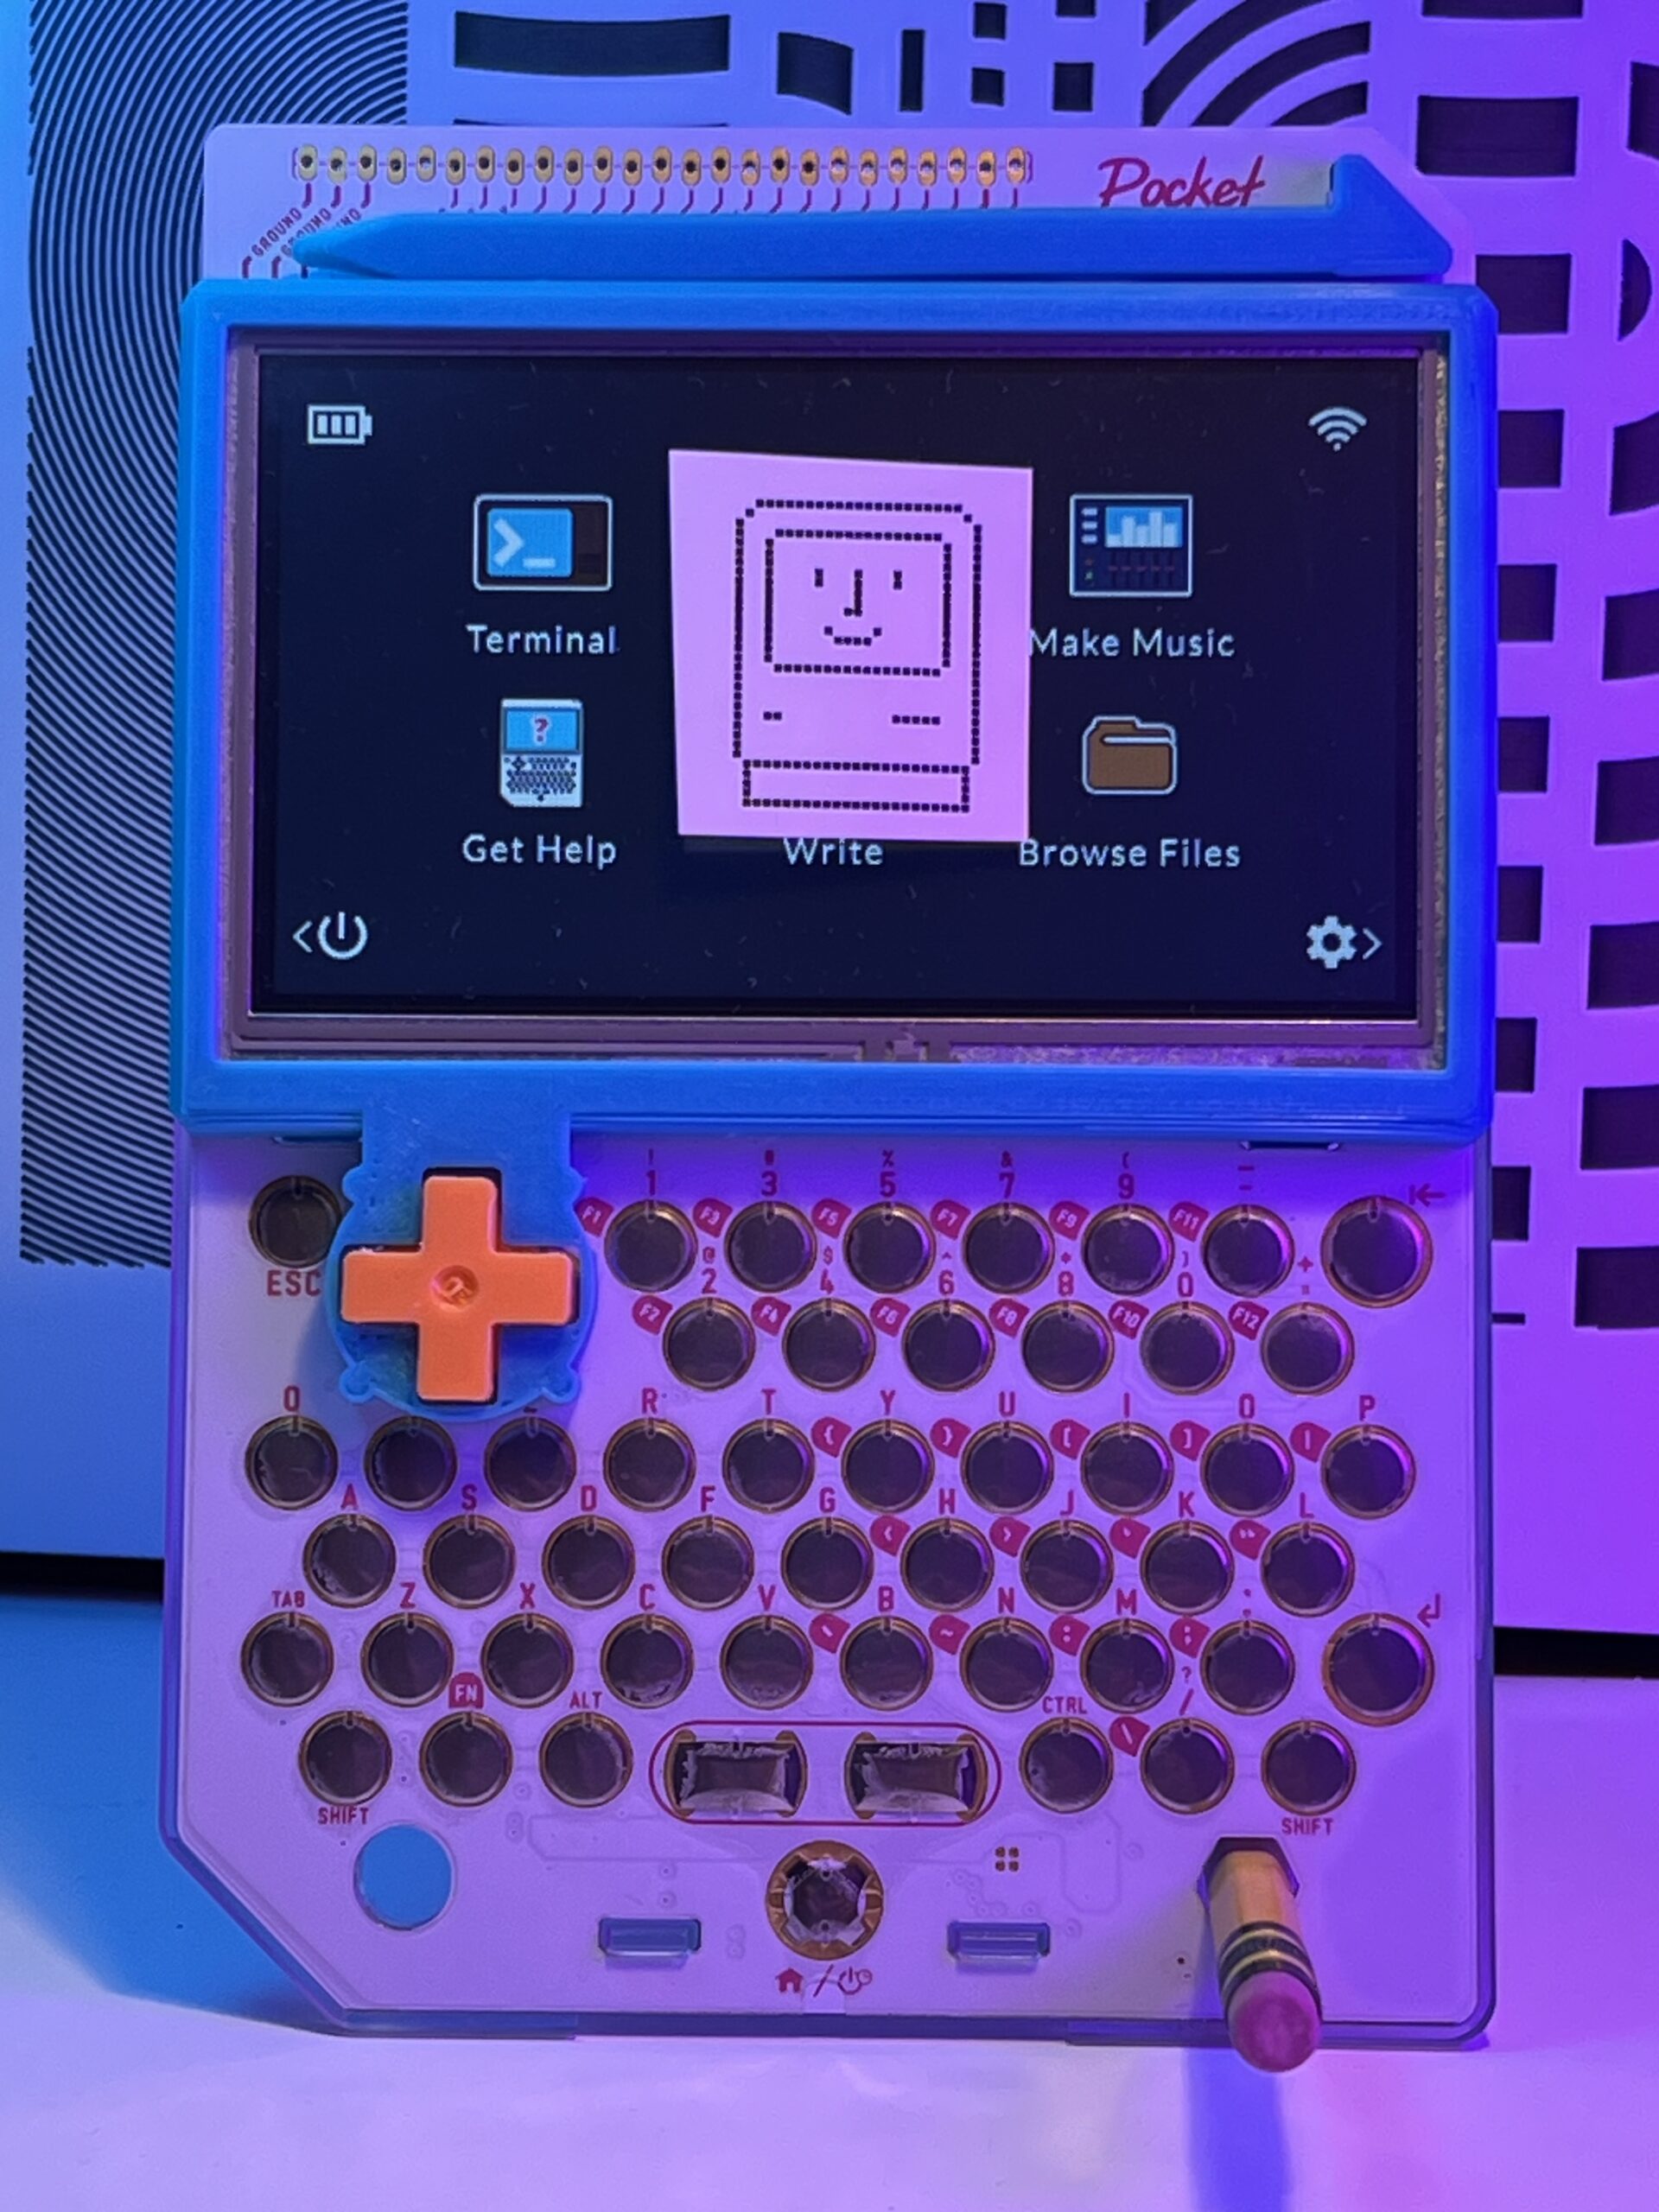
I’ve had a PocketCHIP for several years now. I picked it up right after the Kickstarter campaign was finished sometime in 2016/2017. It’s a great little Linux-based handheld device that combines a lot in one package (touch display, keyboard, storage, battery, sound, USB port, WiFi, Bluetooth, etc.). The novelty wore off and I stowed it away in a box. The company Next Thing Co. went out of business shortly thereafter in March 2018.
Recently, a new retro handheld computer popped up on Alibaba called the Hand386. The 60 or so of those units were snapped up quickly by retro enthusiasts and folks that were lucky enough to get one were having a party with them.
The form factor was very similar to the PocketCHIP which gave me a renewed interest in it again. Couple that with my recent adoration of everything early Mac and it got me wondering if the PocketCHIP was up to the challenge of running a Macintosh emulator.
On my desktop, I was successful in building customized versions of the Mac emulator Mini VMac. Its purpose is to emulate the original and early versions of the Mac (from the 128k through the Mac II). Most of the settings are “baked in” during compilation time which means if there’s a option you’re hoping to manipulate (screen size for instance) you’ll need to compile it from source. This is usually a big hurdle, but given enough time it seems solvable.
It’s Been Done Before!
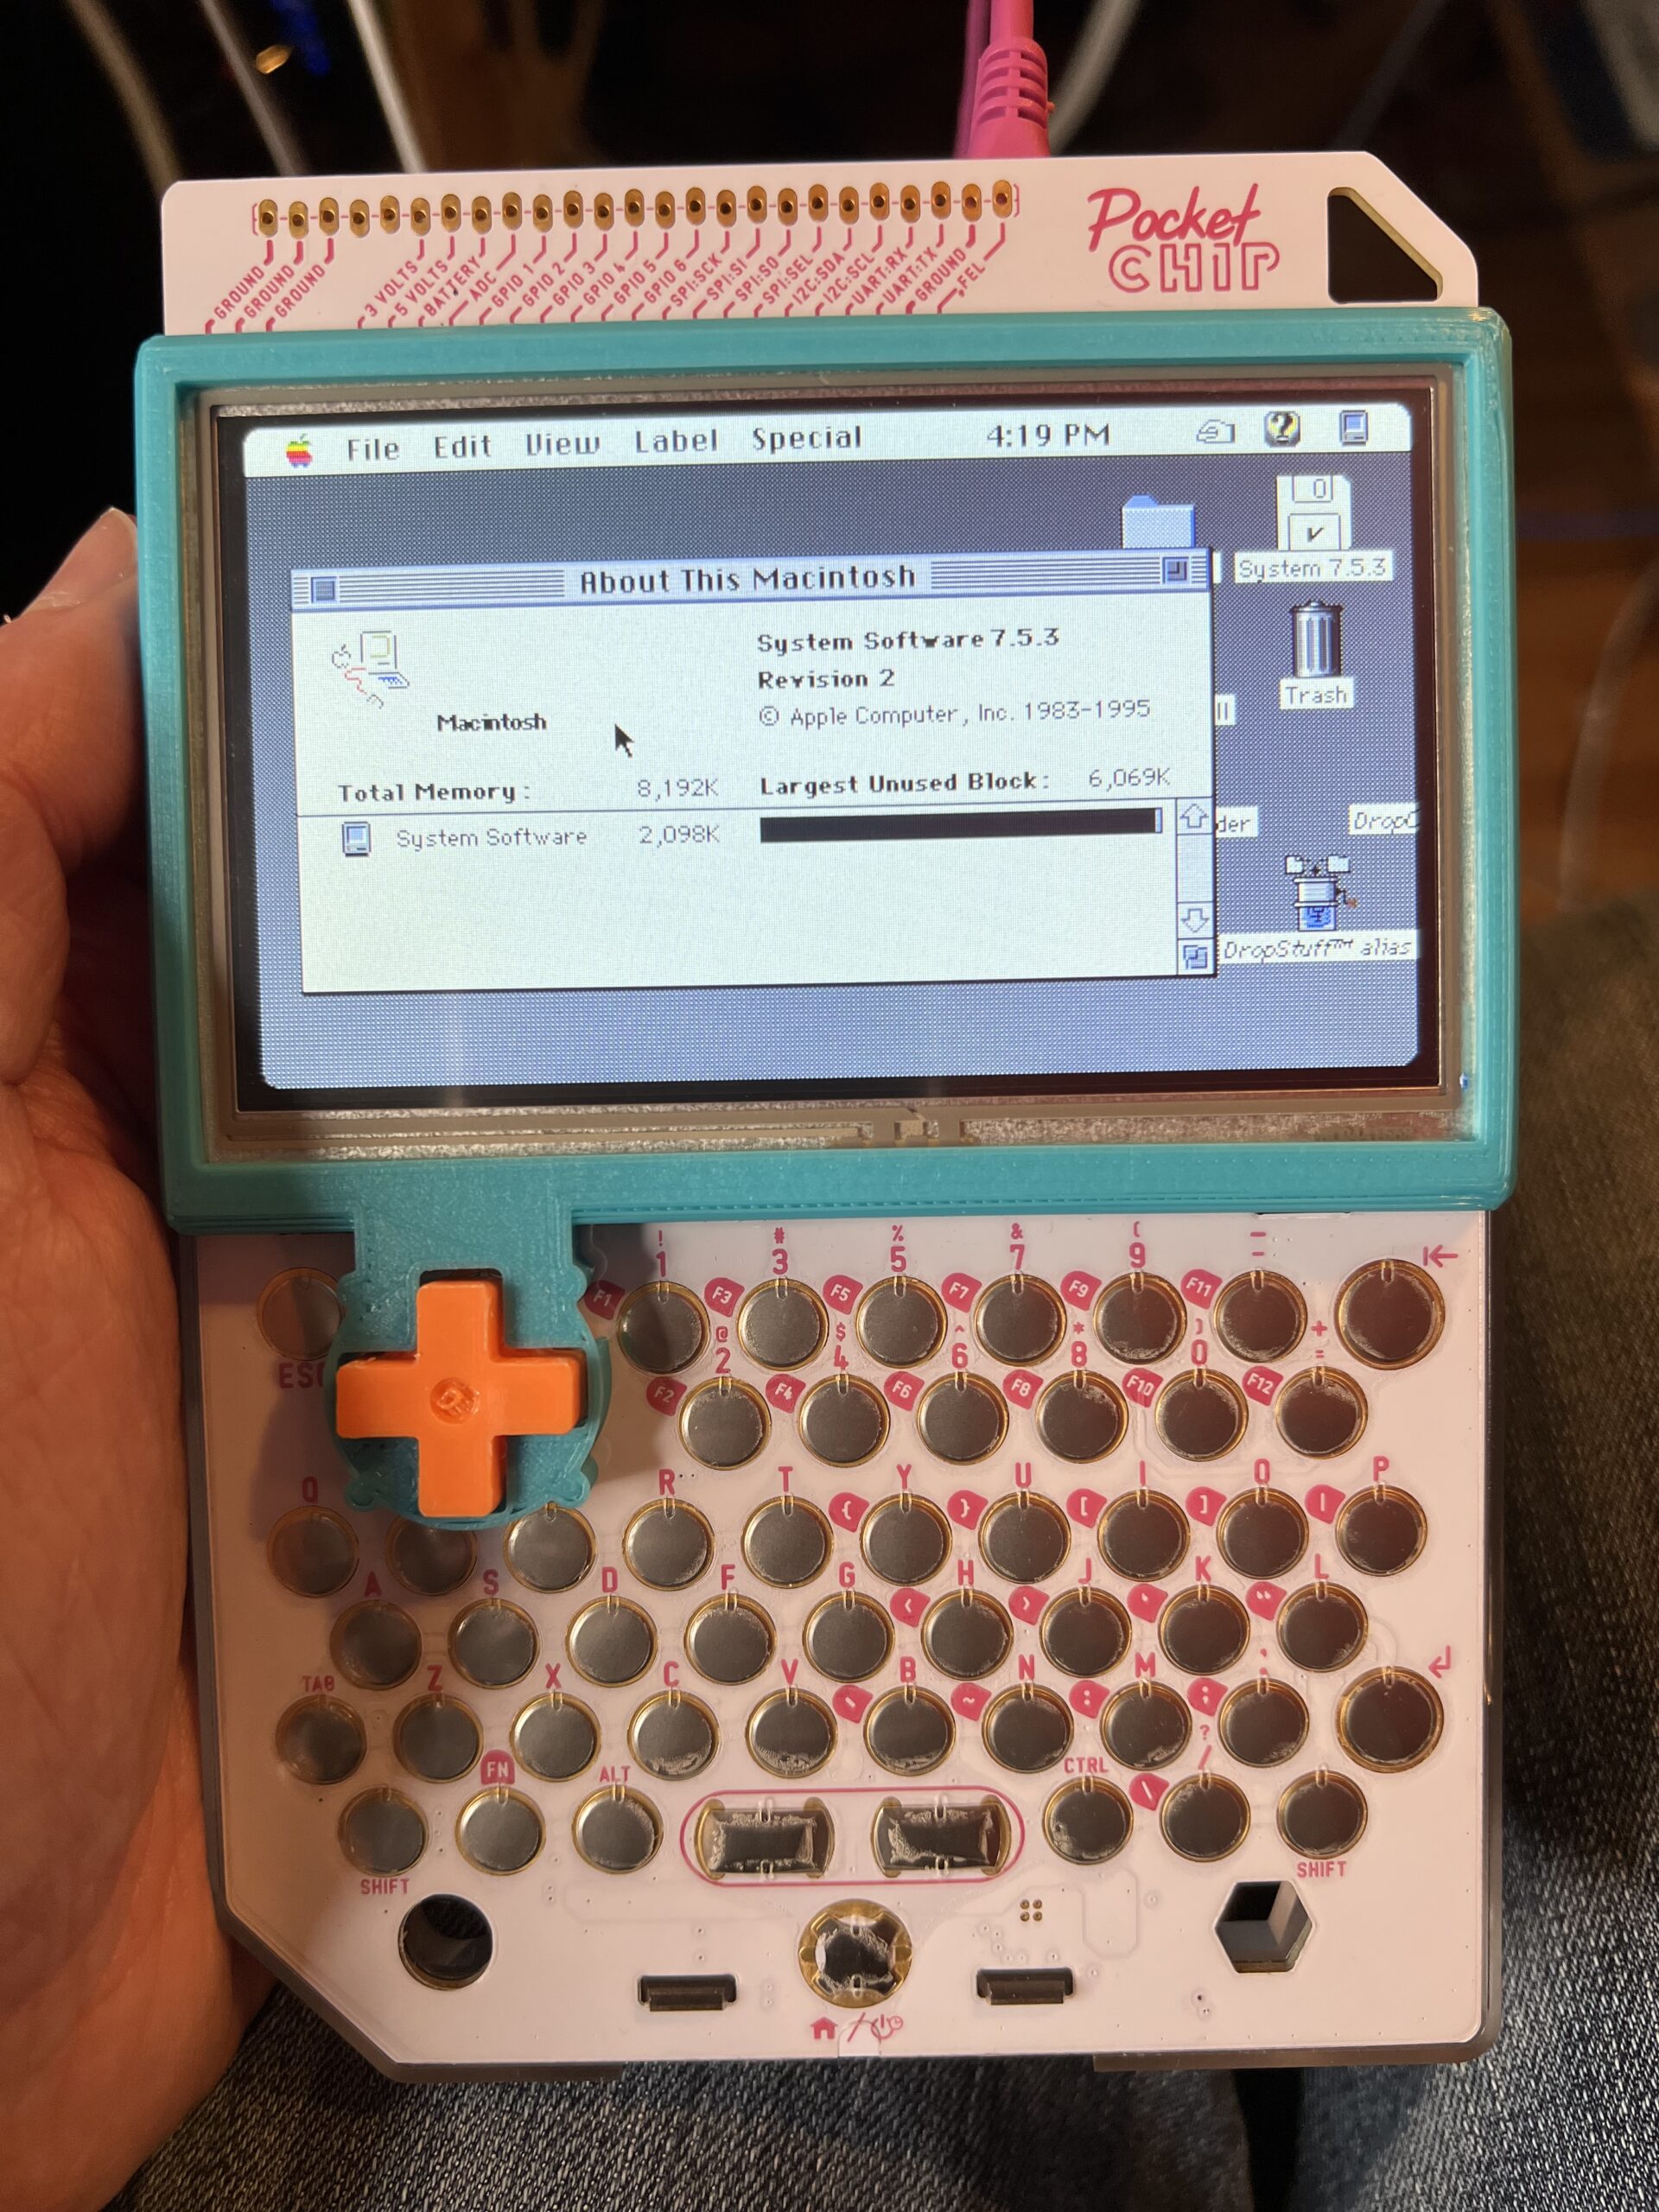
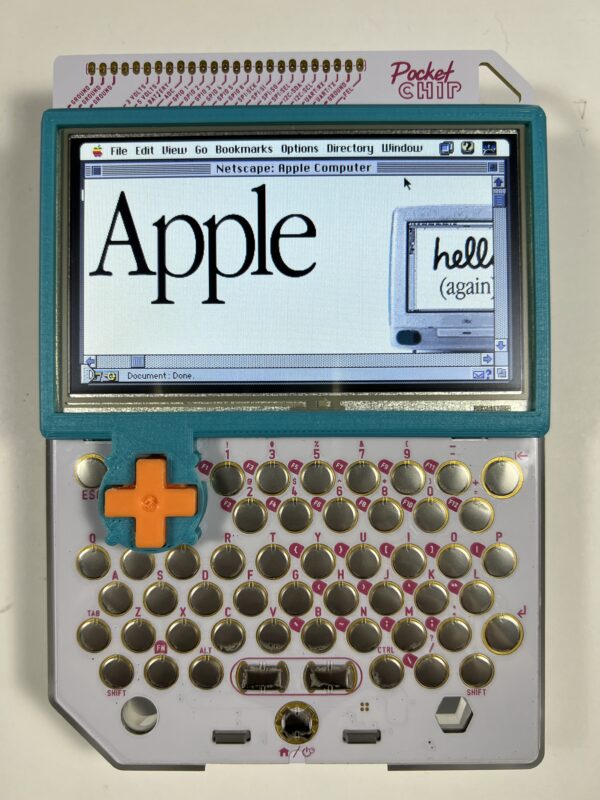
I set about to get Mini VMac installed on the PocketCHIP. Much to my delight, user zzxzzk115 has already built Mini VMac for the PocketCHIP and it was sitting on GitHub! The build here was targeted to the Macintosh II which means it’s the best the emulator can do (8 MB memory and color). I immediately fired up the PocketCHIP, used SFTP to copy the binaries from my desktop. I provided a System 7.5.3 disk image I’ve been using and it booted right up! The build was set to 4x speed so it was delightfully quick as well (I wasn’t expecting this).
Note: The D-Pad on my PocketCHIP is 3D printed from Thingiverse.
But Could We Improve It?
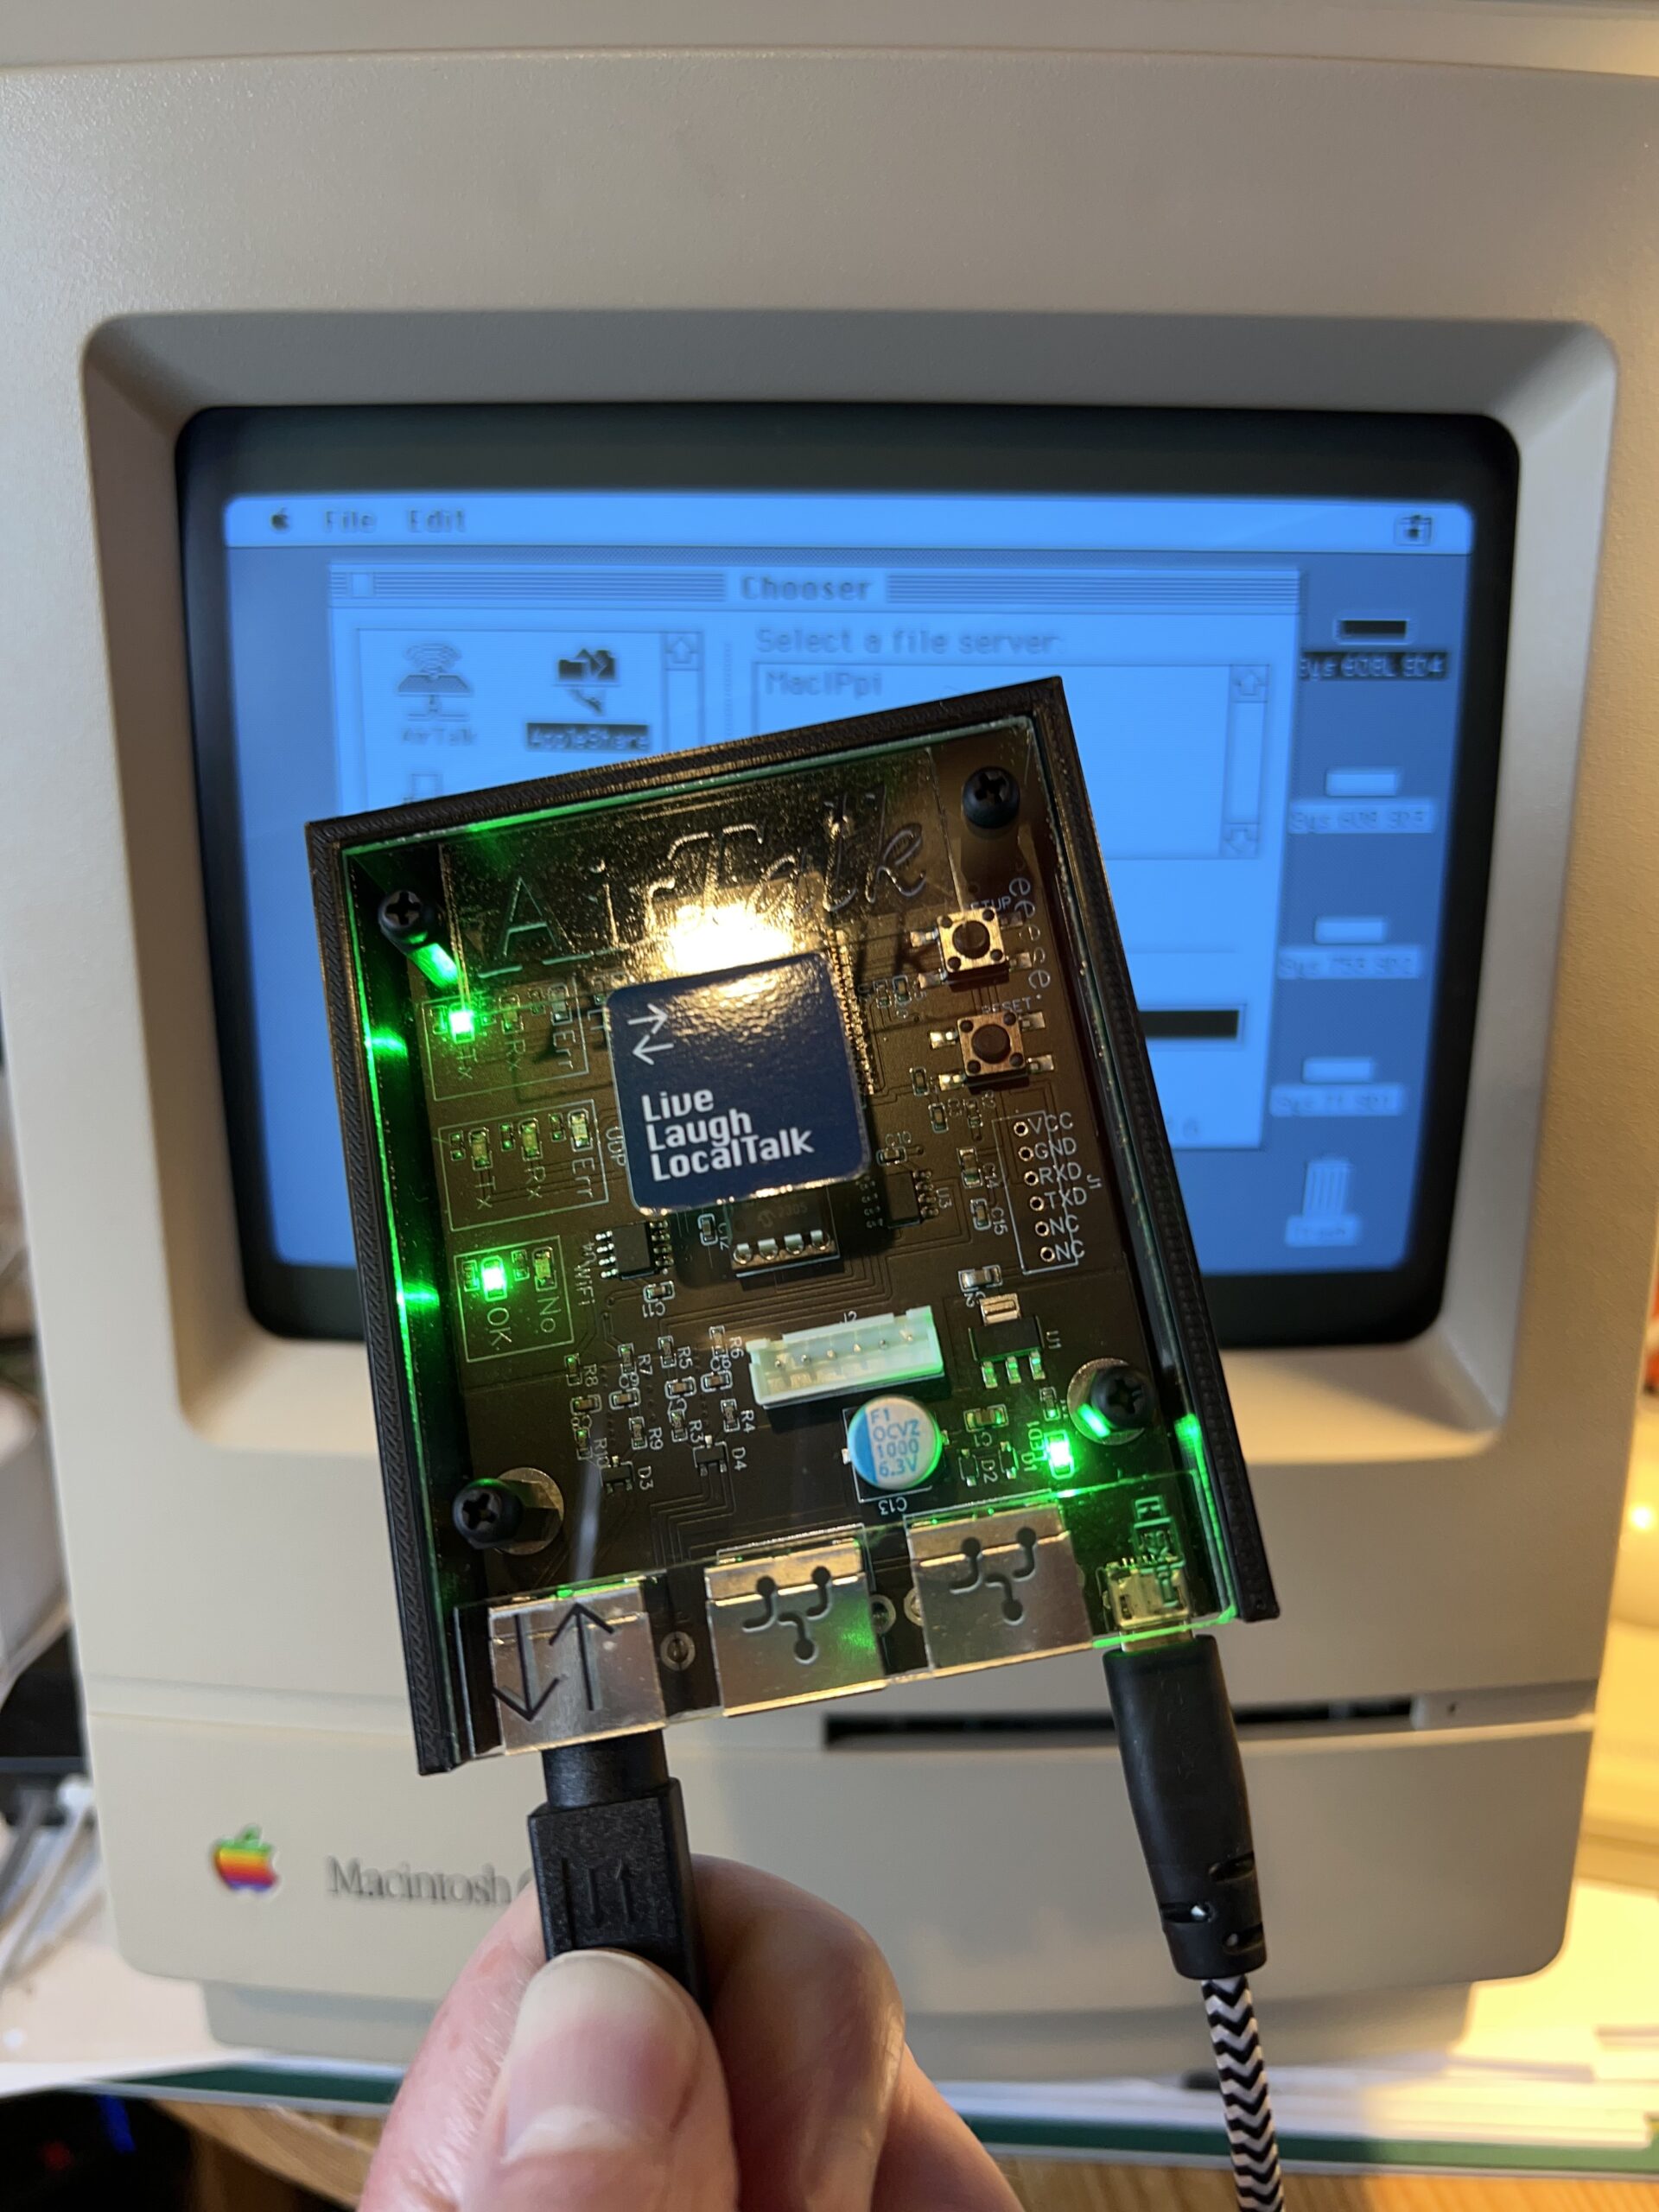
At the same time, I recently acquired a couple of AirTalk adapters (purchase here: http://airtalk.shop/). These nifty boxes connect to your LocalTalk network and stuff that traffic into WiFi UDP packets. If you have two of these, you can create a wireless connection between two physical Macs.
It also can speak with Mini VMac using the same UDP packets using what it calls LTO UDP (LocalTalk Over UDP). This means that I could (with the right build) use Mini VMac on the PocketCHIP to access real LocalTalk devices (Macs, printers, etc.)
Note: You can follow the development of the AirTalk beginning in Dec 2021 by reading this (currently) 22 page thread on 68KMLA.org.
Building Mini VMac for PocketCHIP
Tip: It’s likely easier to do this by using SSH on your desktop to log int remotely to the PocketCHIP. Or plug in a USB keyboard. Typing on the cramped metal-domed keyboard is painful!
Tip: Don’t want to do this part? Skip to the Shortcut section below to download my binary.
I set about trying to figure out how to build Mini VMac for PocketCHIP. The Debian distribution I have (Jessie) is no longer supported since June 2020 which means getting sources for things will be more challenging. I’m going to outline some of the things that I did to get this working. They may not be the more correct, safest, or even down right wrong things to do. If there’s a better way, please (gently) let me know in the comments so I and others can learn.
Also, I do remember installing some things on my PocketCHIP early on but can’t remember what. So my starting point may be different than yours.
I downloaded the beta source code of Mini VMac (at the time of this writing, version 37.03) and unpacked it on the PocketCHIP.
Note: I had to tell curl below to ignore HTTPS security because the certificates on the PocketCHIP have expired. Updating that will be a project for another day. Know how? Let me know in the comments.
cd Downloads
curl -k -O "https://www.gryphel.com/d/minivmac/minivmac-37.03/minivmac-37.03.src.tgz"
gzip -d minivmac-37.03.src.tgz
tar -xvf minivmac-37.03.src.tar
cd minivmac
gcc setup/tool.c -o setup_t
./setup_t -t larm -m II -lt -lto udp -speed z -hres 480 -vres 272 -fullscreen 1 -emm 0 > setup.sh
chmod +x setup.sh
./setup.sh
make
Everything was working up until the build.
gcc "src/MINEM68K.c" -o "bld/MINEM68K.o" -c -Wall -Wmissing-prototypes -Wno-uninitialized -Wundef -Wstrict-prototypes -Icfg/ -Isrc/ -Os
gcc "src/OSGLUXWN.c" -o "bld/OSGLUXWN.o" -c -Wall -Wmissing-prototypes -Wno-uninitialized -Wundef -Wstrict-prototypes -Icfg/ -Isrc/ -Os
In file included from src/OSGCOMUI.h:36:0,
                 from src/OSGLUXWN.c:38:
cfg/CNFUIOSG.h:16:22: fatal error: X11/Xlib.h: No such file or directory
 #include <X11/Xlib.h>
                      ^
compilation terminated.
Makefile:12: recipe for target 'bld/OSGLUXWN.o' failed
make: *** [bld/OSGLUXWN.o] Error 1
I was missing the X11 sources that were needed.
Update Package Manger Sources
Since Jessie is no longer supported, the original location for the package manager sources are gone but they’ve been archived. Edit /etc/apt/sources.list as follows (commenting out existing lines and adding new ones as shown).
#deb http://ftp.us.debian.org/debian/ jessie main contrib non-free
#deb-src http://ftp.us.debian.org/debian/ jessie main contrib non-free

deb http://archive.debian.org/debian-archive/debian/ jessie main contrib non-free
deb-src http://archive.debian.org/debian-archive/debian/ jessie main contrib non-free

#deb http://security.debian.org/ jessie/updates main contrib non-free
#deb-src http://security.debian.org/ jessie/updates main contrib non-free

deb http://archive.debian.org/debian-archive/debian-security/ jessie/updates main contrib non-free
deb-src http://archive.debian.org/debian-archive/debian-security/ jessie/updates main contrib non-free

#deb http://http.debian.net/debian jessie-backports main contrib non-free
#deb-src http://http.debian.net/debian jessie-backports main contrib non-free

deb http://archive.debian.org/debian jessie-backports main contrib non-free
deb-src http://archive.debian.org/debian jessie-backports main contrib non-free

#deb http://opensource.nextthing.co/chip/debian/repo jessie main
#deb http://opensource.nextthing.co/chip/debian/pocketchip jessie main

deb http://chip.jfpossibilities.com/chip/debian/repo jessie main
deb http://chip.jfpossibilities.com/chip/debian/pocketchip jessie main
Update Keys
The keys on the PocketCHIP have expired and you’ll get errors such as the following when trying to do an apt-get.
W: GPG error: http://archive.debian.org jessie/updates InRelease: The following signatures were invalid: KEYEXPIRED 1668892417 The following signatures couldn't be verified because the public key is not available: NO_PUBKEY AA8E81B4331F7F50
W: GPG error: http://archive.debian.org jessie-backports InRelease: The following signatures were invalid: KEYEXPIRED 1587841717 KEYEXPIRED 1668891673
W: GPG error: http://archive.debian.org jessie Release: The following signatures were invalid: KEYEXPIRED 1587841717
To install the current keyring, I used the following.
sudo apt-get install debian-archive-keyringAnd accepted the warning.
WARNING: The following packages cannot be authenticated!
  debian-archive-keyring
Install these packages without verification? [y/N] y
But I still got a KEYEXPIRED error.
W: GPG error: http://archive.debian.org jessie-backports InRelease: The following signatures were invalid: KEYEXPIRED 1587841717 KEYEXPIRED 1668891673
W: GPG error: http://archive.debian.org jessie Release: The following signatures were invalid: KEYEXPIRED 1587841717
I checked the clock on the PocketCHIP and it was correct (this could cause the error). Googling then revealed this one-liner, which I also tried.
sudo apt-key adv --recv-keys --keyserver hkp://keyserver.ubuntu.com 7638D0442B90D010That seemed to work without issue.
gpg: requesting key 2B90D010 from hkp server keyserver.ubuntu.com
gpg: key 2B90D010: "Debian Archive Automatic Signing Key (8/jessie) <ftpmaster@debian.org>" revocation certificate added
gpg: key 2B90D010: "Debian Archive Automatic Signing Key (8/jessie) <ftpmaster@debian.org>" 14 new signatures
gpg: Total number processed: 1
gpg:         new signatures: 14
But then running sudo apt-get update, I still got KEYEXPIRED errors. Humph.
W: GPG error: http://archive.debian.org jessie-backports InRelease: The following signatures were invalid: KEYEXPIRED 1587841717 KEYEXPIRED 1668891673
W: GPG error: http://archive.debian.org jessie Release: The following signatures were invalid: KEYEXPIRED 1587841717
Installing X11 Source
I threw caution to the wind and tried installing X11 source.
sudo apt-get install libx11-devAnd after accepting the same warning again,
WARNING: The following packages cannot be authenticated!
  libpthread-stubs0-dev xorg-sgml-doctools x11proto-core-dev libxau-dev x11proto-input-dev x11proto-kb-dev xtrans-dev libxcb1-dev
Install these packages without verification? [y/N] y
The sources were installed!
Building Mini VMac
Now to try building Mini VMac again.
gcc setup/tool.c -o setup_t
./setup_t -t larm -m II -lt -lto udp -speed z -hres 480 -vres 272 -fullscreen 1 -emm 0 > setup.sh
chmod +x setup.sh
./setup.sh
make
After a moment, the compilation completed without error and I had a new binary to try.
Note: If you’re interested to know what the options are in the setup command, see the Mini VMac page on compilation options.
Need a Shortcut to the Finish Line?
Don’t want to build it yourself? You can have the binary I created. (Click view raw).
Running Mini VMac on PocketCHIP
You’ll need the Mac II ROM for the emulator, which is conveniently located at the GitHub page linked earlier. You’ll also need a bootable Mac disk image. These you can make yourself or use a pre-built one. Use the following command (assuming your disk image is called Disk1.dsk).
./minivmac Disk1.dskAnd after a few moments, you’ll see the familiar boot process happening on the tiny screen.
Tip: Make sure that your ROM image is named MacII.ROM (case sensitive)!
Managing Limitations of Screen Size
A screen size of 480 x 272 is a bit of a struggle sometimes. Splash screens are cut off or centered oddly. Games likely aren’t going to be fun as they were designed for a screen size of a a minimum of 512 x 342. Sometimes a window will present itself with no visible buttons and no way to move it to access them.
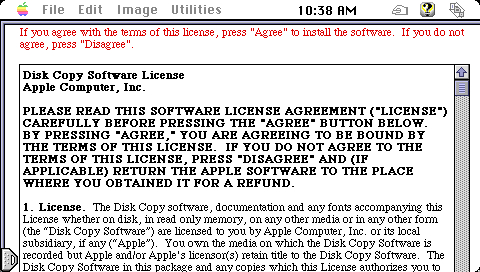
Disk Copy 6.3.3 is a fine example: the license agreement window shows in the center with the Cancel and Agree buttons outside of your view. The ESC key will hit the Cancel button– great. But the return key, which usually defaults to clicking OK is not applicable here. The agree button is not the default action. There’s no keyboard shortcut I could find for the Agree key.
Note: It may be possible to use AppleScript here to click those buttons off screen, but that’s a challenge all on it’s own.
What I did to solve this issue was install Virtual Desktop that would virtually embiggen the screen so I could click those buttons. It’s a little janky but eventually it worked.
Emulation Speed and LTO UDP
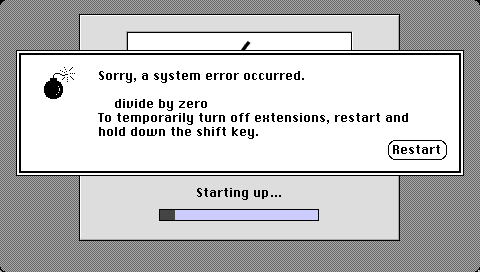
You may have noticed the speed option is specified as “z” which means 1x. This is because anything other than 1x speed will cause the Mac to crash with a divide by zero error on startup. This only seems to happen when the LocalTalk over UDP option is enabled.
Once you’re past the startup phase, you can increase the emulator speed manually by holding down the control key. Then tap “S” and then choose a speed. Then let go of the control key. YMMV. I’ve seen some quirks over LocalTalk when the emulation speed was set over 1x.
Printing over LocalTalk for Fun and Profit
With Mini VMac on the PocketCHIP speaking LocalTalk over UDP now coupled with my AirTalk connected to my ImageWriter II (with AppleTalk card installed), it was super easy to print to it.
Opening the Chooser and selecting the AppleTalk ImageWriter II shows that my printer is being found!

Hooray, it works! This fills me with much joy as it links the past with the present in quirky ways.
Note: For even better output to an ImageWriter II, try using MacPalette II (it comes in both serial and AppleTalk flavors).
Next, I opened Quark XPress 3.3 and set about designing something silly to print.
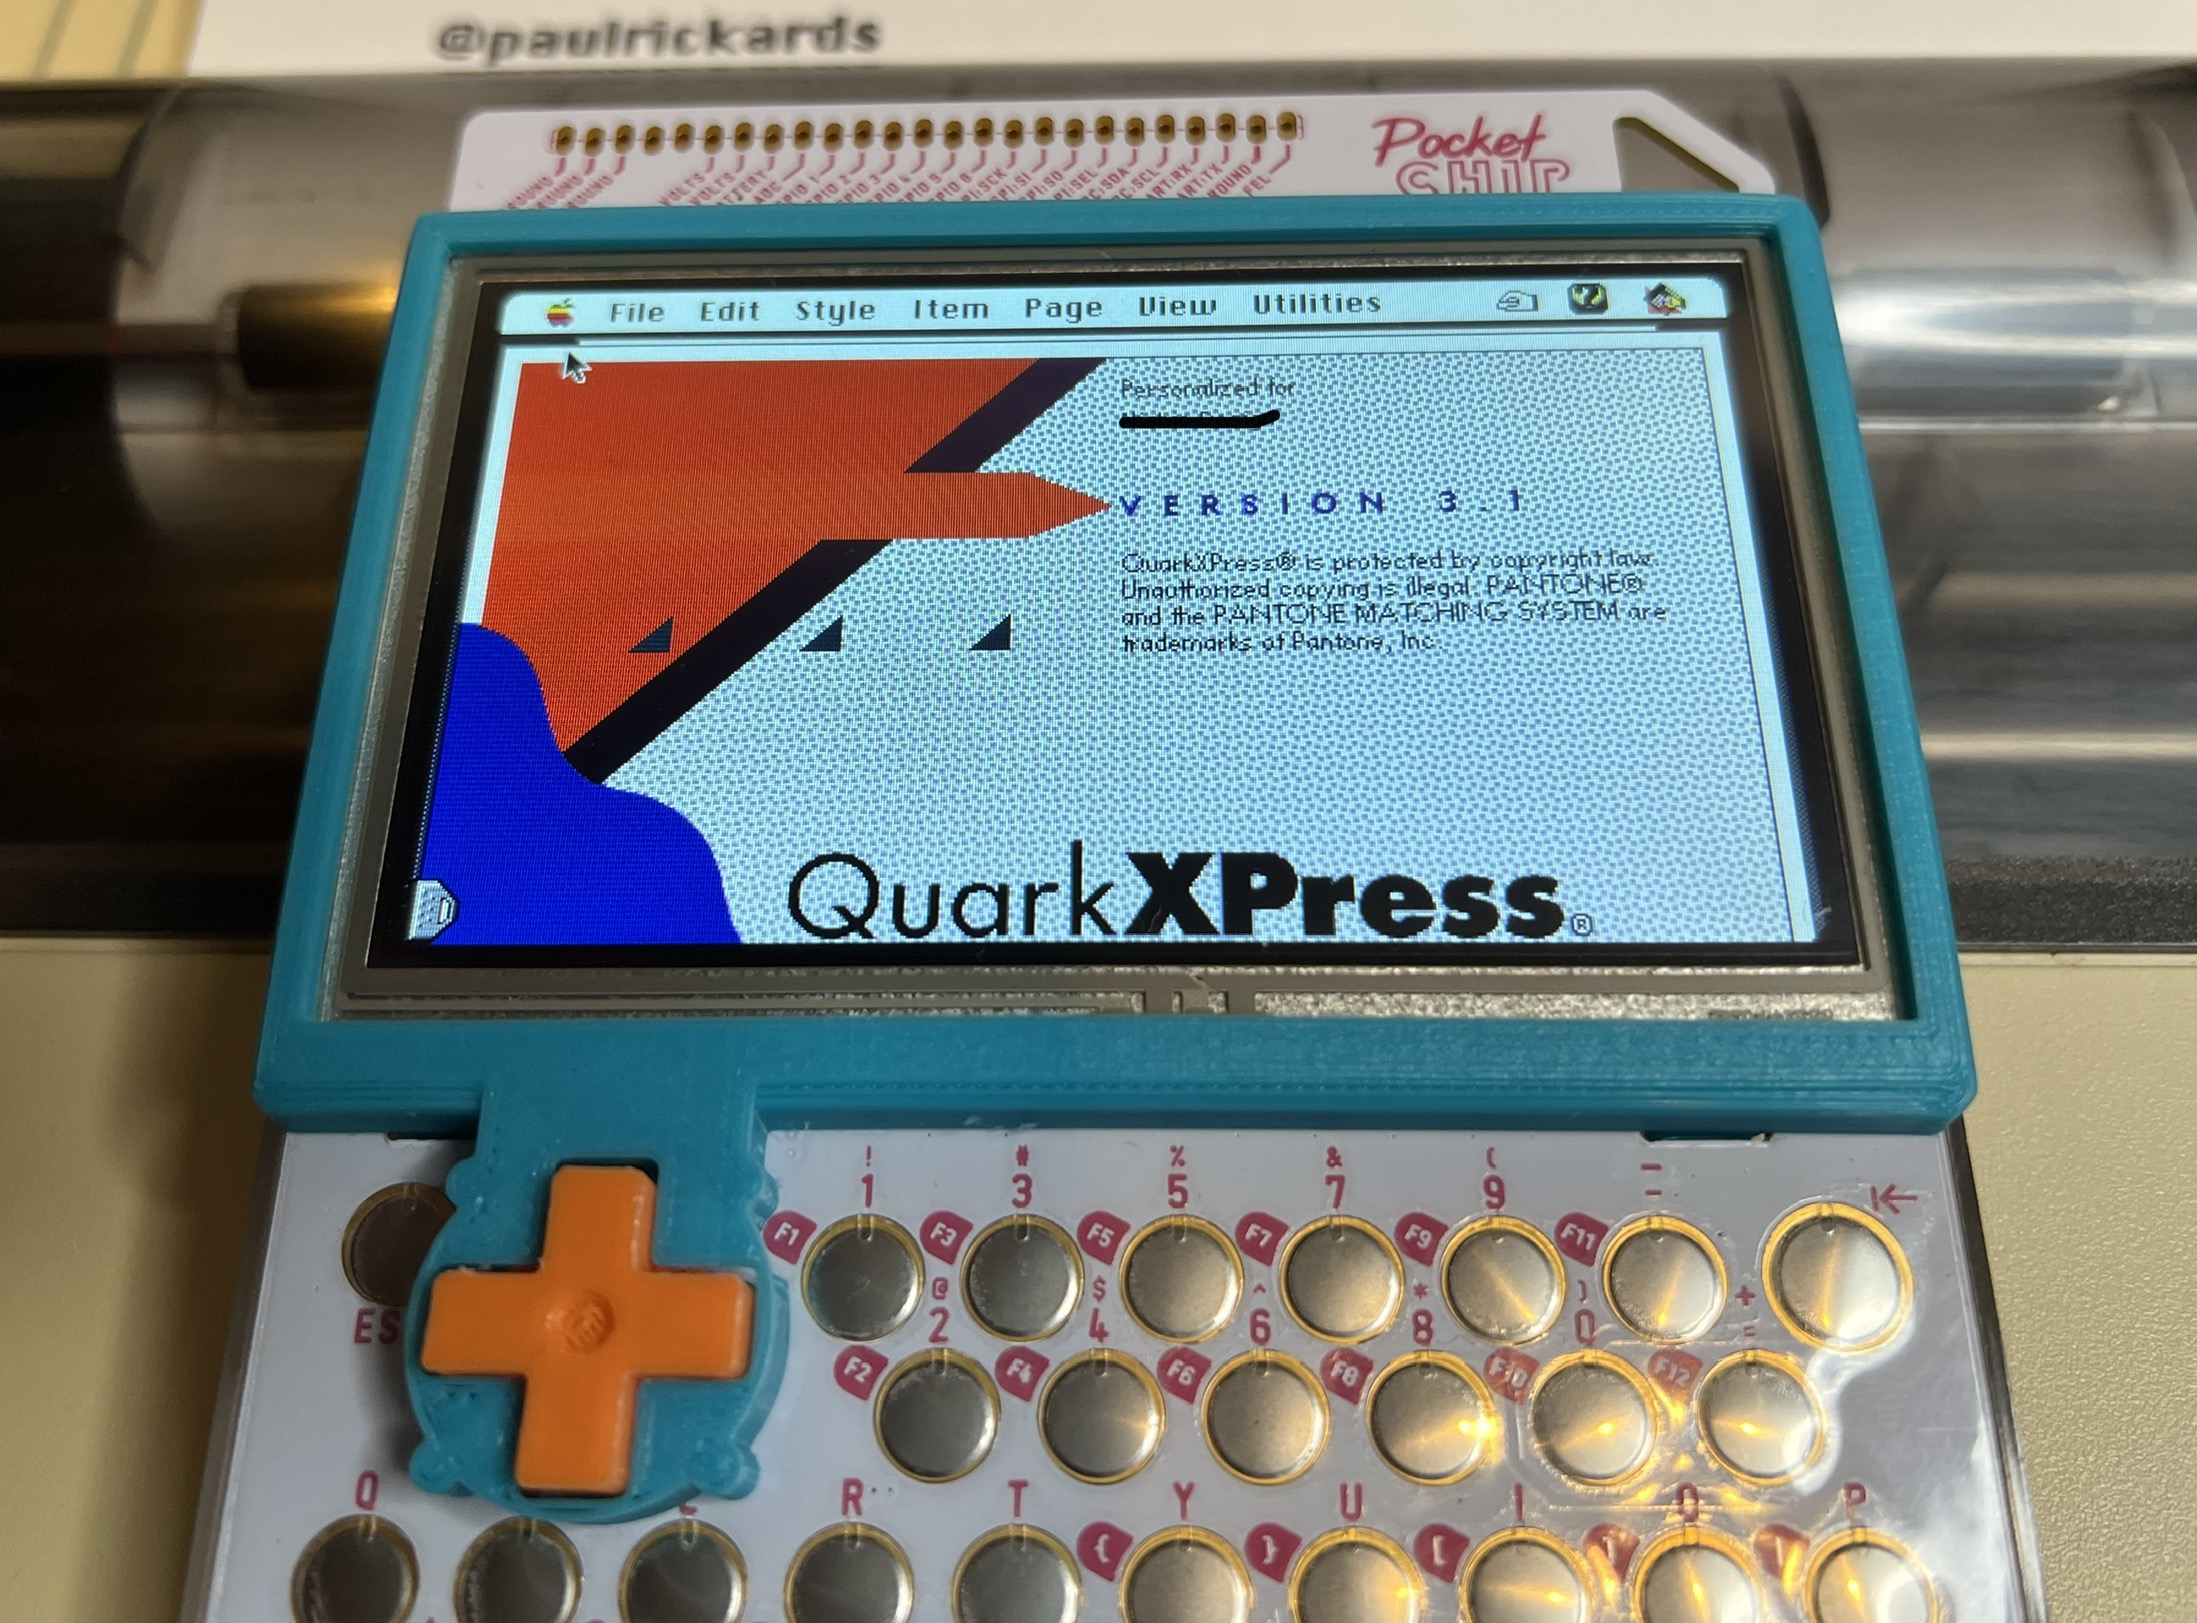
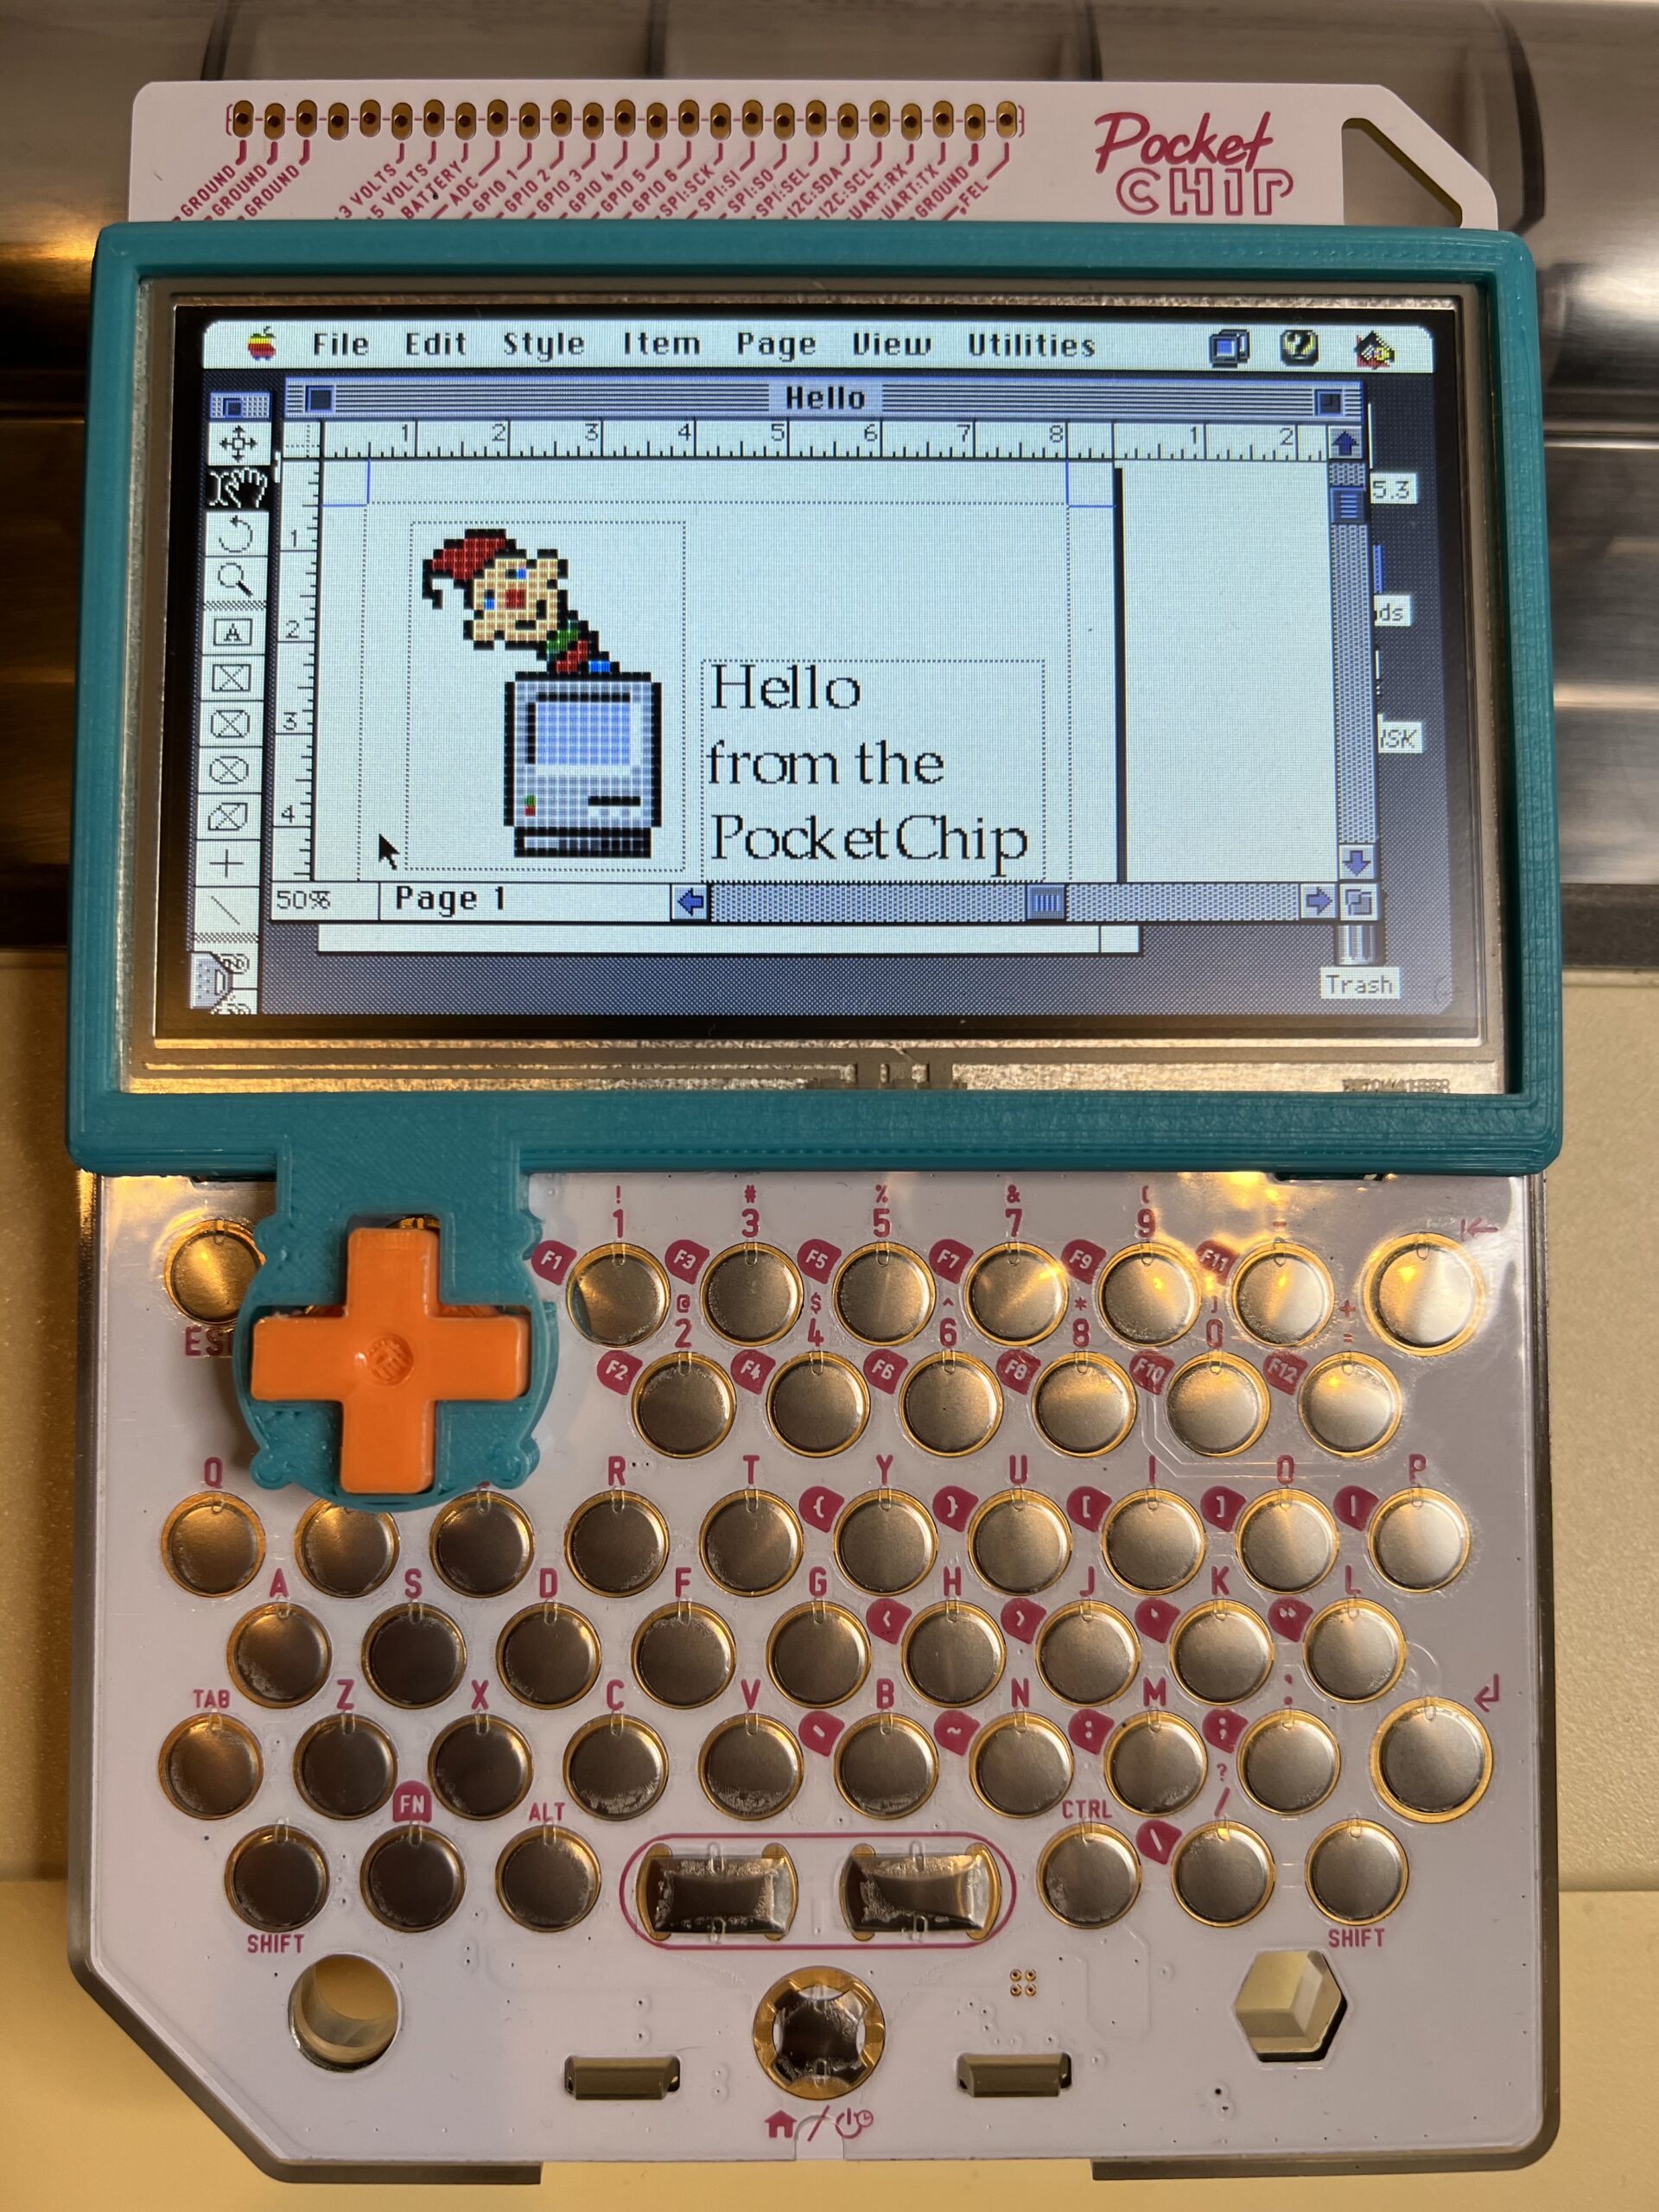
All that was left to do, was to select print!
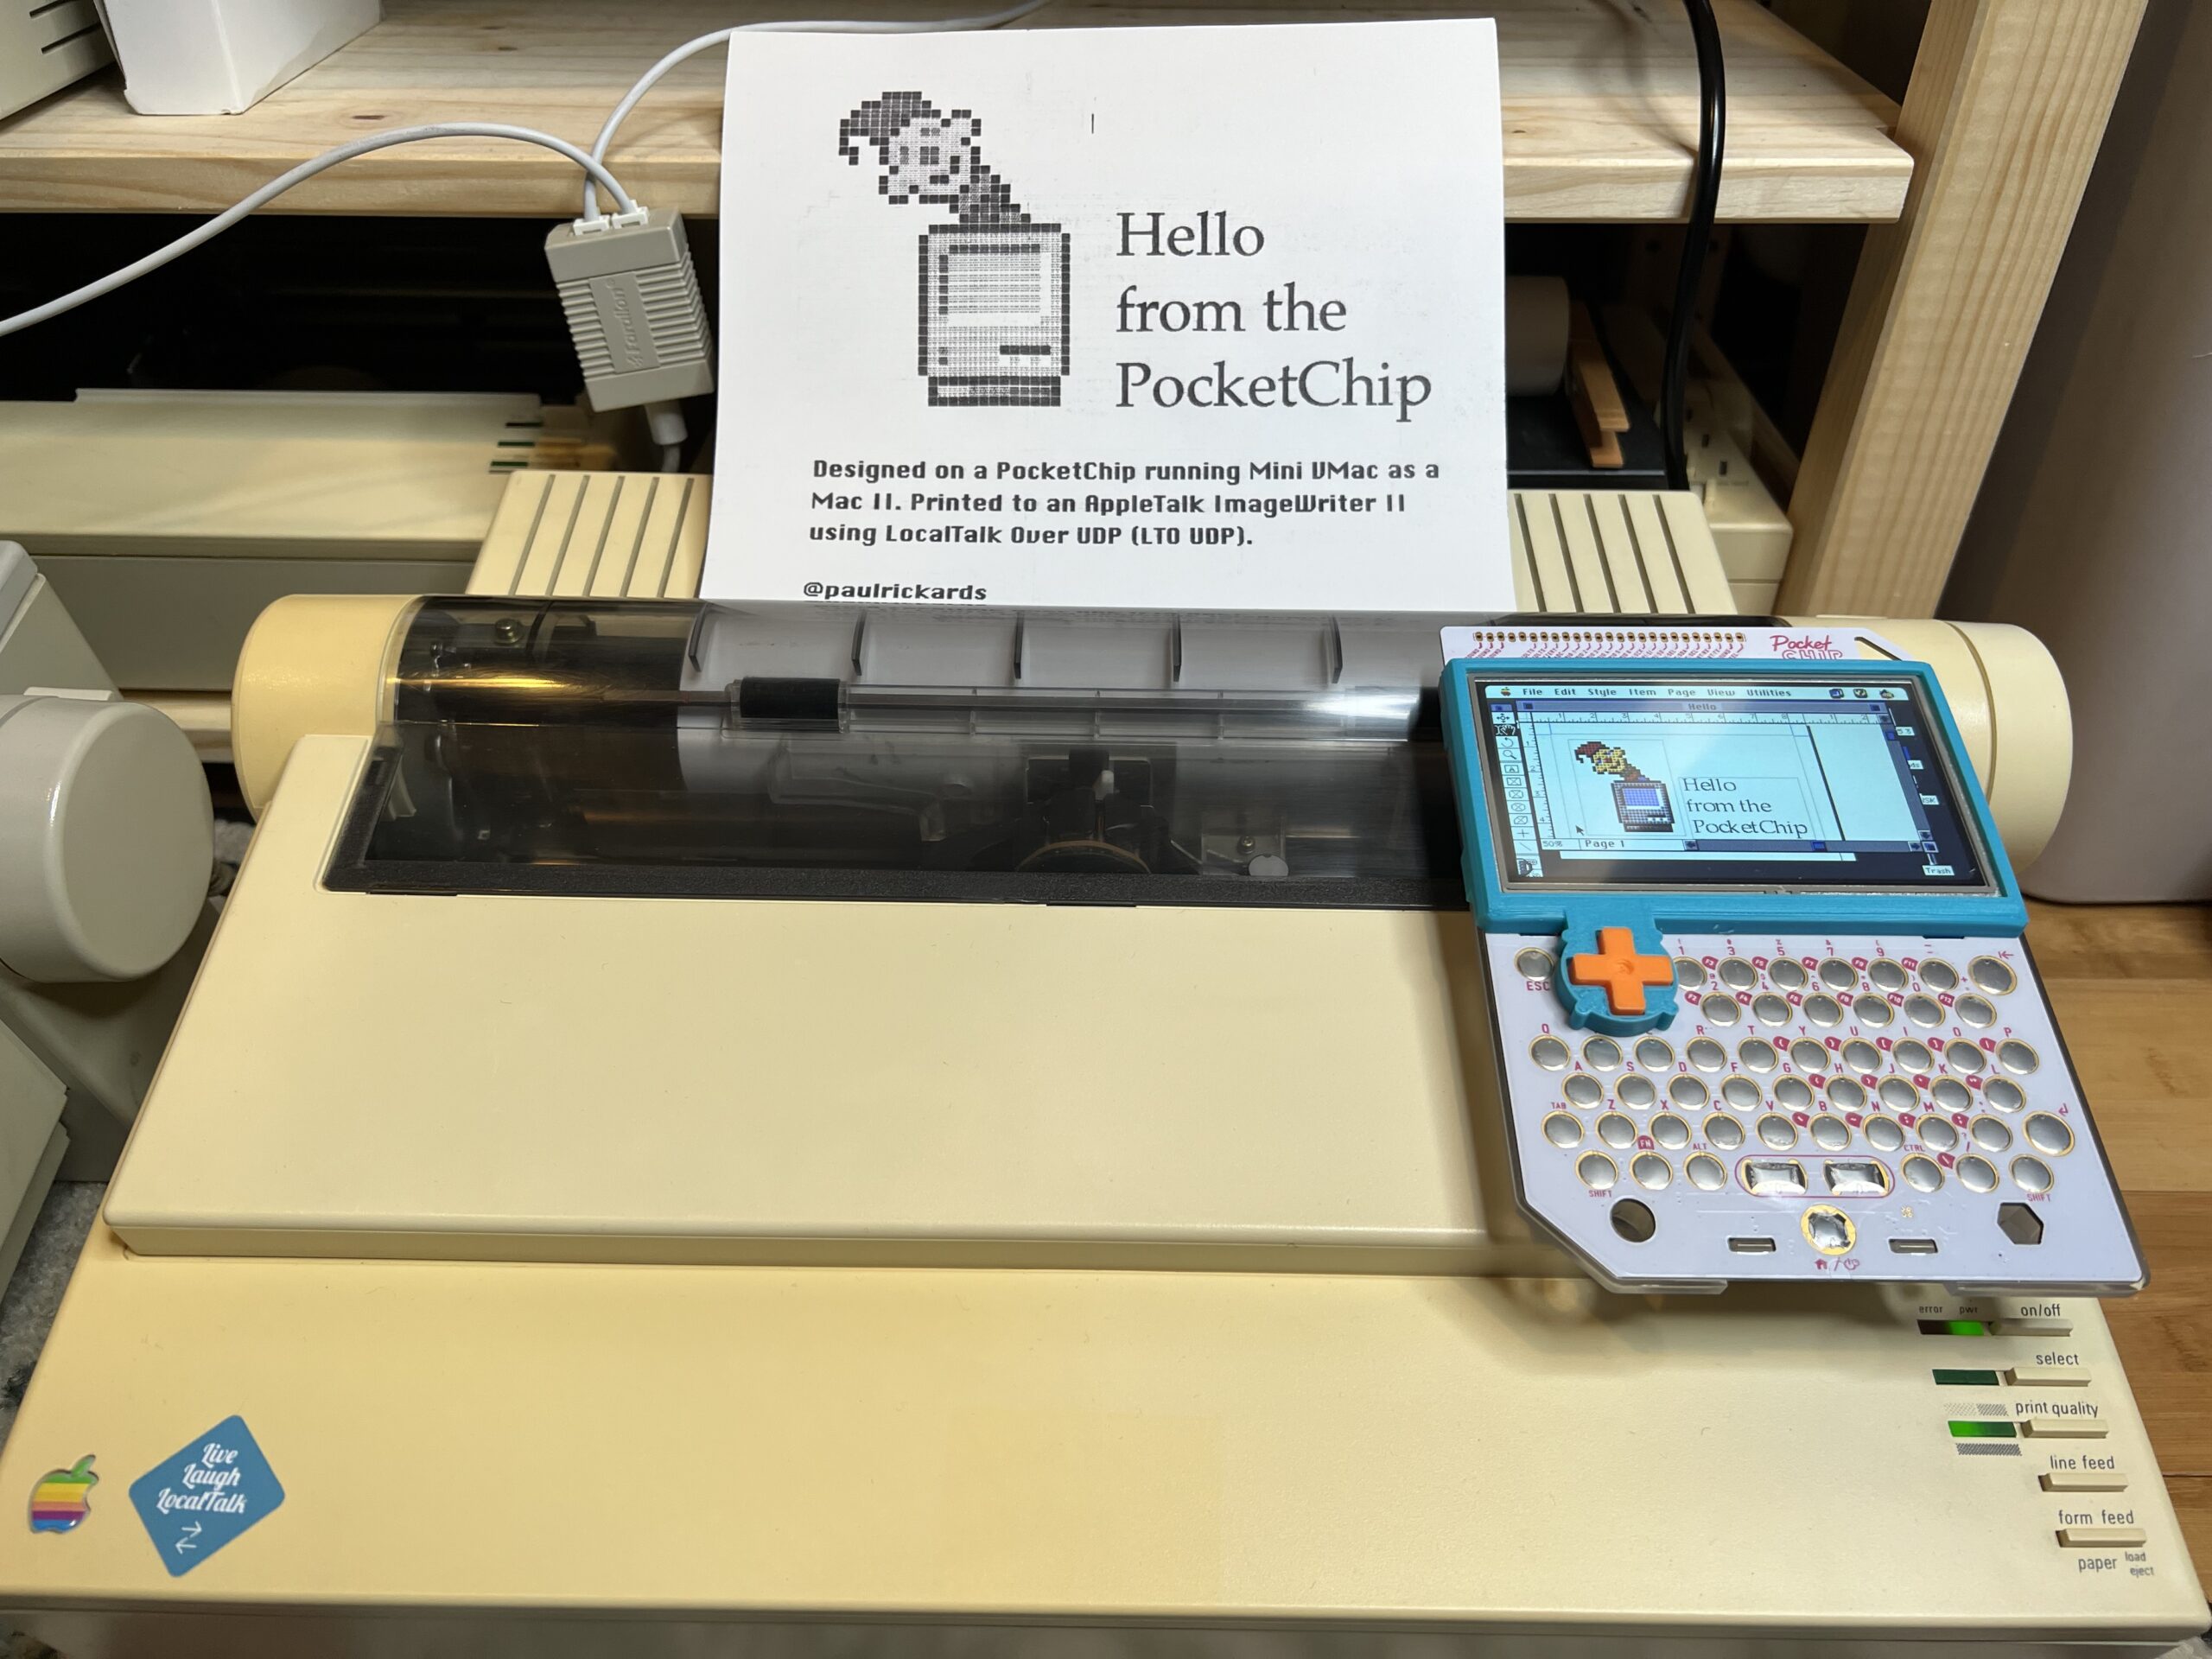
And it worked! But it was quite slow. There were long pauses between each row printed. This was to be expected, but there may be some room to optimize my network.
Note: I did notice the LocalTalk LED on the AirTalk was blinking red (for error) whenever the ImageWriter II was talking. I wonder if there’s a problem with my AppleTalk card?
Bonus: Connect to The Internet
If you happen to have a Raspberry Pi running MacIPGW (a free collection of pre-built tools that make using a vintage Mac easier) then you have what it takes to put the emulated Mac on the Internet using MacIP (IP encapsulated over AppleTalk).
I also am using a LocalTalk to Ethernet Bridge to link the EtherTalk that MacIPGW uses to the LocalTalk side so the AirTalk can see it. I’m using an Etherwave Muli-Printer Adapter for this but something like an AsanteTalk or even the Apple’s own software LocalTalk bridge. The Multitalk project may also work but I’ve not tried it yet.
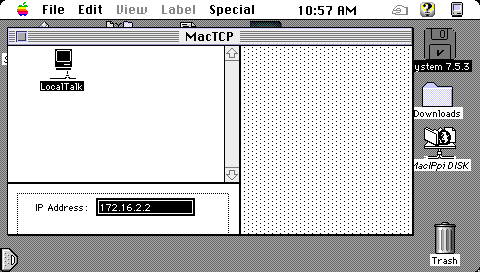
Install MacTCP for Classic Networking from the System 7.5.3 installer. Open the MacTCP control panel. You’ll immediately notice an issue. The “More..” button isn’t showing!
This is another case of where the tiny screen size gets in the way. Unfortunately, the Virtual Desktop trick doesn’t work here– the screen remains truncated at the bottom.
Thought: I wonder if ResEdit could solve the window size issue?
I had to use Mini VMac on my desktop built with a larger screen to configure MacTCP using the same disk image. I then transferred that disk image back to the PocketCHIP. Once it’s set, you won’t have to futz with it again.
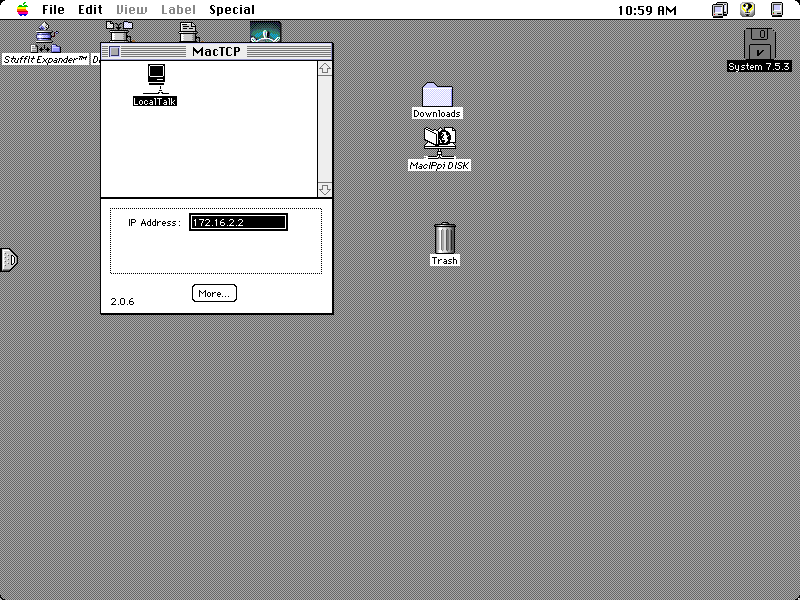
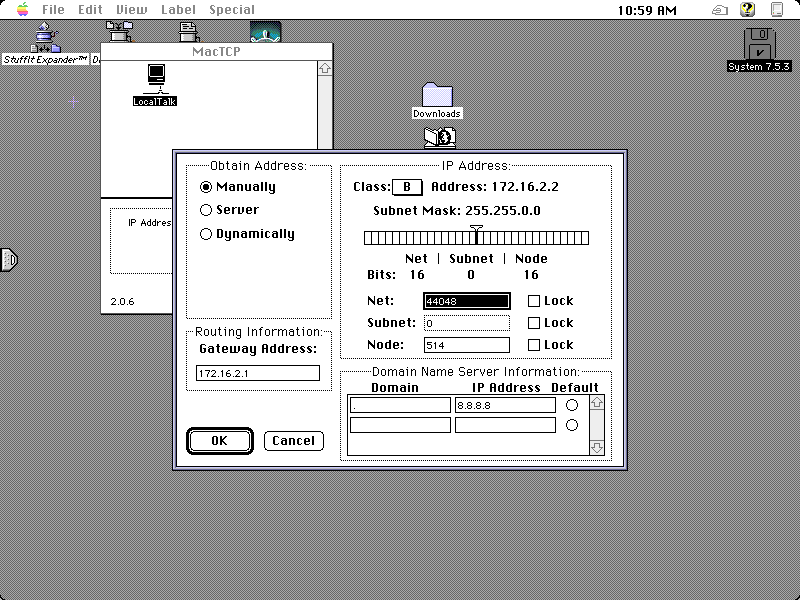
On your desktop Mini VMac: configure MacTCP the following:
- IP Address: 172.16.2.2
- Obtain Address: Manually
- Gateway Address: 172.16.2.1
- DNS: Domain: . (a single period), IP Address: 8.8.8.8
Close MacTCP and fire up Netscape 2.0.2 and browse the web (and marvel at how many sites won’t work)! =)
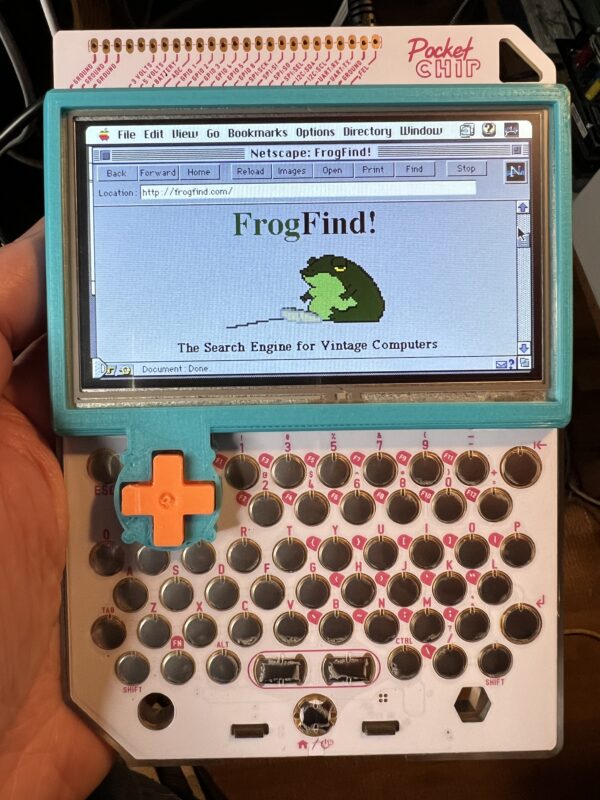
For now, you can visit Frog Find or 68k.news from @ActionRetro. You can also browse the Internet Archive’s Way Back Machine to see the Apple home page from 1998! (It works, but there’s a lot of errors to dismiss. Just remember to remove the S from HTTPS!)
Your Support Matters
If you found this interesting or useful and you’d like to support my computing hijinks, you can:
- Buy yourself a retro goodie like one of my WiFi232 Internet Modems.
- Buy some of my unique artwork created with vintage pen plotters.
- Buy me a coffee on Ko-Fi.
- Share this post with others that might find it interesting.
- Make a comment below about what you found interesting or useful.
Conclusion
So there you have it. A modern emulator of a vintage platform installed on an almost vintage Linux handheld computer printing to a vintage printer using a vintage protocol using a modern translator. =)
Have you built Mini VMac for the PocketCHIP? I’d love to hear what you’re doing with it. Let me know in the comments.
Cheers!