Make an Apple // disc for BASIC week at Reddit RetroBattlestations

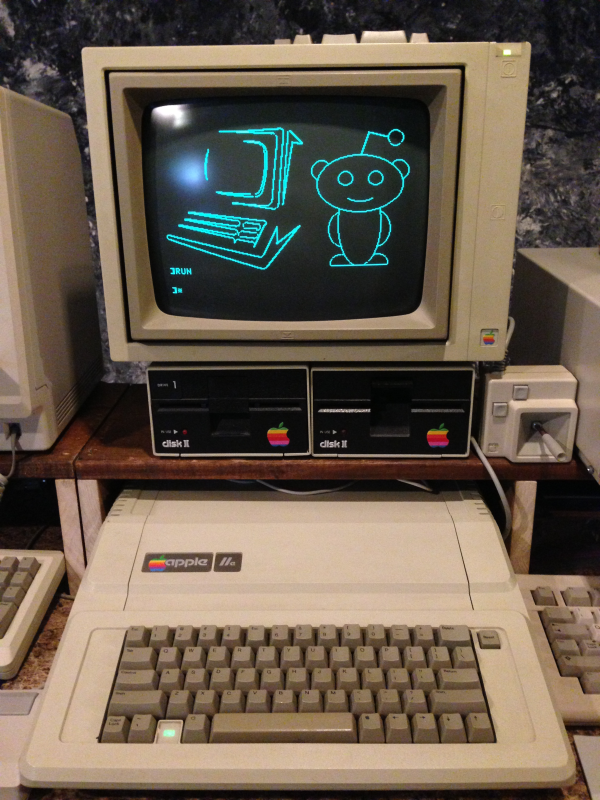
Apple //e for BASIC weekBASIC week at Reddit /r/retrobattlestations is over but you can relive the fun on your Apple // without any typing! Simply follow these steps to download the disk image to a new disk for your machine.

  1. Connect your laptop, tablet or phone’s headphone jack to the tape input jack on the back of your Apple // using a 1/8″ mini headphone cable.
  2. Turn the volume up to maximum.
  3. Turn on your machine and hold control and hit reset to get to a ] prompt.
  4. Insert a blank disk into drive 1 (it will be erased!).
  5. Turn on caps lock and type LOAD and hit return.
  6. Begin playing the .WAV file below on your device.

If all goes well, in about 2 minutes you should have a floppy that you can now boot from. When it’s finished, hit return to reboot your machine. ProDOS should load BASIC. Once it does, type LOAD REDDIT and then RUN.

[Apple // .WAV file to disc for BASIC week program 5.5MB]

Credit for creating the .WAV file from a .DSK image goes to C2T found at ASCII Express.

Enjoy!


Create a local web-based Apple II disc server

Here are the steps I used to create a local web-based Apple II disc server. This method uses the c2t tool for converting .dsk disk images to .wav audio files suitable for playback into the tape in jack of the Apple II. The Apple Disc Server site does this with preexisting disk images already converted to .wav files. I thought it would be nice to create a web-based service that would allow you to convert .dsk images to .wav files on the fly. This enables you to browse Apple II software with your iPad and instantly convert it to a disk.


  • Enable Apache server on your Mac
  • Create a directory (default is “c2t”) for the new service in /Library/WebServer/Documents
  • Create a new temporary directory (default is “tmp”) inside this new directory
  • Change ownership and permissions
     sudo chown www:www /Library/WebServer/Documents/c2t/tmp
     sudo chmod g+w /Library/WebServer/Documents/c2t/tmp
  • Download c2t and wget and install in your path

Adding S-Video to an Atari 800XL

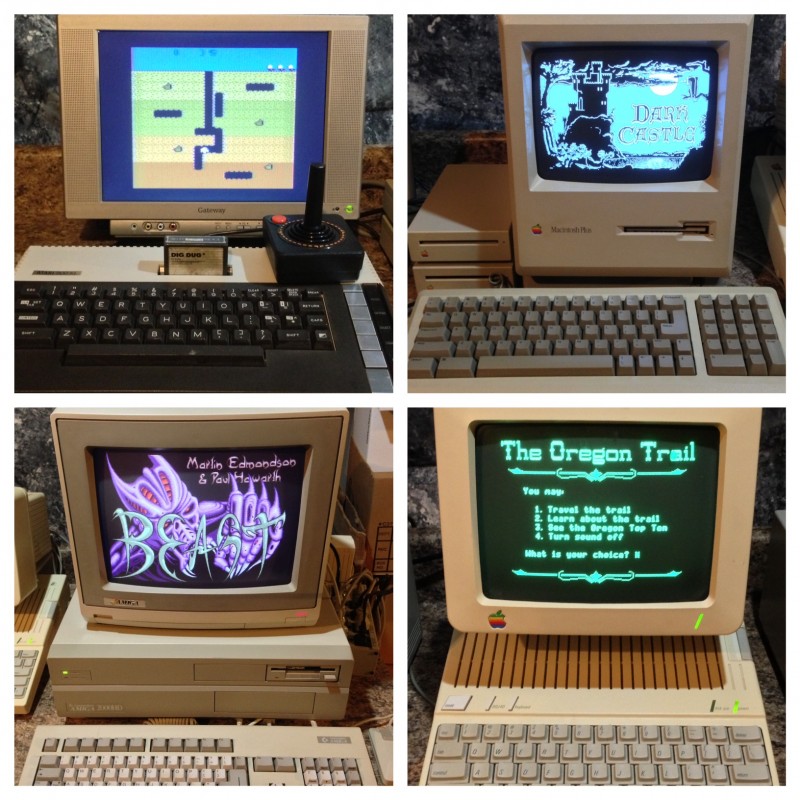
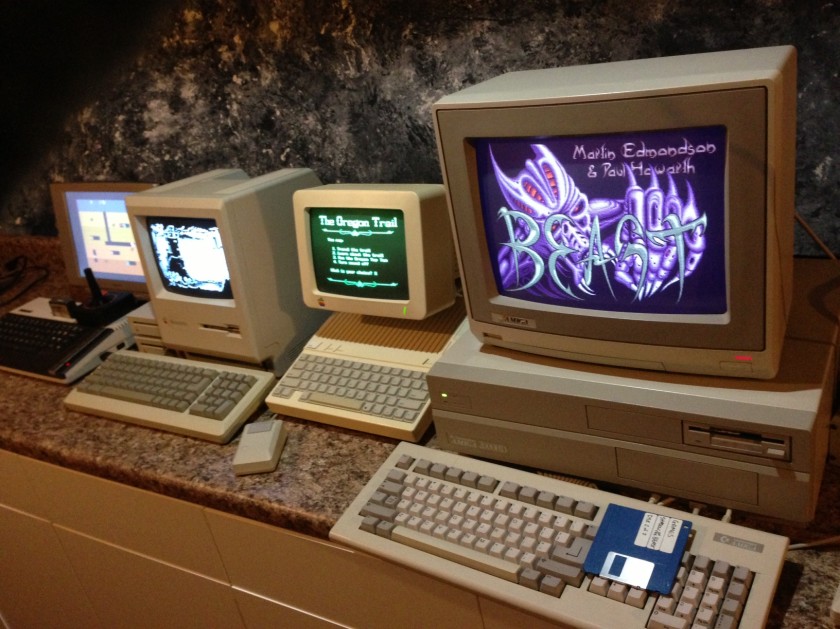
Recently I setup a few of the computers from my retro computing collection. Along with the Amiga 2000, Apple IIc, and Macintosh Plus was the Atari 800XL.


I’ve not used it all that much and thought it deserved a little hands on time. When I acquired it I also purchased a 5 pin DIN plug for the video jack on the rear to bring out stereo RCA audio (although it’s just mono) and s-video. I was puzzled when I plugged it in and turned it on to find that the video was only in black and white. I switched to the RF modulator and saw color so I knew the computer was working fine. I searched and discovered that some (maybe all?) Atari 800XL’s have provisions for s-video, namely separated luma (brightness) and chroma (color) but Atari neglected to connect the chroma to the plug. This explains why the image has no color.


I searched and was surprised that I didn’t find all that much information on the subject. One site called the seemed to have the most information but I found the directions confusing and images that were hard to see. I kept searching and found a clear forum posting on AtariAge (post #8), also summarized below.

  1. REMOVE C56 capacitor (if present)
  2. Lift C54 right-hand side, preferably by inserting an on-off switch (if you want to preserve composite out).
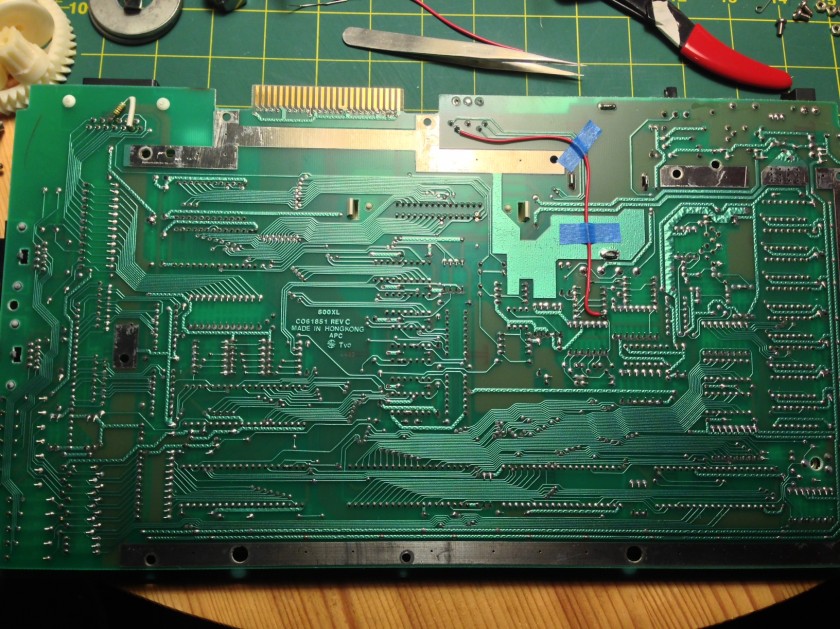
  3. On the underside of the motherboard, solder chroma-signal wire from R67/R68 junction, to chroma pin in video DIN port pin 5. Follow the cable pathway exactly as shown so the RF shielding fits back on.
  4. Adjust brightness/contrast/saturation on your monitor. Don’t underestimate this step as I did at first. It’s important and made all the difference in the quality of the final picture.


With those small changes, I now have crisp s-video output from my Atari 800XL to an LCD monitor. The picture looks fantastic!

DIY C64 Diagnostic and Dead Test Carts

If you’ve ever attempted to repair a dead Commodore 64 beadbin, you know how frustrating it can be. You’re lucky if the machine turns on and shows something on the screen. This at least gives you some clues as to the problem. However, more often and not, you’re stuck with a blank screen. It doesn’t tell you much other than just about any chip in the computer is bad, or even a bad power supply. After checking the obvious things like missing chips, reseating socketed chips and checking the power supply voltages, the next place to go would be one of the two diagnostic carts that were available from Commodore service technicians.

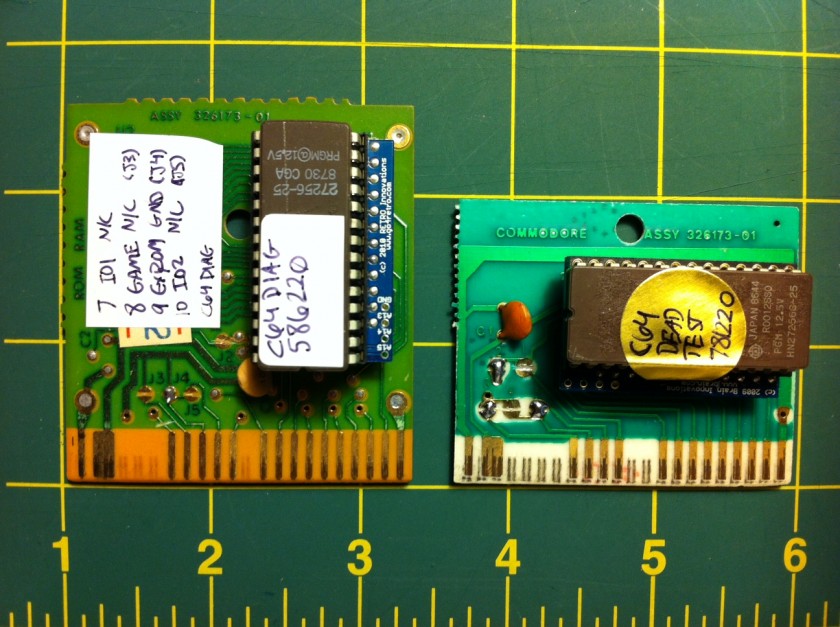
The two test carts that were available are the C64 Diagnostic cart and the C64 Dead Test cart. Together, these carts are very useful in identifying problems. In order to use them, you need them in a cartridge. The diagnostic cart also had a cable harness that would test certain ports– it’s not required but will report false problems if not present. If you’ve followed my posts, you’ll know that I have a tutorial on how to convert an existing cartridge into a EPROM carrier board. In this case, instead of creating a 24 to 28 pin adapter, I’ve purchased the Retro Innovations 2364 Adapter for $5. It’s well worth the price.


In both cases, I’ve used a Commodore cartridge with ASSY # 326173-01. The thing you’ll find odd about the picture is the carts look completely different but have the same ASSY number. The good news is they behave the same way.

There are solder jumpers on the cart labeled J1 through J5. These control certain lines on the cartridge port that tell the C64 what type of peripheral is connected. Below is a table of the settings for the two carts.

C64 Diagnostic Cart Jumpers
J1: Closed (ROMH)
J2: Open (ROML)
J3: Open (GAME)
J4: Closed (EXROM)
J5: Open (I/O 2)

C64 Dead Test Cart Jumpers (Ultimax Mode)
J1: Open (ROMH)
J2: Closed (ROML)
J3: Closed (GAME)
J4: Open (EXROM)
J5: Closed (I/O 2)

DIY Cynthcart for Commodore 64

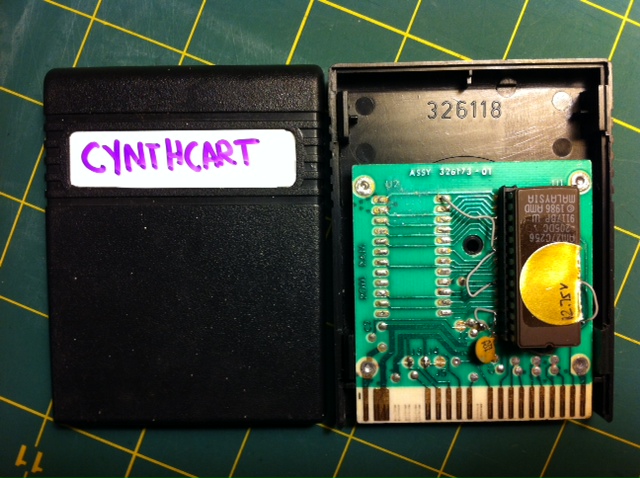
I’ve wanted to create my own cartridges for the C64 for a while now. I have a few old Commodore cartridge games like Clowns and Kickman that would better serve me as, say, a diagnostic cartridge or Cynthcart. These boards are ASSY 326173-01 and seem to be common so you should be able to pick one up cheap.


The first hurdle was burning EPROMs. I took a chance on eBay and bought a TOP 853 universal programmer. It was shipped from China and arrived in about 3-4 weeks. I was struggling to get it working over USB on my Mac to Virtual Box to a Windows XP VM but I figured it out (hint: disable USB 2.0 (EHCI) Controller for the VM).

I erased the chips using a Pocket Purifier battery operated hand held UV light that I picked up from Amazon. It took anywhere between 30 minutes to 2 hours (most 1 hour) to completely erase the EPROMs. I’m using 27c256 (32 kilobyte) chips which are 28 pins. Cynthcart is an 8 kilobyte ROM so I copied the ROM four times on the chip– only one of the copies will be used. You could add four different 8k ROMs and select one with dip switches on the higher address lines (A13 and A14 I believe).

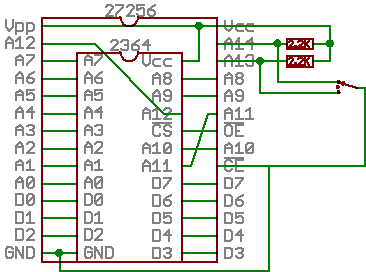
The C64 cartridges I’m going to use have 24 pin chips on them. This presents a problem. Luckily the pinout is almost the same that it’s rather easy to reroute the pins. I followed the C64 ROM guide on Symlink.dk which had the pinout from the board to the new socket.

24 to 28 pin EPROM

You’ll need to desolder the old chip at U1. I used a 28 pin socket, bent out pins 1, 2, 20, 23, 26, 27, 28 on the socket. I soldered in small wires (from an 80 pin IDE cable) into the board on pins 18, 21, 24. See the schematic above to know which pins connect to which wires. Pay attention to the pin numbering– it will get confusing with the socket on top with different pin numbers. Also, make sure you orient the socket and the chip in the right direction. Pin numbers start upper left of the chip notch, down to bottom left, then to bottom right, then up to upper right.

There are 5 “jumpers” (solder bridge pads) on the board. This forum post on Lemon 64 was a great help but turned out not to work for me 100%. I opened J2, J5 and closed J1, J3, J4. The EPROM is too tall for the case to close completely but the screw will hold it together enough.

There you have it. This should work for any 8 kilobyte game that maps to $8000. Best part is since you’ve used a socket, the software can be easily swapped with something else. Enjoy!

Code for DIY NES Game Pad to Arduino to iPad Adapter

As promised, here’s the code to connect your NES game pad to an Arduino via USB to an iPad emulating an iCade controller (whew!).

// NES to USB iCade emulation to iPad
// Paul Rickards
// rickards@gmail.com
// January 15, 2012
// Tested with Arduino 1.0 IDE
// Add V-USB for Arduino to your Libraries folder
// http://code.google.com/p/vusb-for-arduino/
//
// Changes I made to the library (usbconfig.h):
// * changed USB_CFG_DMINUS_BIT to 3
// * commented out defintions of USB_CFG_PULLUP_IOPORTNAME and USB_CFG_PULLUP_BIT
//
// Arduino pin 2 = USB+
// Arduino pin 3 = USB-
// Don't forget the small circuit (3 resistors and 2 diodes) needed to connect
// USB to the Arduino. See the library for more info.
//
// Other controllers are possible. I first designed it for use with an Atari/C64 joystick
// The pins needed to be debounced (the bounce.h library will not work with the V-USB stack)
// and I needed more buttons on the joystick so I scrapped the idea.

#include "UsbKeyboard.h"

// Define NES pins
int latch=8;
int clock=9;
int datin=10;

bool t = 1, prev_nes[8] = { 1,1,1,1,1,1,1,1 };

// iCade key mapping http://www.ionaudio.com/downloads/iCade_Dev_Resource_v1.3.pdf
// NES controller mapping      A      B    select start   up    down   left   right
const int key_press[8]   = { KEY_O, KEY_L, KEY_Y, KEY_H, KEY_W, KEY_X, KEY_A, KEY_D };
const int key_release[8] = { KEY_G, KEY_V, KEY_T, KEY_R, KEY_E, KEY_Z, KEY_Q, KEY_C };

void setup() {
  // Setup NES controller
  pinMode(latch,OUTPUT);
  pinMode(clock,OUTPUT);
  pinMode(datin,INPUT);
  digitalWrite(latch,HIGH);
  digitalWrite(clock,HIGH);
}

void loop() {
  UsbKeyboard.update();

  digitalWrite(latch,LOW);
  digitalWrite(clock,LOW);
  digitalWrite(latch,HIGH);
  delayMicroseconds(2);
  digitalWrite(latch,LOW);

  for (int i=0; i<8; i++) {
    t = digitalRead(datin);
    if (prev_nes[i] != t) { // button changed
      if (t) UsbKeyboard.sendKeyStroke(key_release[i]);
      else   UsbKeyboard.sendKeyStroke(key_press[i]);
      prev_nes[i] = t;
    }
    digitalWrite(clock,LOW);
    delayMicroseconds(2);
    digitalWrite(clock,HIGH);
    delayMicroseconds(2);
  } 
}

DIY NES Gamepad to iPad Adapter

In my last post, I showed that I could use my homebrew C64 USB keyboard with the iPad using the Camera Connection Kit. What was interesting was when I opened iMAME (you were lucky enough to snag it, right?) and accidentally pressed keys on the keyboard. iMAME said it was enabling iCade mode. I thought this was interesting and looked it up.

iCade connects via Bluetooth and acts as a Bluetooth keyboard. My keyboard was connected via USB. Could a USB keyboard work to control games on the iPad? Maybe the connection type didn’t matter? Could I create an adapter that connects via USB and lets you use standard game controllers in iMAME?

iCade sends key strokes when a button is pressed and once again when it’s released. The keys are documented for developers. I launched iMAME again with the USB keyboard plugged in to confirm and as expected the keys worked to control the games.

The next part was pretty straight forward. Make a USB keyboard with an Arduino (see previous post on how this was done) but instead of an actual keyboard matrix, use a game pad. I chose to use my trusty original NES game pad since they’re so easy to interface with.


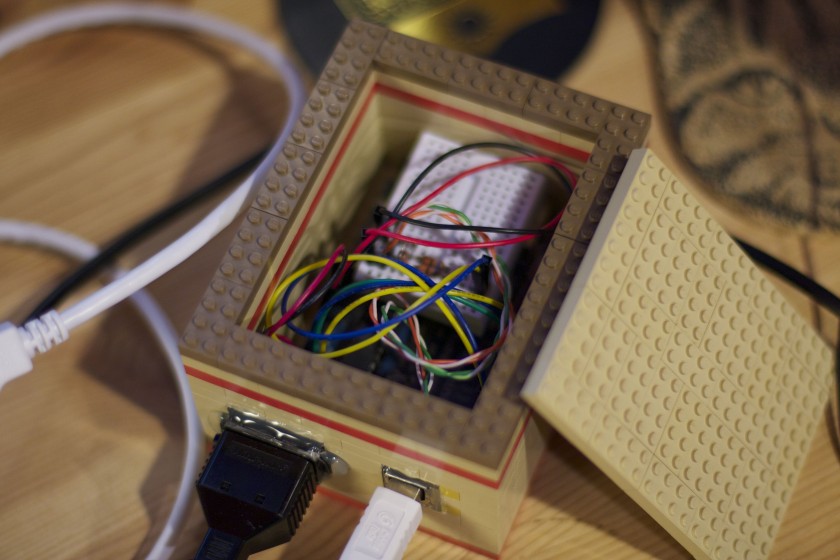
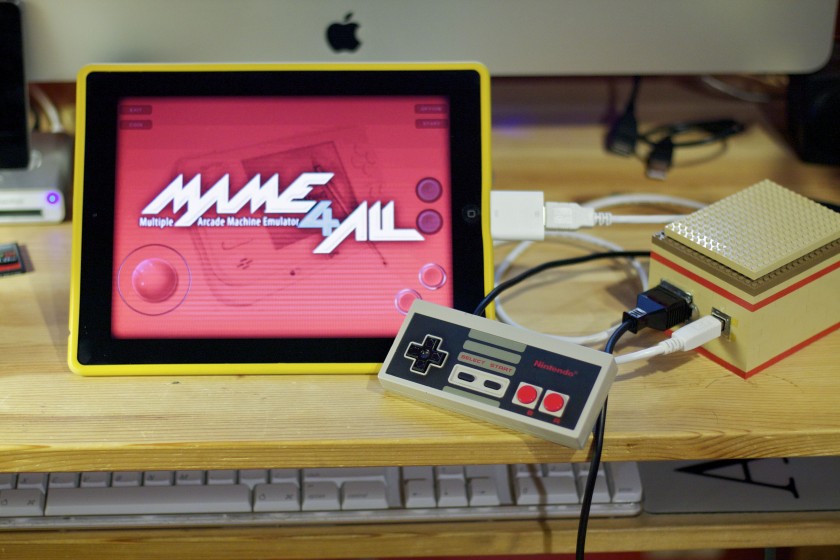
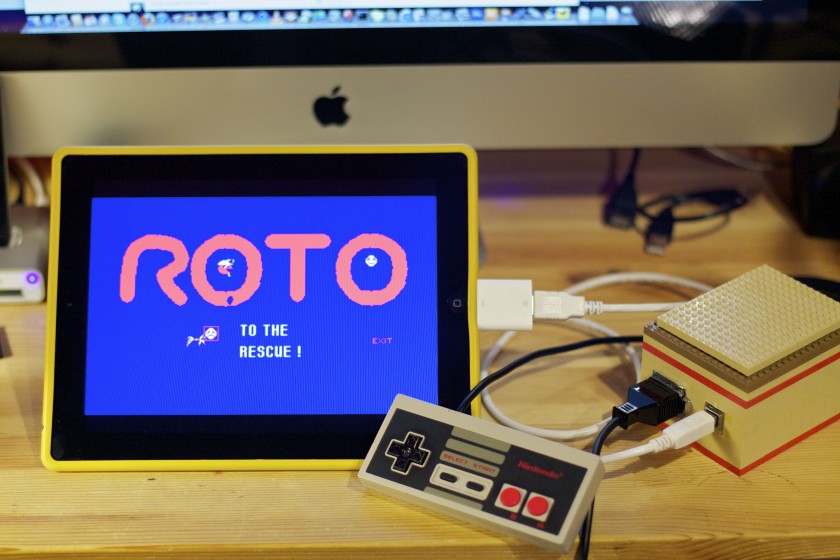
I threw together a quick case from LEGO and hot glued in two jacks, one for the NES controller and one for USB. The iPad powers the Arduino and the NES controller so no power supply is needed.

And there you have it, a DIY NES Gamepad to iPad via USB adapter. I’ll post the code later when it’s been cleaned up a bit. The only other game I’ve tested was Atari’s Greatest Hits and it seemed to work fine. In theory, any game that supports the iCade should work.

C64 USB Keyboard works with iPad


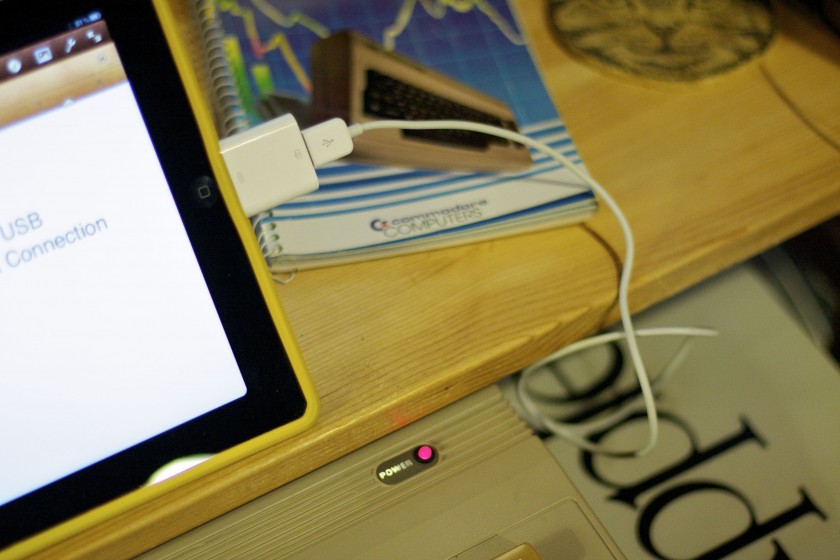
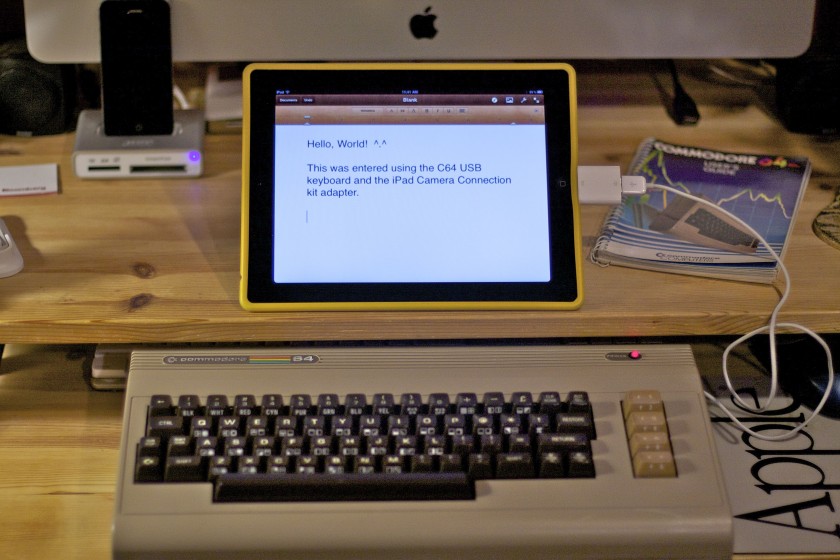
Just a follow up to the C64 USB keyboard Arduino project that I made last week. I was curious if it would work on the iPad using the iPad Camera Connection kit. So I tried it out and was greeted with the error “Cannot Use Device” and “The connected USB device is not supported.” I dismissed the window and tried anyway and it worked! I was able to type in any application.

Any application that is except the Manomio C64 emulator on the iPad/iPhone. I doubt that any USB keyboard would work there, not just mine. Maybe support for USB keyboards could be added?

Commodore 64 Keyboard Gets The USB Treatment Thanks to Arduino

Recently I’ve been repairing a batch of broken Commodore 64’s that I scored on eBay for cheap. Out of the repairs, two boards were beyond hope but still had some usable parts on them so motherboards became donor boards. That left me with a couple empty cases and keyboards so I decided to make a Commodore 64 USB keyboard.
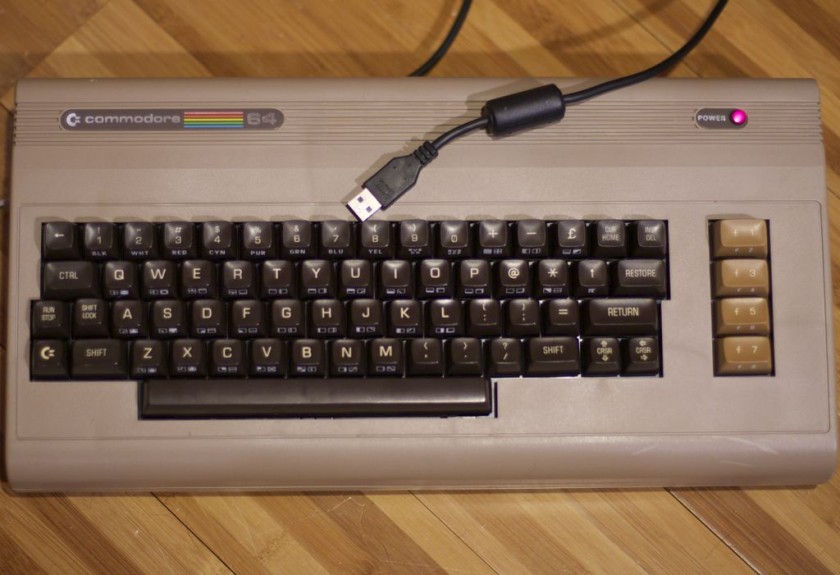
There’s already a nice product called Keyrah that does just this (plus a lot more) and I recommend you checking it out as it adds Amiga keyboard and joystick support.

But if you’re like me and want the challenge, I decided to go the maker route.

First, I searched for any such projects– no sense in re-inventing the wheel. I found a project by Mikkel Holm Olsen called C64 USB Keyboard. It used an Atmel ATMega-8 chip which I’ve learned is very similar to Arduino’s 168/328P chip. It might work but with some modifications– beyond my skill set today. I shelved this project and continued.

The keyboard is basically an 8×8 matrix keypad. There’s already a keypad library for Arduino. A couple of things that I discovered while using this library. One, don’t use pin 13 with the C64 keyboard. It’s probably because of the built in resister and LED that causes the pull ups to not work. An outside pull up might fix this. Two, the library only supports single keypresses. This is a bummer since you often will press two keys (i.e. the shift key, control, etc). But I worked around it. I put together a quick harness that will connect the Commodore 64 keyboard to the Arduino, aligning the rows and columns to the right pins. I like to make my projects the least destructive way so I use a lot of tape, jumpers and breadboards.
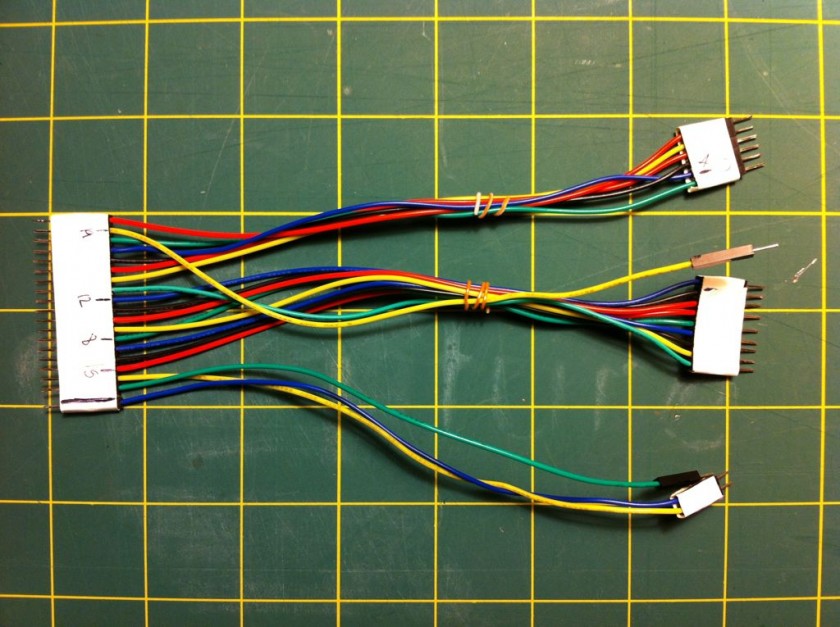
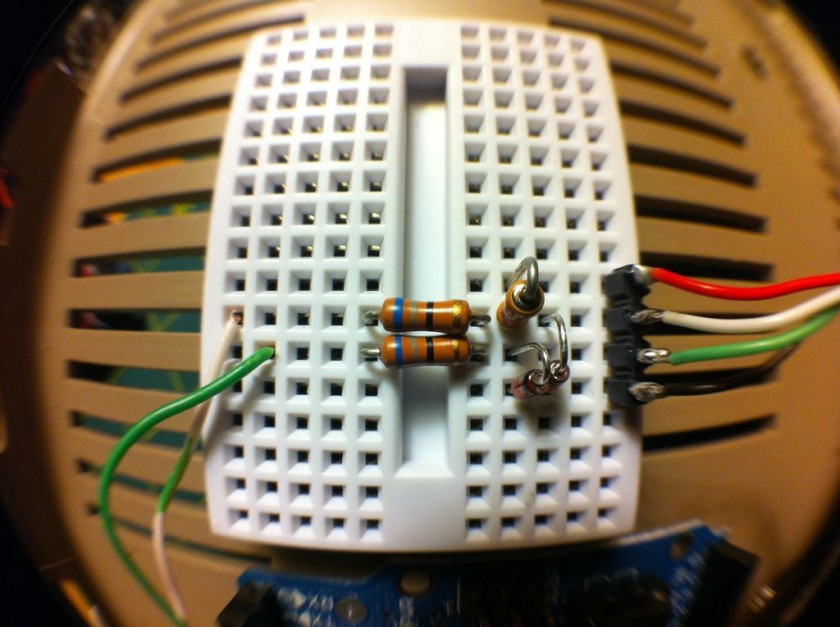
Getting the Arduino to talk USB makes use of the V-USB library which has been ported to Arduino. I really like this implementation because it’s all handled by the Arduino and needs very little passive glue on the outside to make it work. Below is a diagram of how to hook up USB to the Arduino. The values on the diodes are pretty strict and must be 3.6V 500mW zener diodes (although I hear 250mW is better). More information can be found in the V-USB documentation.

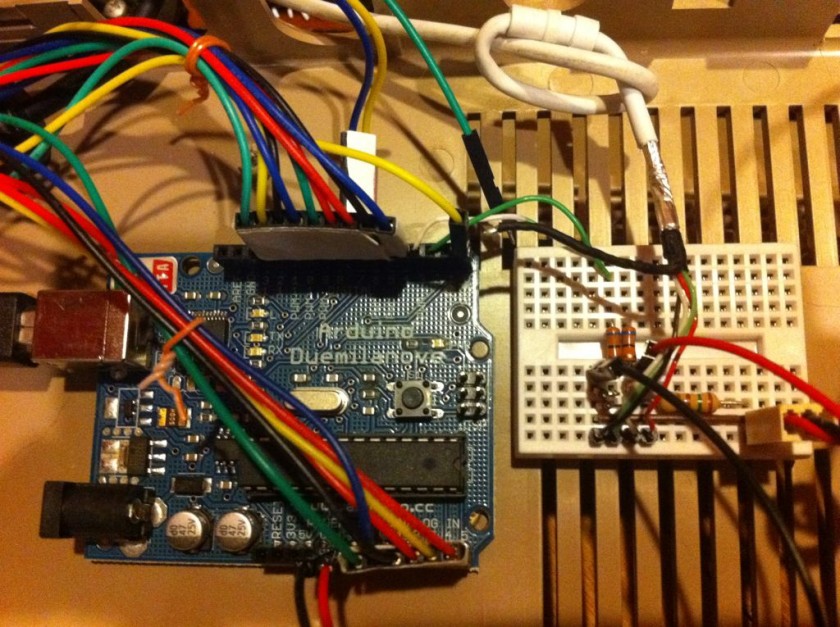
I made a small change to the V-USB code and moved the USB data (-) from Arduino pin 4 to pin 3– just edit usbconfig.h inside the UsbKeyboard library. I also commented out the optional connect/disconnect on pin 5 because I simply don’t have the pins to spare! Connected, the inside looks like this.
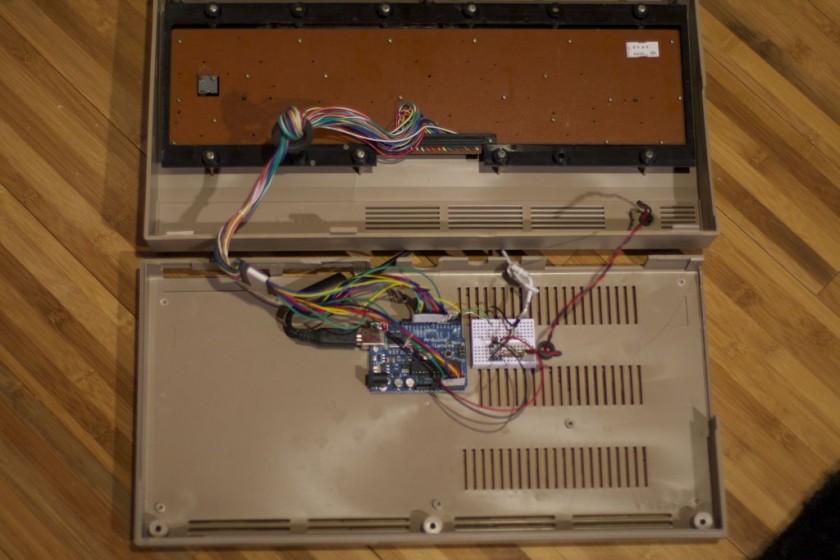
Commodore 64 USB Keyboard Inside

Commodore 64 USB Keyboard Arduino

Arduino V-USB Glue

The pin mapping goes like this:
C64 Pin Arduino Pin
Column 0 = 13 -> 4
Column 1 = 19 -> 5
Column 2 = 18 -> 6
Column 3 = 17 -> 7
Column 4 = 16 -> 8
Column 5 = 15 -> 9
Column 6 = 14 -> 10
Column 7 = 20 -> 11
Row 0 = 12 -> 12
Row 1 = 11 -> 0 (This was pin 13 if you’re wondering why the break in continuity)
Row 2 = 10 -> 14 (Analog 0)
Row 3 = 5 -> 15 (Analog 1)
Row 4 = 8 -> 16 (Analog 2)
Row 5 = 7 -> 17 (Analog 3)
Row 6 = 6 -> 18 (Analog 4)
Row 7 = 9 -> 19 (Analog 5)

I power the Arduino via the incoming USB. To get it to be recognized properly by your computer, unplug the USB programming cable from the Arduino and then plug in the USB cable to the V-USB side. Otherwise it will not be recognized. It makes for a lot of cable swapping unfortunately while coding. I also powered the C64 power LED for nostalgia (this may be a good use for pin 13).

Speaking of code, I needed to define some key codes that were missing from the UsbKeyboard library. This was fairly straight-forward by looking them up on the USB HID guide (chapter 10). I also defined “bogus” key codes that I could intercept and do something else with. Most keys on the keyboard can be passed straight through. Others, like the arrow keys, F-keys, quote, asterisk, etc need a little more help since their locations are different than a standard keyboard. I also hacked together to ability to detect a modifier key (shift, control, etc) along with another key (from the keypad library). The resulting code isn’t pretty but I think it’s easy enough to follow. It’s included below for your amusement.

This project is far from perfect but it’s a start.


#include <Keypad.h>
#include <UsbKeyboard.h>

// Define keys that are missing from UsbKeyboard.h
#define KEY_ESCAPE  41
#define KEY_DELETE 42
#define KEY_TAB 43
#define KEY_MINUS 45
#define KEY_EQUAL   46
#define KEY_LEFTBRACKET 47
#define KEY_RIGHTBRACKET 48
#define KEY_BACKSLASH 49
#define KEY_SEMICOLON 51
#define KEY_SINGLE_QUOTE 52
#define KEY_BACKTICK 53
#define KEY_COMMA   54
#define KEY_PERIOD  55
#define KEY_SLASH   56
#define KEY_INSERT  73
#define KEY_HOME    74
#define KEY_PAGEUP 75
#define KEY_PAGEDOWN 78
#define KEY_RIGHTARROW 79
#define KEY_LEFTARROW 80
#define KEY_DOWNARROW 81
#define KEY_UPARROW 82
#define KEY_AT      206

// Bogus key codes, intercepted in code below
#define KEY_PLUS 249
#define LEFT_SHIFT 250
#define RIGHT_SHIFT 251
#define COMMODORE 252
#define CONTROL 253
#define KEY_COLON 254
#define KEY_STAR 255

const byte ROWS = 8;
const byte COLS = 8;
byte mod = 0;

// Define the Keymap
char keys[ROWS][COLS] = {
 {KEY_DELETE, KEY_ENTER, KEY_RIGHTARROW, KEY_F7, KEY_F1, KEY_F3, KEY_F5, KEY_DOWNARROW},
 {KEY_3, KEY_W, KEY_A, KEY_4, KEY_Z, KEY_S, KEY_E, LEFT_SHIFT},
 {KEY_5, KEY_R, KEY_D, KEY_6, KEY_C, KEY_F, KEY_T, KEY_X},
 {KEY_7, KEY_Y, KEY_G, KEY_8, KEY_B, KEY_H, KEY_U, KEY_V},
 {KEY_9, KEY_I, KEY_J, KEY_0, KEY_M, KEY_K, KEY_O, KEY_N},
 {KEY_PLUS, KEY_P, KEY_L, KEY_MINUS, KEY_PERIOD, KEY_COLON, KEY_TAB, KEY_COMMA},
 {KEY_PAGEDOWN, KEY_STAR, KEY_SEMICOLON, KEY_HOME, RIGHT_SHIFT, KEY_EQUAL, KEY_BACKSLASH, KEY_SLASH},
 {KEY_1, KEY_BACKTICK, CONTROL, KEY_2, KEY_SPACE, COMMODORE, KEY_Q, KEY_ESCAPE}
};
byte colPins[COLS] = {4,5,6,7,8,9,10,11};
byte rowPins[ROWS] = {12,0,14,15,16,17,18,19};

// Create the Keypad
Keypad kpd = Keypad( makeKeymap(keys), rowPins, colPins, ROWS, COLS );

void setup()
{
}

void loop()
{
  UsbKeyboard.update();
  mod = 0;

  // Kludge, find activate modifiers
  // control   [7][2]
  // commodore [7][5]
  pinMode(rowPins[7], OUTPUT);
  digitalWrite(rowPins[7], LOW);
  if (digitalRead(colPins[2]) == LOW) { mod = mod | MOD_CONTROL_LEFT; }
  if (digitalRead(colPins[5]) == LOW) { mod = mod | MOD_ALT_LEFT; }
  pinMode(rowPins[7], INPUT);
  digitalWrite(rowPins[7], HIGH);

  // left shift[1][7]
  pinMode(rowPins[1], OUTPUT);
  digitalWrite(rowPins[1], LOW);
  if (digitalRead(colPins[7]) == LOW) { mod = mod | MOD_SHIFT_LEFT; }
  pinMode(rowPins[1], INPUT);
  digitalWrite(rowPins[1], HIGH);
  
  // right shift[6][4]
  pinMode(rowPins[6], OUTPUT);
  digitalWrite(rowPins[6], LOW);
  if (digitalRead(colPins[4]) == LOW) { mod = mod | MOD_SHIFT_RIGHT; }
  pinMode(rowPins[6], INPUT);
  digitalWrite(rowPins[6], HIGH);
  
  if (mod == 6) {
    UsbKeyboard.sendKeyStroke(0, mod); // This works, but sends 3-4 times. :(
    return;
  }

  char key = kpd.getKey();
  if (key) {
    switch (key) {
      case KEY_STAR:
        UsbKeyboard.sendKeyStroke(KEY_8, MOD_SHIFT_LEFT);
        break;
      case KEY_AT:
        UsbKeyboard.sendKeyStroke(KEY_2, MOD_SHIFT_LEFT);
        break;
      case KEY_PLUS:
        UsbKeyboard.sendKeyStroke(KEY_EQUAL, MOD_SHIFT_LEFT);
        break;
      case KEY_COLON:
        UsbKeyboard.sendKeyStroke(KEY_SEMICOLON, MOD_SHIFT_LEFT);
        break;
      default:
        if (mod == MOD_SHIFT_LEFT || mod == MOD_SHIFT_RIGHT) {
          if (key == KEY_2) { key = KEY_SINGLE_QUOTE; } // "
          if (key == KEY_7) { key = KEY_SINGLE_QUOTE; mod = 0; } // '
          if (key == KEY_6) { key = KEY_7; } // &
          if (key == KEY_9) { key = KEY_0; } // )
          if (key == KEY_8) { key = KEY_9; } // (
          if (key == KEY_DOWNARROW) { key = KEY_UPARROW; mod = 0; }
          if (key == KEY_RIGHTARROW) { key = KEY_LEFTARROW; mod = 0; }
          if (key == KEY_F1) { key = KEY_F2; mod = 0; }
          if (key == KEY_F3) { key = KEY_F4; mod = 0; }
          if (key == KEY_F5) { key = KEY_F6; mod = 0; }
          if (key == KEY_F7) { key = KEY_F8; mod = 0; }
        }
        UsbKeyboard.sendKeyStroke(key, mod);
        break;
    }
  }
}
Converting standard joysticks to wireless infrared for Amiga CDTV and Chameleon 64

The Chameleon 64 is a great cartridge. With each release of the firmware, new features are being unlocked. Recently, the Minimig core was ported to the Chameleon 64 which means you can now have a fully emulated Amiga that fits in the palm of your hand.

To play games using a joystick, you need a CDTV infrared (IR) remote. They are still available for purchase here and here but it would take a few weeks for it to arrive.

I wanted to see if it’s possible to convert a standard joystick to wireless IR communications. I know it can be done– I’ve had some experience using Arduino’s to communicate over IR with a vintage LED sign I have. I reverse engineered the original protocol by using the original remote to the sign. That project taught me a lot.

In this case, I don’t have the remote. So I asked on the forum and got a response from the programmer of the Chameleon IR code with all the info I needed (Thanks Peter!).

This version uses an original Nintendo NES game pad for the joystick but this could be easily changed to support a standard 9-pin Commodore/Amiga/Atari style joystick. The gamepad is connected to the Arduino and decoded into button presses. It then transmits it via infrared signals to the Chameleon. The code uses the Arduino-IRremote library with additions (included) for the CDTV remote type added.

Download CDTV IR Remote